


Book Creator in a Browser
In many schools that I work in, teachers are familiar with the wonderful app Book Creator on their iPads. I’ve noticed lately that many are surprised when I tell them that they can also use Book Creator online – with a Chrome or Safari browser. There are a few differences when working with the online version…
The biggest differences are:
1.Students can use any device as the content is stored on the cloud rather than on the device – so they don’t have to worry about getting the same iPad.
2.You can create a teacher library and students books will automatically appear in that library after they’ve joined it (which is very straightforward).
3.You can combine books super easily.
4.Google Image search (with the labelled for reuse filter applied) is built into Book Creator in the browser, meaning your students can find images without leaving and going to Google AND they know it’s ok for them to use them.
[bctt tweet=”Have you tried Book Creator in a Chrome browser rather than on an iPad – check out these reasons why you should! #utbPD” username=”lara_kirk”]
Using Book Creator in Chrome is great for students who can log in with their own accounts. In my experience, nearly all students from Year 3 and above are really capable of that – many from earlier. It’s just a matter of practice so that they remember the process and their login details.
Here are some tips to get started with Book Creator in the browser.
SETTING UP YOUR TEACHER LIBRARY
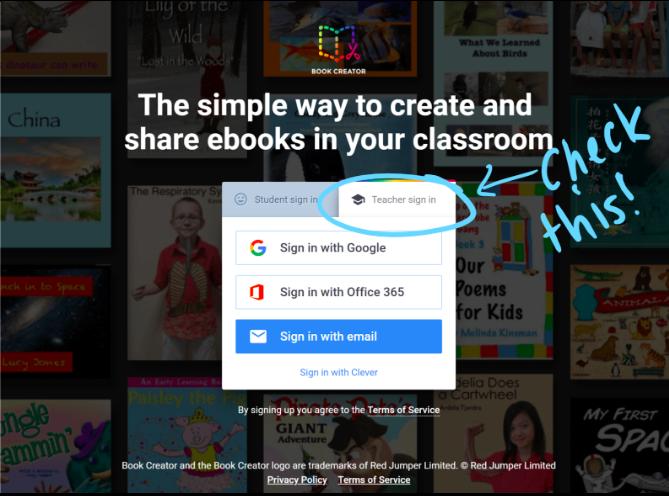
1.Go to Book Creator.
2.Sign in as a teacher with your Google account
3.You can combine books super easily.
4.Google Image search (with the labelled for reuse filter applied) is built into Book Creator in the browser, meaning your students can find images without leaving and going to Google AND they know it’s ok for them to use them.
Using Book Creator in Chrome is great for students who can log in with their own accounts. In my experience, nearly all students from Year 3 and above are really capable of that – many from earlier. It’s just a matter of practice so that they remember the process and their login details.
Here are some tips to get started with Book Creator in the browser.
SETTING UP YOUR TEACHER LIBRARY
1.Go to Book Creator.
2.Sign in as a teacher with your Google account
3.Create a library in the Teacher Dashboard. NB: If you are using the free version of Book Creator you will only be able to create one library.
4.Get your students to go to Book Creator and sign in using their Google or Microsoft accounts.
5.Display the ‘Invite code’ for them by clicking on the blue text when you are in the library you have created.
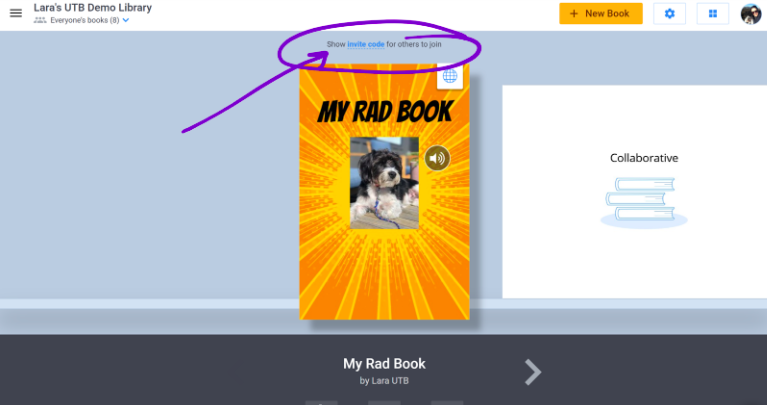
6.Students click on + New Book to make a new book.
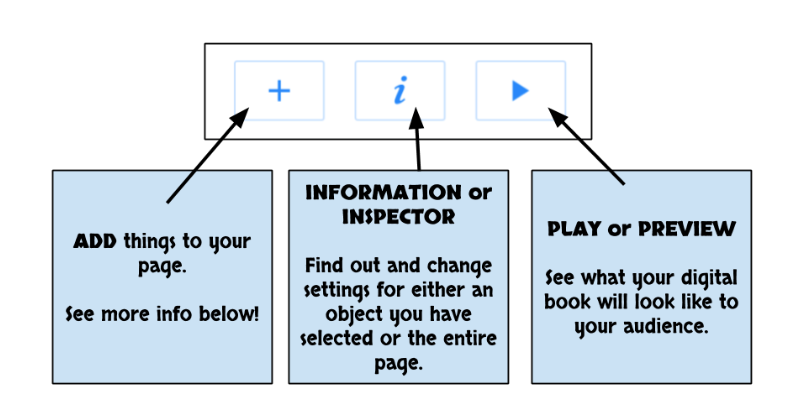
EDITING MENU GUIDE
There are only three main menus in Book Creator – that makes it nice and simple to think, then find what you want.
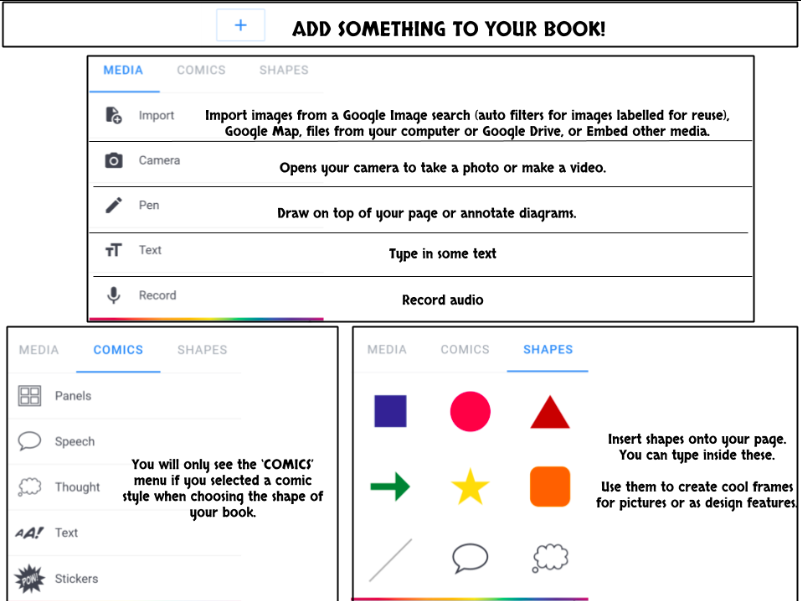
A DEEPER DIVE INTO THE + MENU
Book Creator works with layers – everything you add to your page remains a separate object that you can move around (unless you group them in the inspector menu).
You can add heaps of things to your book – exported objects from other apps, embed things like Scratch projects, videos and more.
DOING ‘THINGS’ WITH THE BOOKS IN YOUR LIBRARY
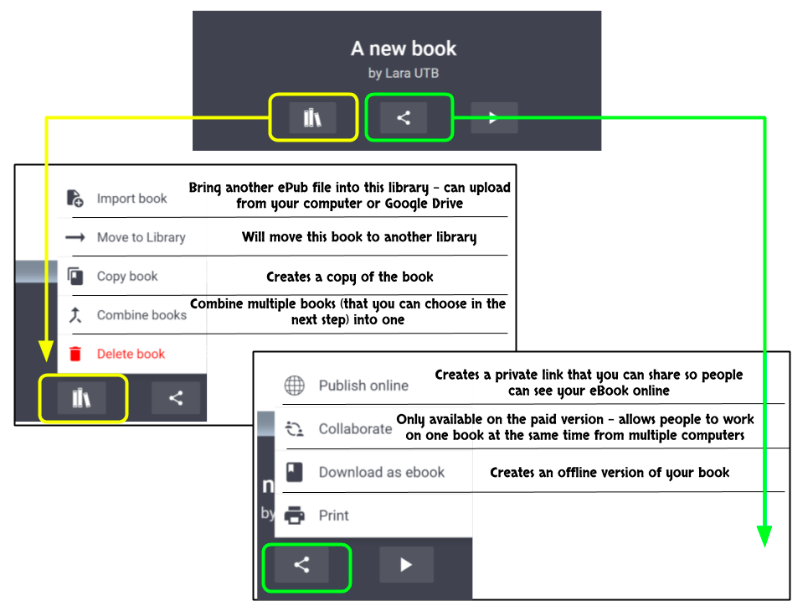
[bctt tweet=”Combine your students’ books in Book Creator to make a class book! #utbPD” username=”lara_kirk”]
So if your students are capable of signing into a device with their Chrome (Google) orO365 accounts, then go ahead and give Book Creator on the browser a try. I find it much better and easier to manage with students than on the iPad. If you do have iPads in your class – they can still use Book Creator in the browser.
Want to find out more about how to integrate Digital Technologies into your Literacy programme? Register your interest for our online and face to face courses here.
For more great ideas about using tools in your classroom check out other blogs on our website.


