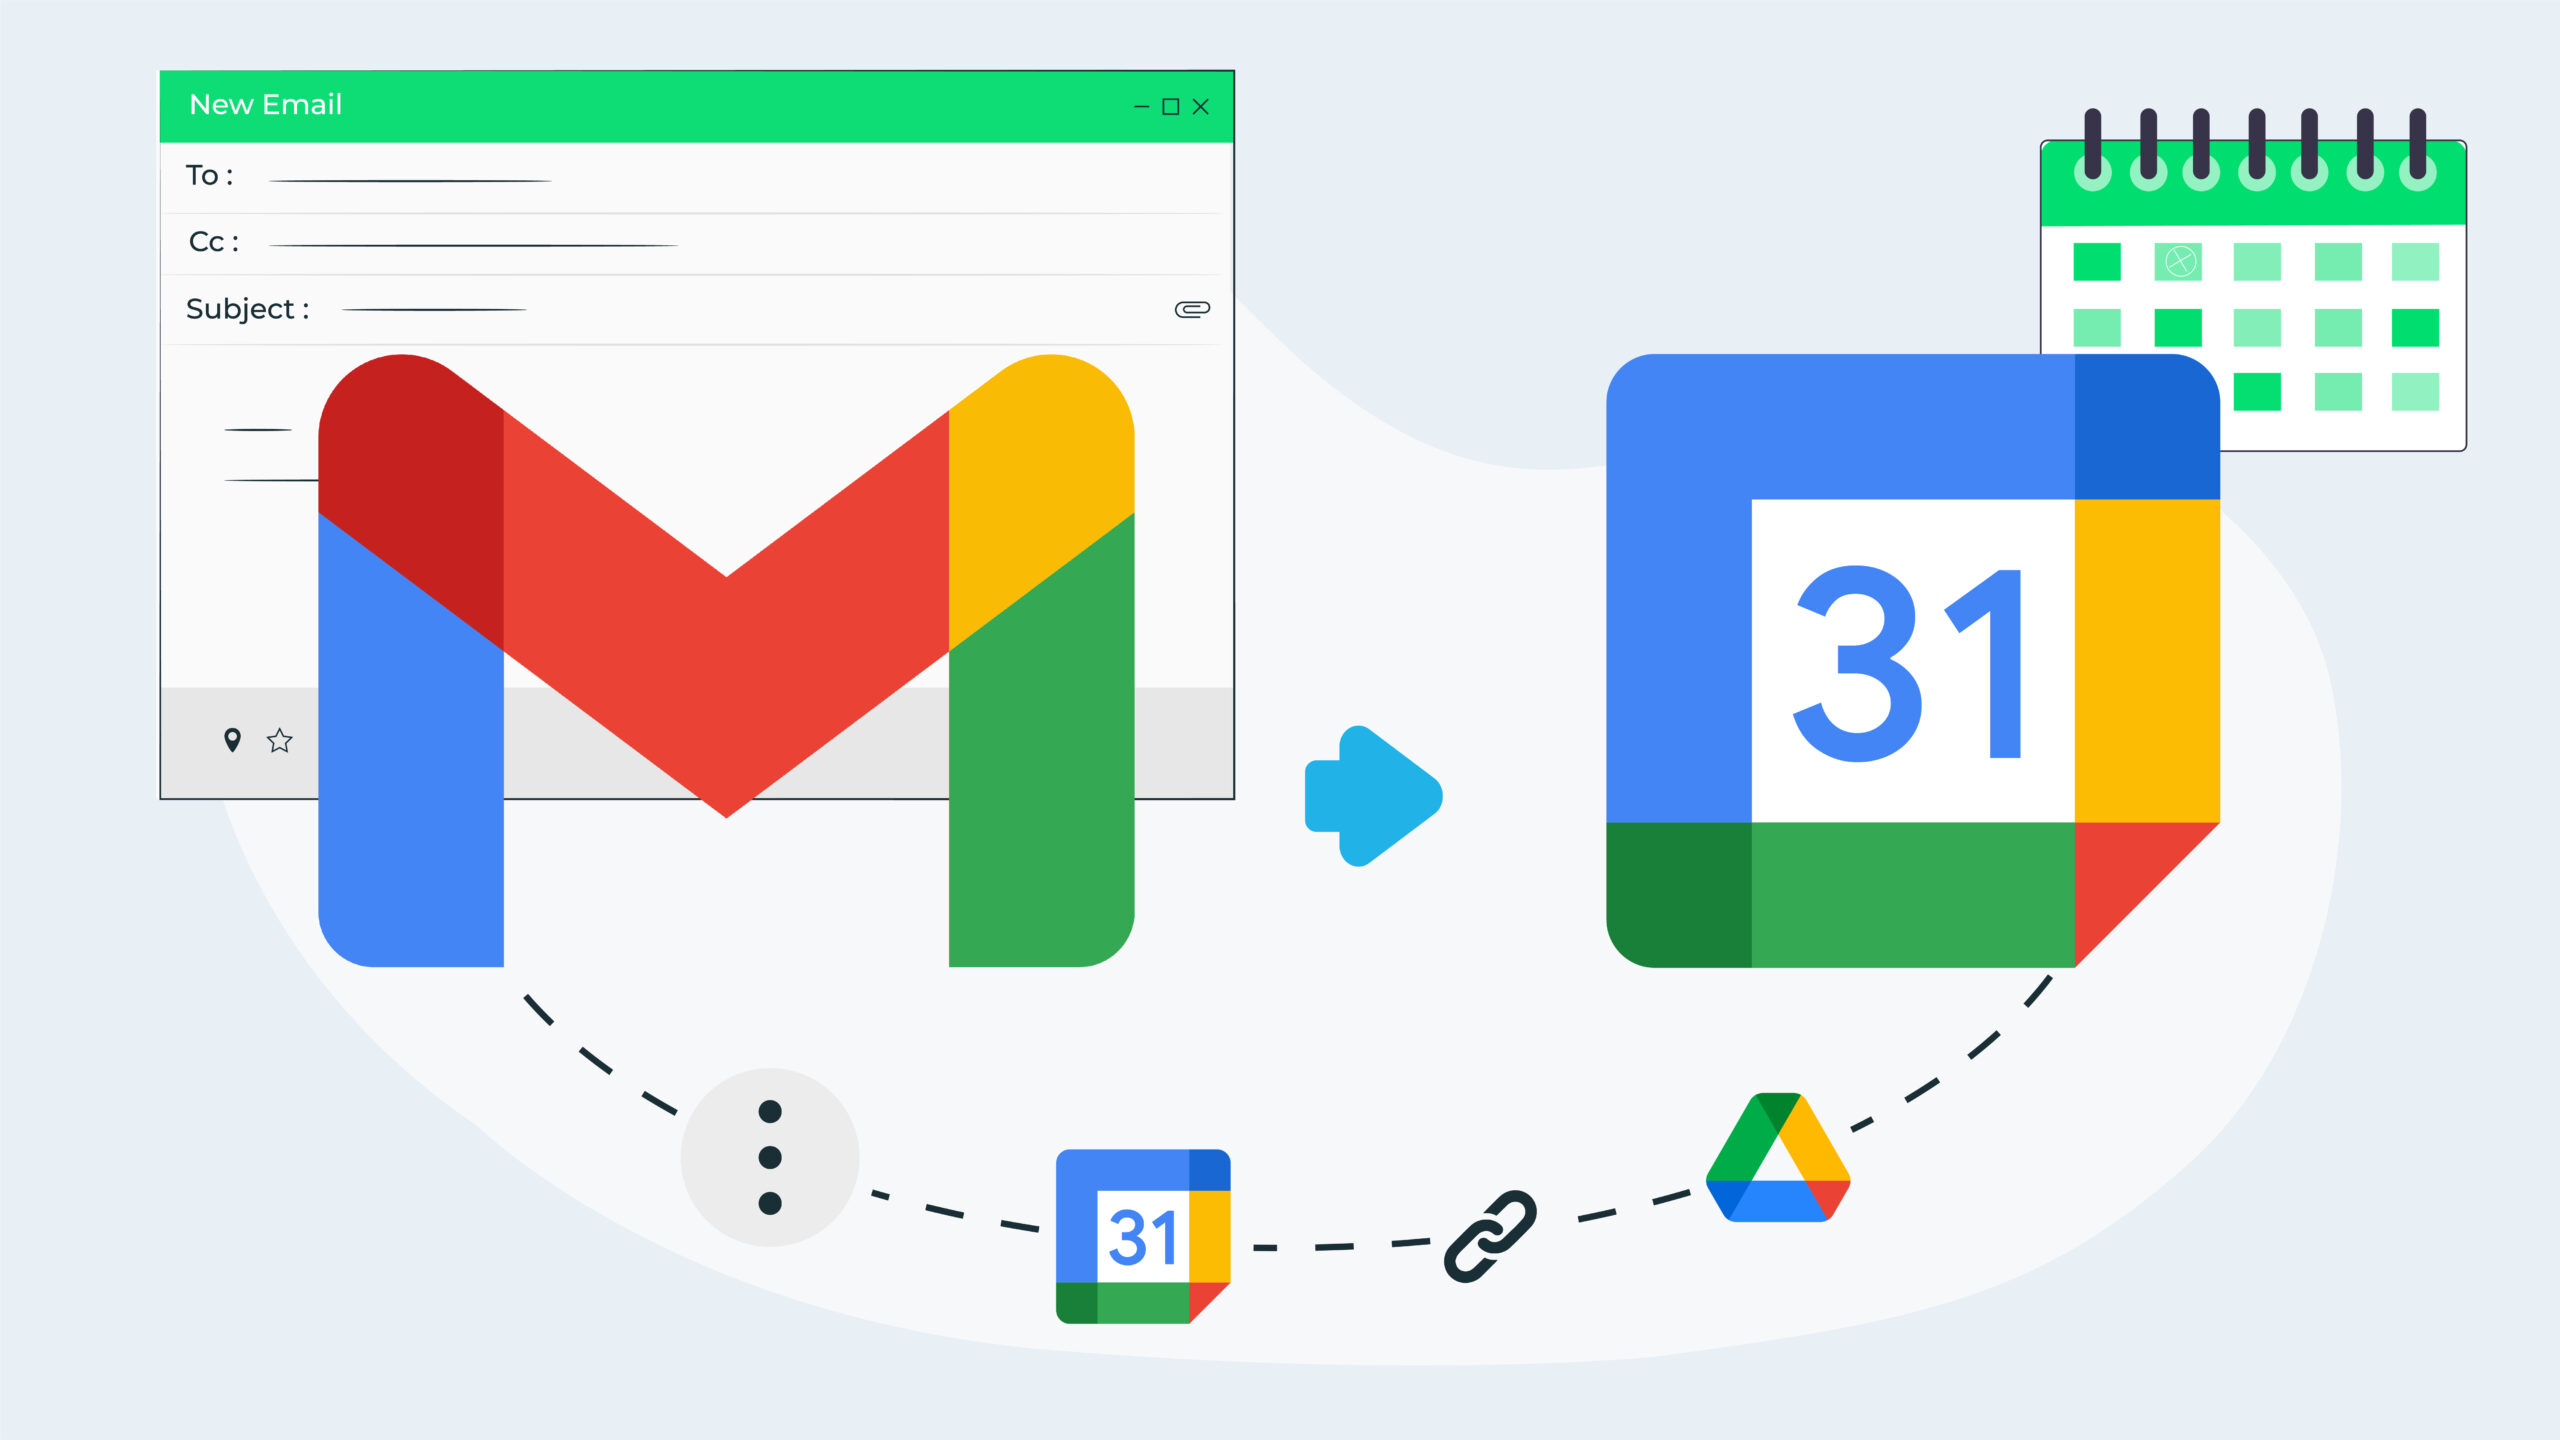
Often an email discussion triggers the need for a meeting. When this happens it can be helpful to have the information contained in the email as part of the calendar event so all attendees have the context and any relevant information for the meeting.
Here are four different ways you can add information from a Gmail email to a Google Calendar event.
Option 1: Use the ‘Create Event’ Feature in Gmail
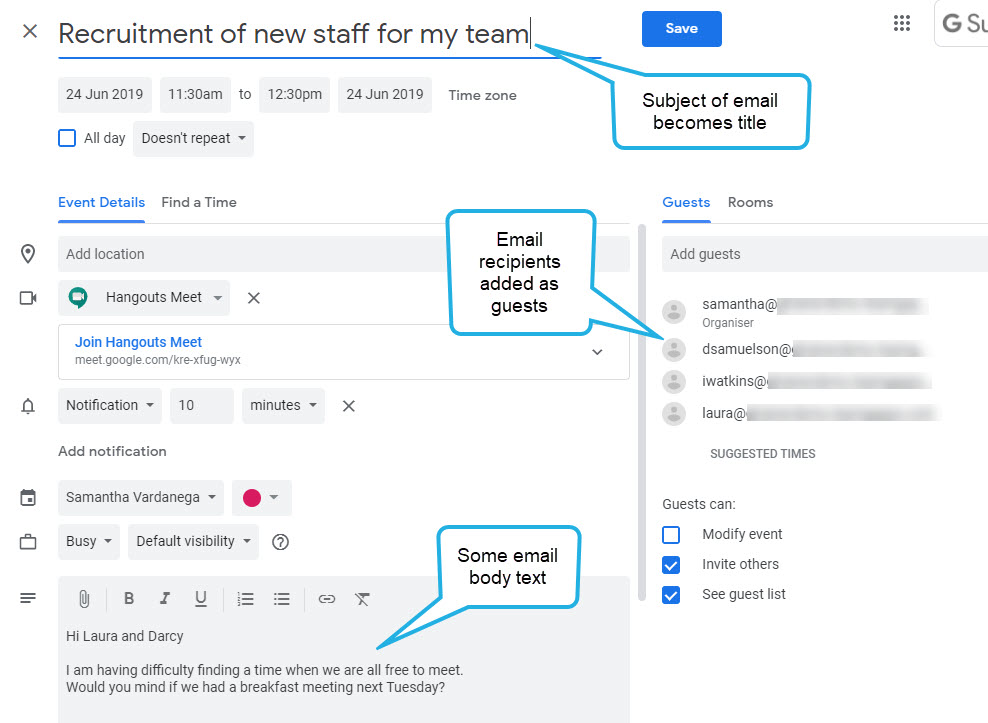
The ‘Create event’ feature in Gmail will generate a Google Calendar event based on an email. This includes turning the subject of the email into the title of the calendar event, putting the the first ~30 lines of the email message into the event description and adding the recipients of the email as event guests.
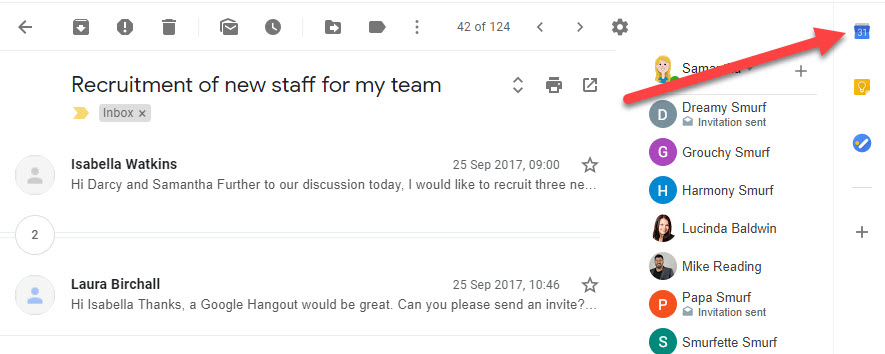
1. Open the email you want to turn into a calendar event.
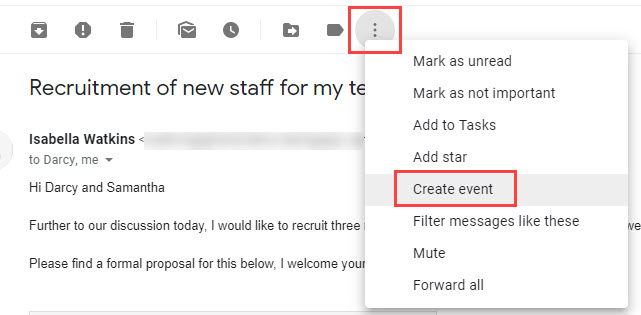
2. Click the three dots button at the top of the email message (see image below). Choose the Create event option.
Note: If you do not see the ‘Create event’ option, it is because you are using the Preview pane. To access the option, you will need to open the email in a new window. You can do this by clicking the ‘In new window’ button (top right corner of email message).
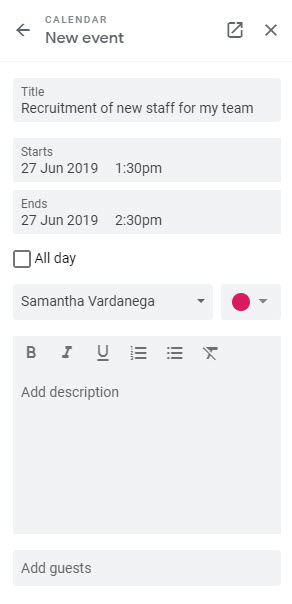
3. A new Google Calendar event will open, with some details from the email copied across as shown below.
4. Change the date and time of the event, and add other details as required.
Note: Be sure to remove any email recipients you don’t want to invite from the Guests list!
5. Save the event.
Option 2: Use the Side Panel in Gmail
You can also use the side panel in Gmail to start a calendar event from an email. At the time of writing, this method only copies the subject of the email into the title of the calendar event. However, it’s highly likely this functionality will grow.
1. Open the email you want to turn into a calendar event.
2. Click the Calendar icon in the Gmail side panel to open calendar.
Tip: If you do not see the side panel, you have probably collapsed it. Click the small arrow in the bottom right corner of the Gmail window to expand it again.
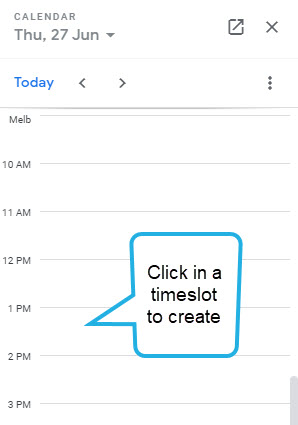
3. Navigate to the date and timeslot you want to schedule the event. Click once on the timeslot to create the event.
4. A new event will launch. The email subject becomes the event title. Add all other required information and invite the appropriate guests. Click Save when you are finished.
Tip: You can also copy and paste information from the email body into the description box.
Option 3: Add a Link to the Email in the Calendar Event
This option simply involves creating an event in Google Calendar and including a link to the email in Gmail. The great thing about this option is that the link is to the entire email conversation. For an even quicker workflow, combine this option with using the side panel, as described in option 2.
Note: This option is only suitable for emails and calendar events that are in your own Google account and just for you. Other people will not be able to access your email via the link. If you are working with another person’s email and calendar (e.g. as a delegate), this option will not work unless you have access to directly login to that person’s account.
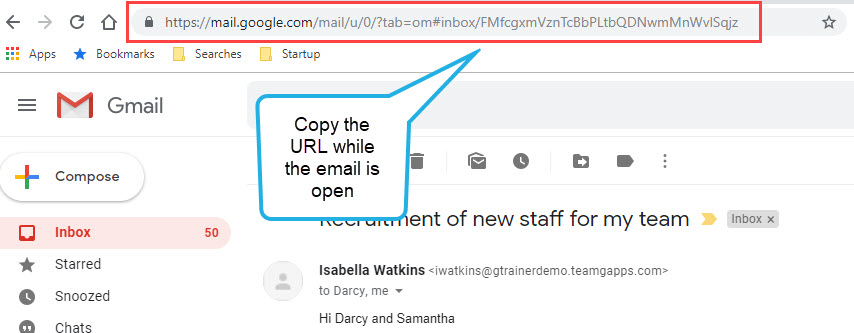
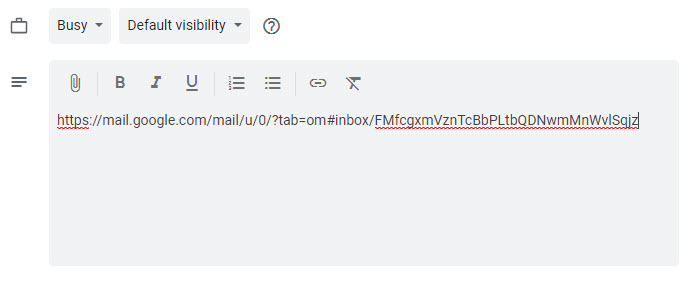
1. Open the email you want to turn into a calendar event.
2. Copy the URL (link) to the email from the address bar.
Note: You must make sure the email is open on the screen when you copy the link.
3. Start a new Google Calendar event and populate the details as per normal.
Tip: To speed up this process, create the event from the side panel as described in option 2.
4. Paste the URL copied in step 2 into the description box.
5. Save the calendar event. When you open the event and click on the link, it will take you straight to the email in Gmail.
Option 4: Save the Email to Google Drive and Add it as an Attachment
This option requires the most effort, but is the best choice if you want to include an entire email conversation in a calendar event in a way that all guests can access it.
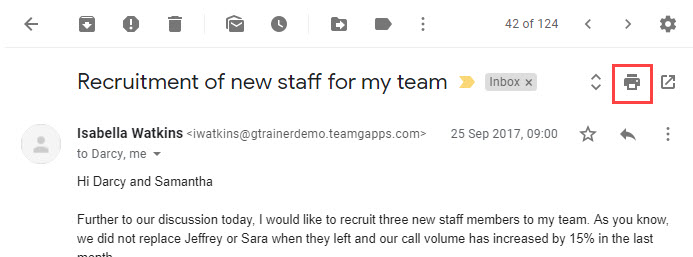
1. Open the email you want to attach to a calendar event.
2. Click the Print button in the top right corner of the email message.
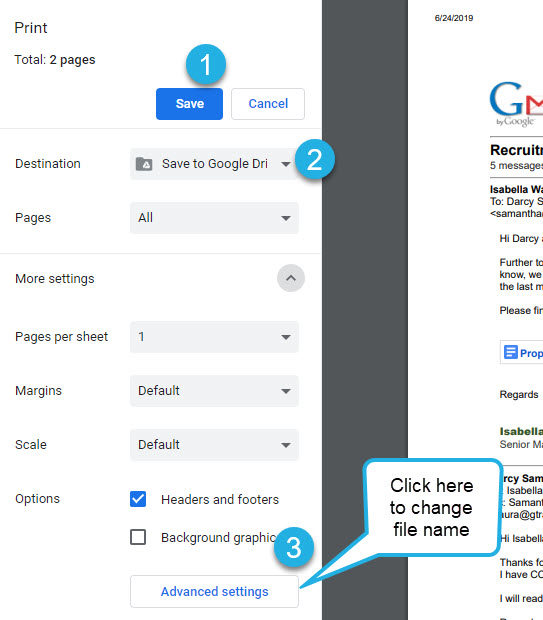
3. Change the Destination to ‘Save to Google Drive’.
4. Click More settings and then Advanced settings.
5. Name the file something suitable and click Apply.
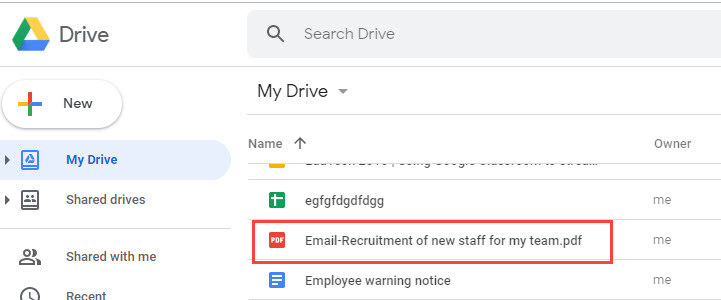
6. Click Save to save the email. It will be located in your My Drive. You may now like to find the email and move it to a folder.
Tip: If you are using Google Drive File Stream, you may prefer to use the ‘Save as PDF’ option and download the PDF file to Google Drive via Drive File Stream. This lets you choose a filename and save location in one go.
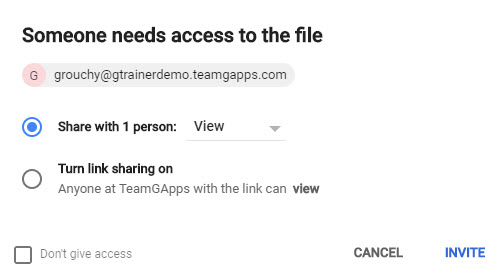
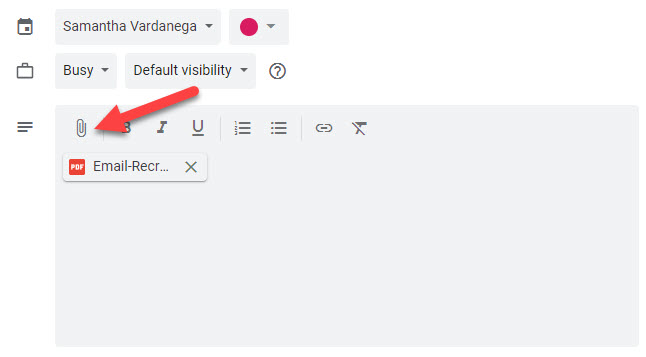
7. Create the new calendar event and add the required information and guests. Attach the PDF created in step 6 to the description.
8. When prompted, share the file with the meeting attendees by choosing a sharing option and clicking Invite.