
Screen recording is now a native tool inside the Chromebook
Screen recording is one of those tools that can be used by teachers and students in a variety of ways to help impact teaching and learning. Chromebooks now have a screen recording tool that is a part of the Chromebook’s built-in tools. Read on to see how to use the Screencast tool to enhance your classroom program easily.
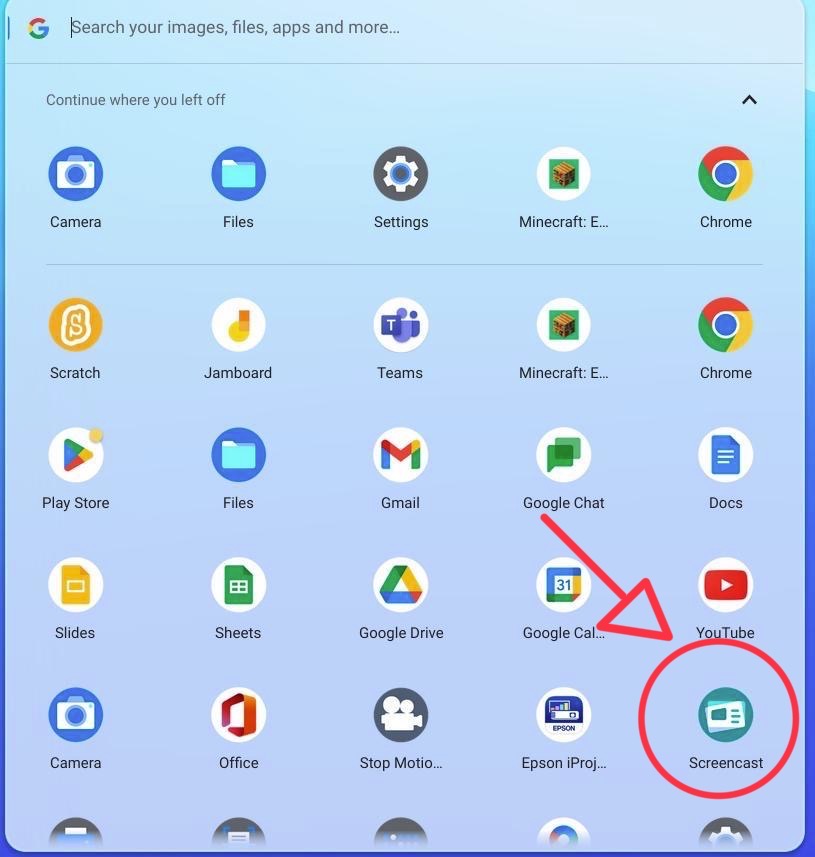
Where do I find the screencast tool?
The Screencast tool is found on the launcher where the apps are found. It might be a few pages over, or you can search for it in the launcher search bar.
The screen cast icon looks like this:
If you don’t see Screencast, then you need to make sure that your Chromebook is fully up to date. If it has been a while since you have updated the Chromebook, then you may need to update it more than once till is says it is up to date. To update, click on the time, then click the settings cog, go to about Chrome on the left and click “check for updates”.
How to use Screencast
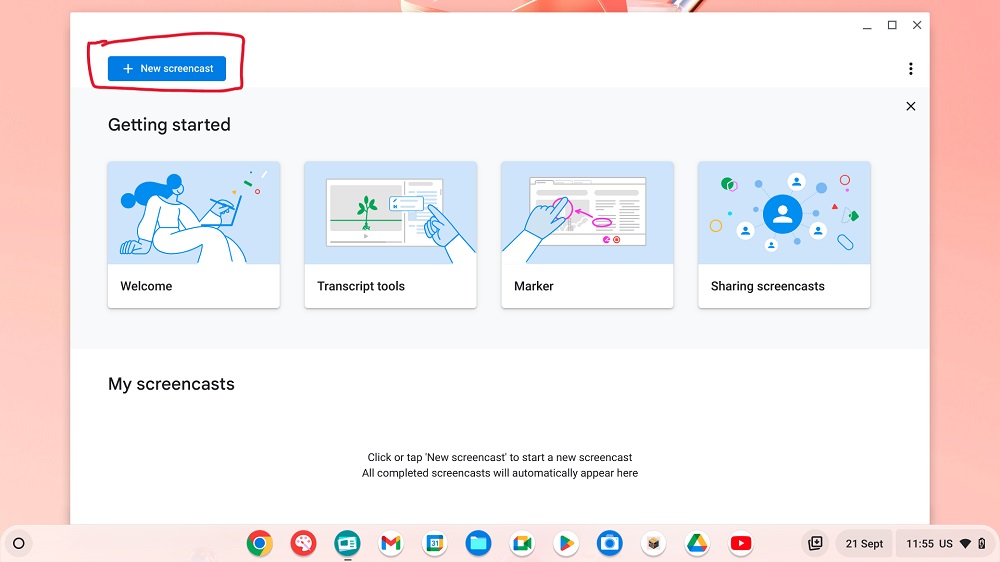
Once you open the Screen cast tool and the top right there is a button called “+ New screencast”, click here to get started. There are 4 tutorial videos that you can watch with your class to help them understand the tools inside too (Welcome, Transcript tools, Marker, and Sharing Screencasts)
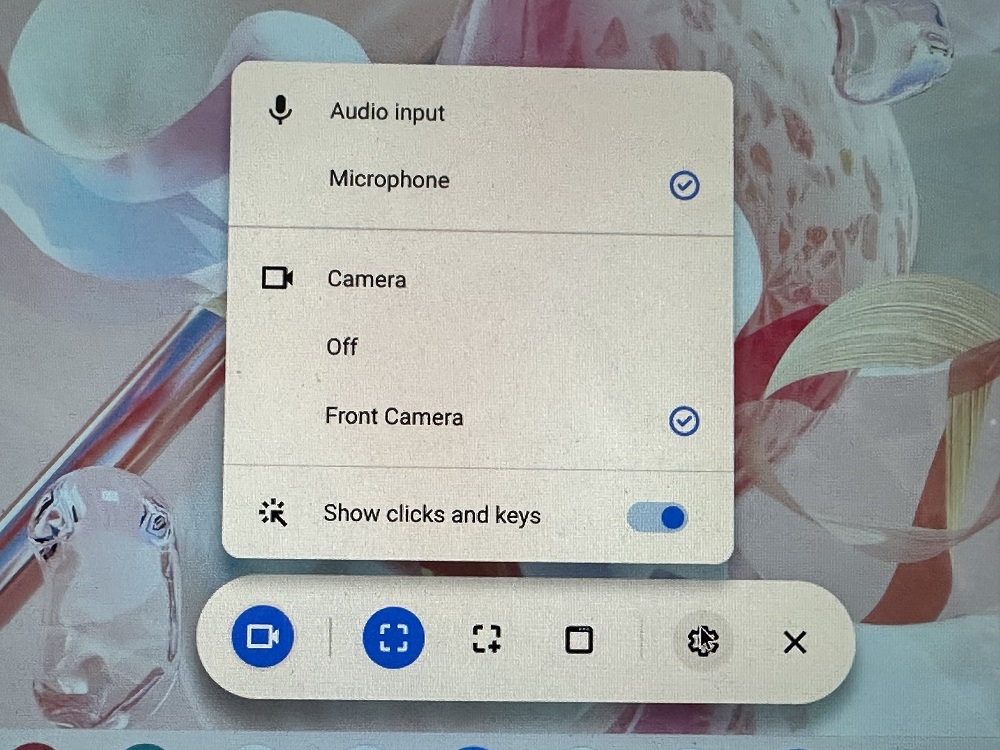
Once you click make a new screencast you then have a few options.
- The size of the screen – you can choose what part of the screen to record, the whole screen, a section of the screen, or a window.
- Audio Output – This is where you can choose which microphone you want the audio to come from, which will only be valid if you have an external mic attached to the Chromebook.
- Camera – This is to choose which camera you would like to have running to capture your face as well as the screen, or you can choose to turn it off.
- Showing the clicks and keys – This allows the keys you touch and the clicks on the mouse you make to come up on the screen to show your audience what you are doing.
When you are ready click the screen to start the recording. It will give you a count down from 3 before the recording starts.
When you have finished recording click the red stop button on the bottom right of your shelf (bottom bar).
Where does it save to?
Screencast files save to your Google Drive. The first time you make a screencast, it will create a folder on your Drive called “Screencast recordings” to save them into. Please note that renaming or moving this folder will result in Google making another folder the next time you make a screencast, so just leave it.
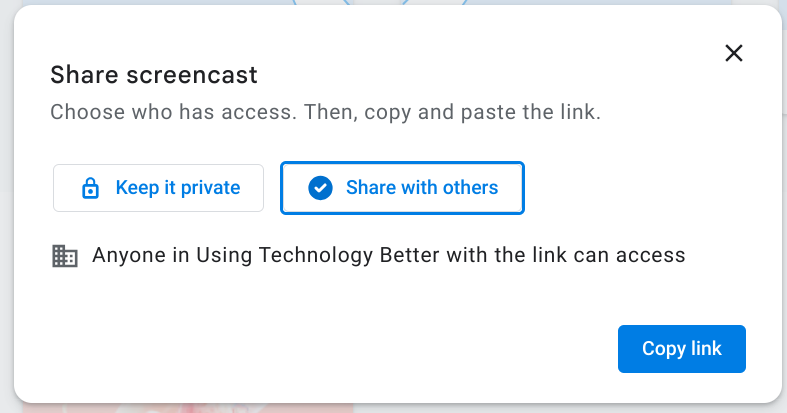
Because it is a Google Drive file, it has some of the same sharing settings as other files. If you click on the 3 dots of the file and click “share”, you are given 2 options. You can keep it private, meaning only you can access it, or you can Share with others, which will open the Screencast to other people in your organisation (school domain). At this stage we are unable to share Screencasts outside our organisations. To share, you then copy the link and send it to the people you are wanting to view it.
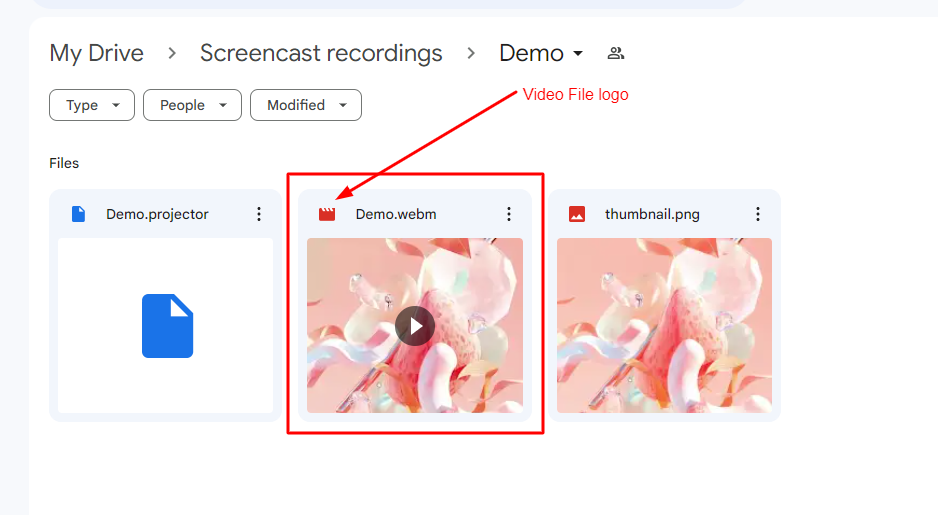
If you want to send the screen recording to someone outside of your organisation, then you can share the link to the video file. Note when you do this, it will not have the transcript or skips in it. Go to the Screencast recording folder and find the folder with the Screencast you want to share. It will have 3 files in the folder: a word file, a video file, and an image file. You want to choose the video file and use the 3 dots to share how you would normally share a file in Drive.
Currently, the feature to view the Screencasts with the transcription is only available on Chromebooks, but this is being opened to any device towards the end of 2023/ beginning of 2024. This will mean we can share screencasts with people on Windows and Apple devices, and they will be able to see them like we do on a Chromebook.
Extra Features
Markers – While you are recording there are markers that you can use to draw on the page to help with understanding. These are a great way to help understanding.
To use, click on the marker button in the bottom right of the shelf, next to the stop button. If you right click on the marker, you will be able to choose the colour of your marker.
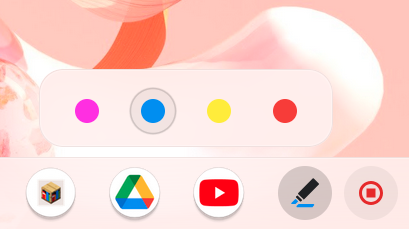
Something to note is that once the screen changes the markers do disappear, but they will be on the recording anyway, so you can scroll to the next bit and mark away again.
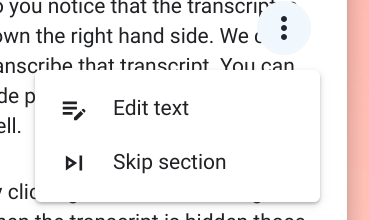
Transcription – A very cool feature of this tool is the auto transcription. When you open the Screencast you can see the transcription of what you said in the video. You can edit this transcription, which is particularly good for if you use different languages or slang within it. To edit, click the 3 dots and click “Edit text”. The transcription also acts as a way to skip through the video to the parts that you need.
Hiding part of the recording – We all mess up when we record, but don’t worry you can now easily hide those part of the recording instead of having to edit them. Click on the 3 dots on the part of the transcription you want to hide, click “Skip section” and that section of the video and transcript will be hidden from the viewer.
Note this will not skip the section if you share the video file within Drive to a viewer.
There are so many ways that Screencast can add value to teaching and learning and I am excited for the new possibilities this tool opens up to our teachers and students. From instructional videos through to sharing of learning, Screencast is a great addition to the Chromebook tools.
Take your classroom program to the next level and let us help you master tools and programs that can enhance teaching and learning. Contact us today.