


Photos are a great way to capture evidence of the activities and the learning that happens within a classroom. Sharing those photos can sometimes be frustrating though- but not with the Photo Gallery by Awesome Table add-on for Google Sheets. Read on to see how easy it can be to embed a folder of folders into your Google Site with this awesome tool.
[bctt tweet=”Use Photo Gallery by Awesome Table #addon to embed photos on a #Google Site” username=”donnagolightly1″]
Many schools and class teachers have Google Sites that they use to share information with their communities. I was regularly documenting my students’ learning with photographic evidence and sharing photos of the very cool activities they got to do, like waterwise and camp to name just two. But then sharing those photos sometimes became quite time-consuming – especially if I was posting them individually to our class site, or making collages with them first so as to upload just one file.
If only I’d known about the Google Sheets add-on Photo Gallery by Awesome Table.
This tool allows you to very quickly embed a folder on your Google Site, share a link with your community or create a Google Slide with individual photos on each slide.
Here’s how it works:
1. Have the photos that you want to use all ready to go. You can have them all in a folder in your Google Drive, or if you use Google Photos (and I’m not sure why you wouldn’t – it’s free and can store an unlimited amount of photos for free) create an album with the photos you want to use.
2. Open a new Google Sheet and install the Photo Gallery by Awesome Table add-on.
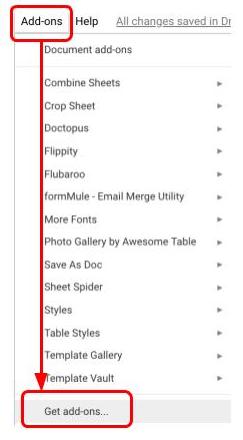
Click on Add-ons then ‘Get add-ons’
Type ‘Photo Gallery by Awesome table’ in the search bar and install the add-on.
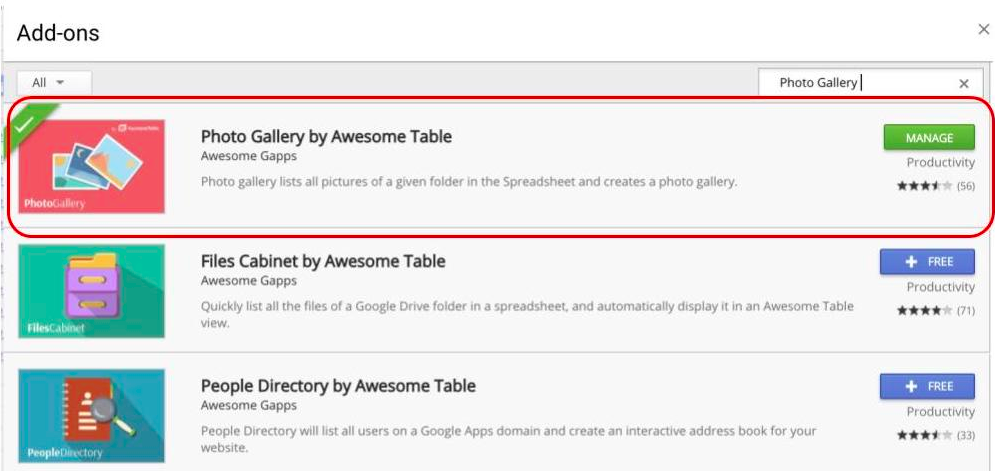
It will ask you to allow your Google account to be accessed – you will need to agree to this in order to install the add-on.
[bctt tweet=”Install Photo Gallery by Awesome Table #Google #Sheets #addon to quickly make a gallery of photos to share.” username=”donnagolightly1″]
3. Once the add-on is installed and you have your photos sorted in a folder or an album, you’re ready to use it.
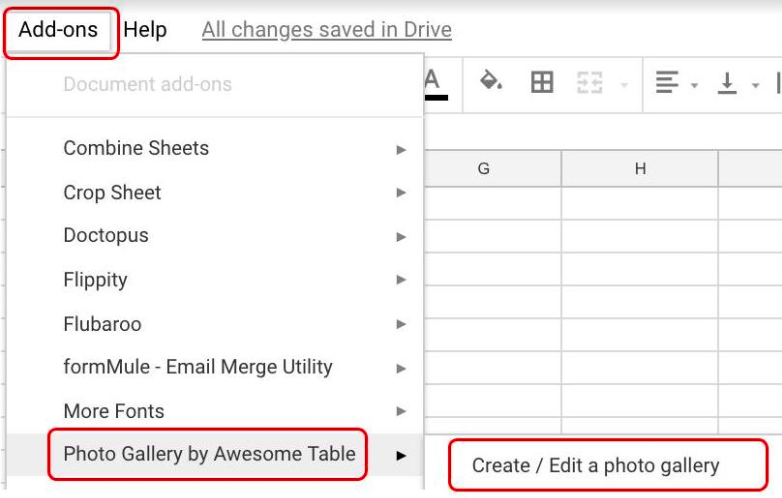
Click on ‘Add-ons’ and select ‘Photo Gallery by Awesome Table’ from your list. Click ‘Create/Edit a photo gallery’.
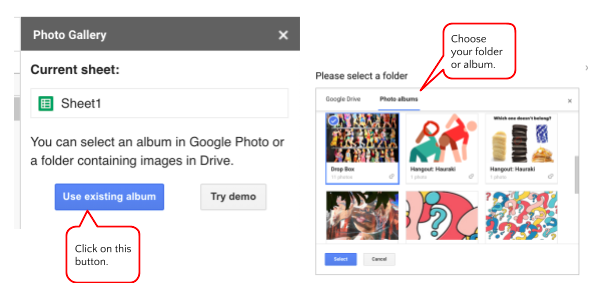
A side panel will open on the right. From there you can choose the folder/album that you want to
work with.
4. The add-on will automatically fill the sheet with the data needed for the photos you selected.
You need to wait for just a few minutes and it will automatically open a new tab and create the
gallery of photos within the Awesome Table website.
At this stage, you will also need to sign in to Awesome Table using the same account you used for
the add-on. (follow the same process you used to instal the add-on.)
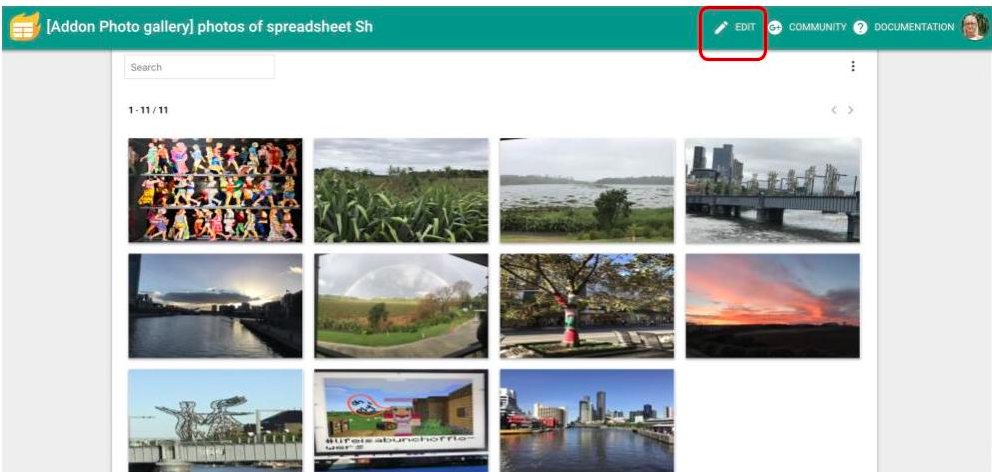
Your photos will now look like this:
5. To get the link you need to embed the album on your Google Site, click on the edit pencil and then the share icon;
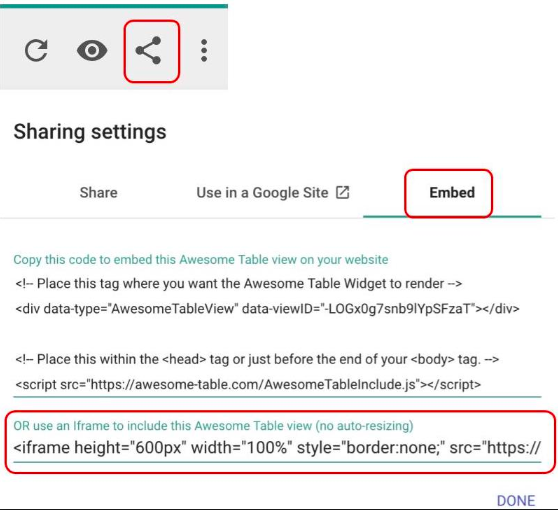
You can get the code to embed the album or a link to share it with others.
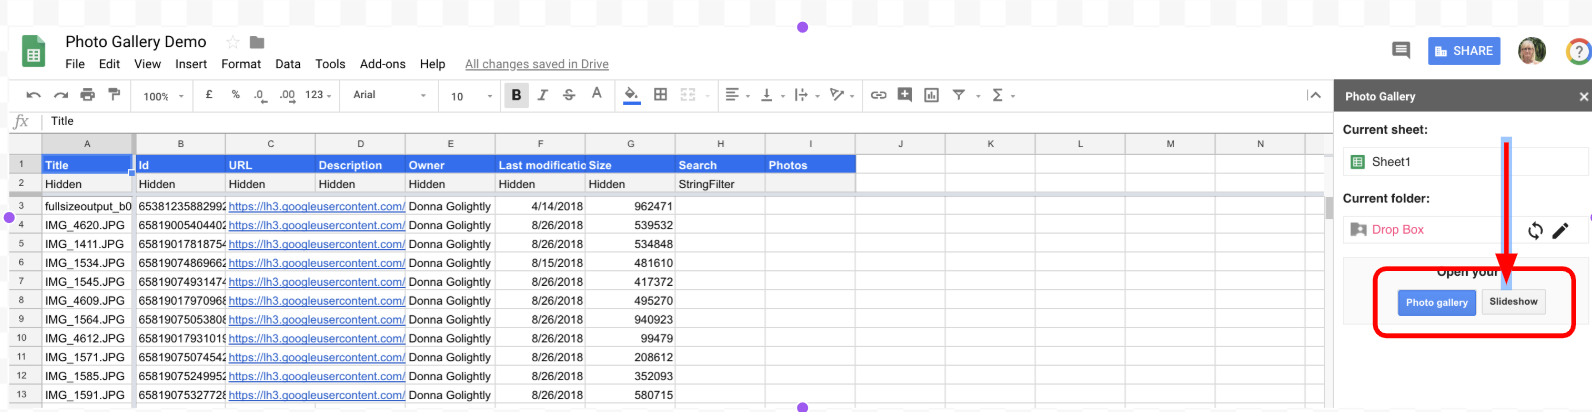
6. Now that your photo gallery has been created, you can see the sheet also gives you an option to view it as a slideshow:
[bctt tweet=”Use Photo Gallery by Awesome Table #addon to make a #Google #Slide with your photos.” username=”donnagolightly1″]
This will make a new Google Slide and put each individual photo on its own slide – so that it fills the space. You could then add this to your site if you wanted to – or you could share it with your students and they could add their thoughts or speech bubbles to the photos.
You can go back to the sheet and change the folder or album of photos if you want to.
So there you are – a very quick way to embed a larger selection of photos onto your Google Site. What other ways can you think of to use this awesome add-on? We’ve love to hear your ideas.
For more ideas on how to use your photos with Google tools check out Sam’s blog here.


