


We’re all looking for ways to save time and clicks when working with email. Gmail’s Send + Archive button is a great feature that can help with this by letting you perform two actions with one click. However, many of the attendees at my training sessions either don’t know it exists or are confused about how it works. In this post, I’ll explain what the Send + Archive button does, how to turn it on and why it should be your new favourite Gmail feature!
What does the ‘Send + Archive’ button do?
Once enabled, the ‘Send + Archive’ button appears whenever you are replying to an email. Here’s an example:
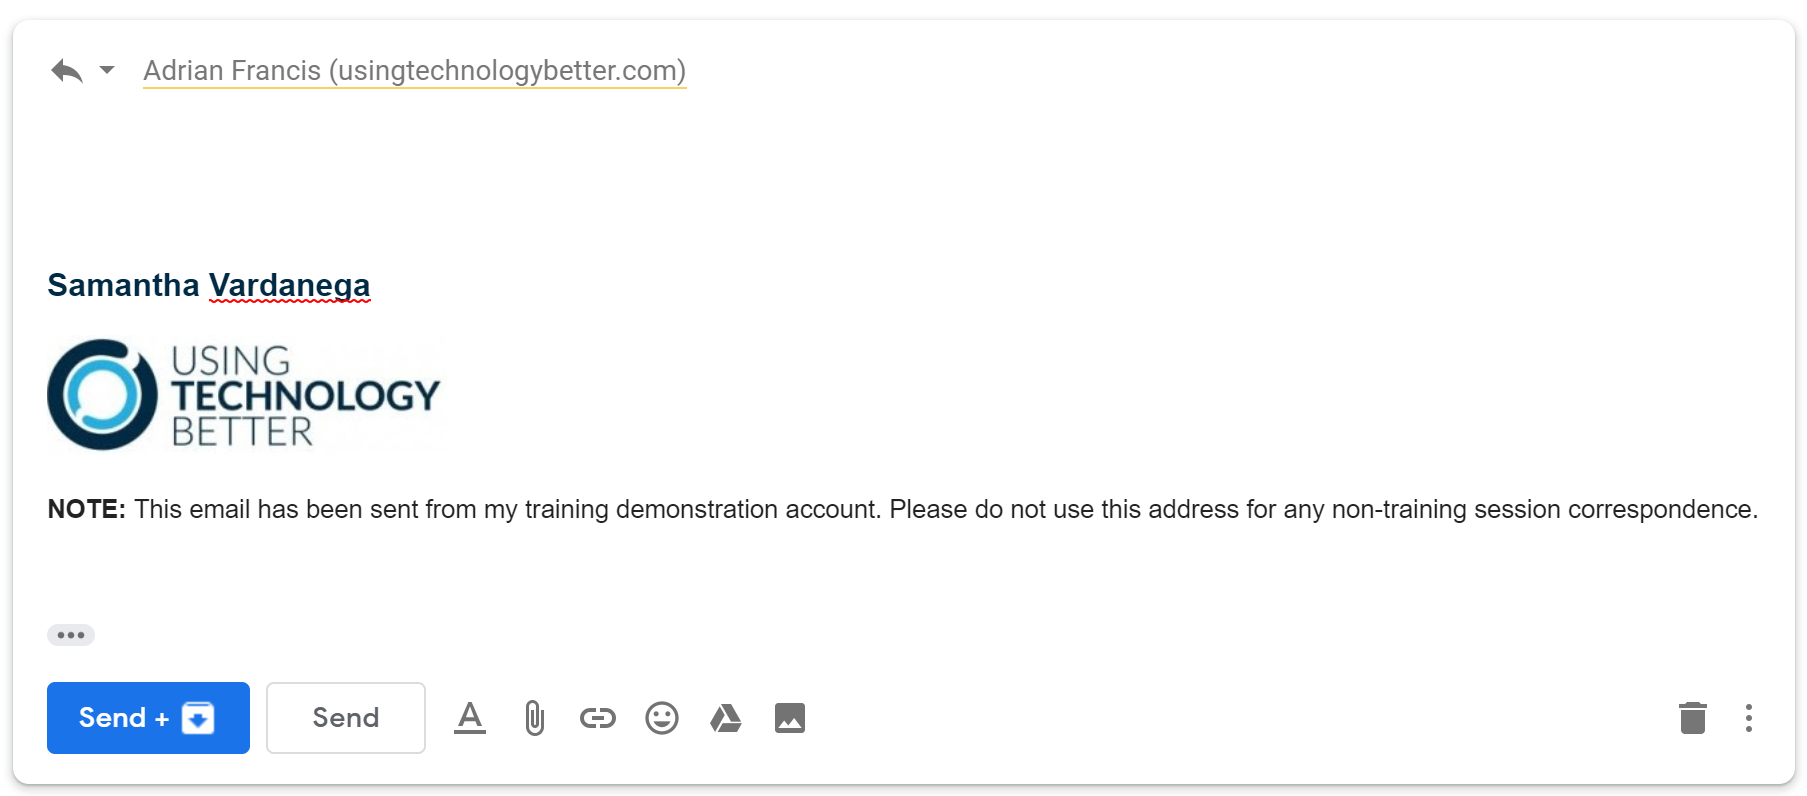
When you click it, your reply is sent and the email you are replying to is archived. These are your two actions in one click.
Now compare this to what would happen if you just clicked the ‘Send’ button. Your reply would be sent and the original email would still be in your inbox. That means you would then have to perform another action on the original email, such as archiving it or moving it to a label.
[bctt tweet=”Ever wondered what the Send + Archive button in #Gmail does? This blog post explains it all.” username=”samvardanega”]
But where does the email go when I archive it?
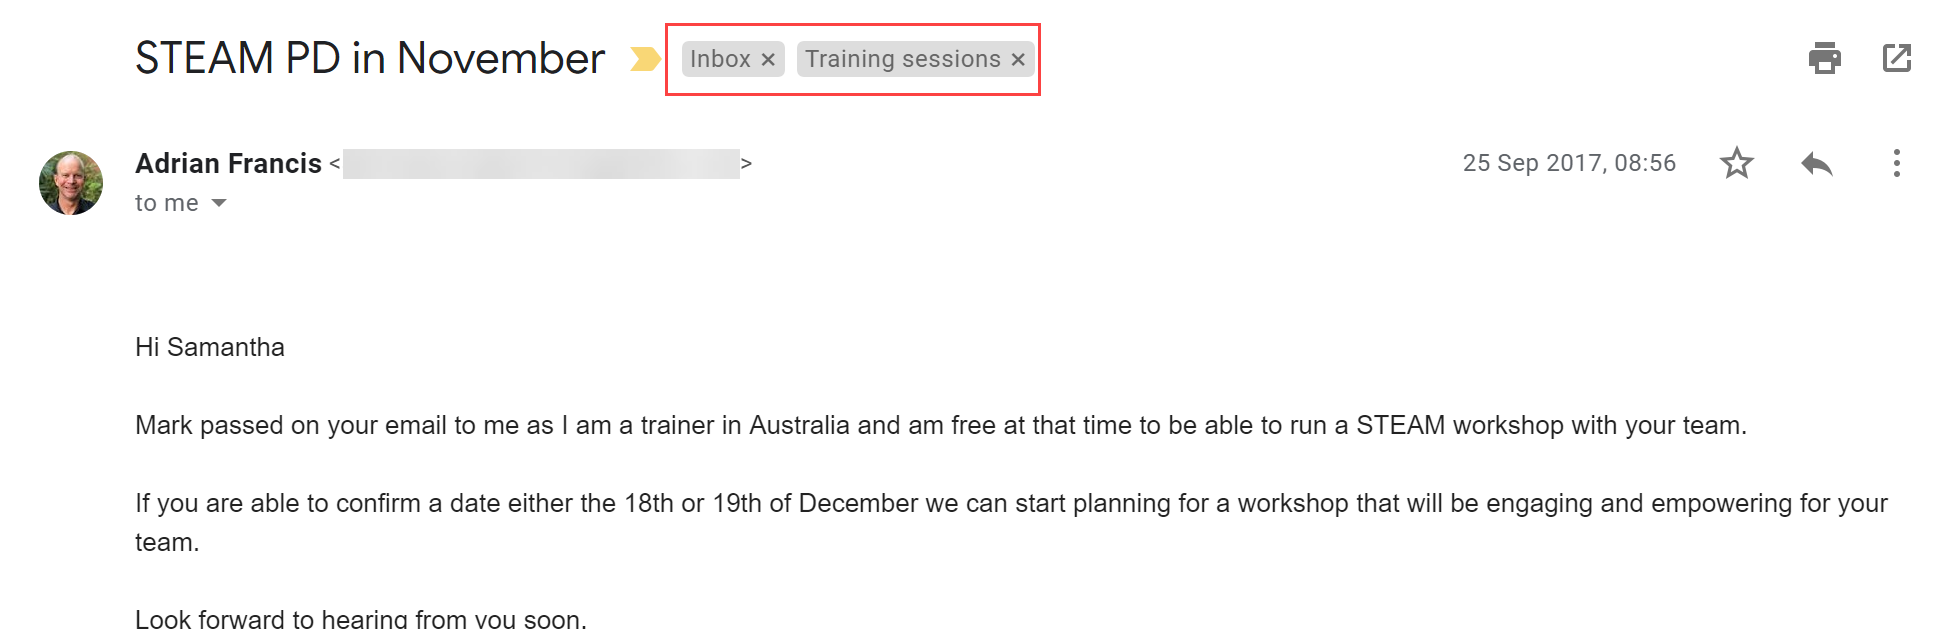
I am so glad you asked! I have explained this in detail in my blog post on demystifing Gmail’s archive button, so I recommend checking that out to get a complete understanding. In brief, if the email you are replying to was only in the inbox, you will see it in the ‘All mail’ label after it is archived. However, if it was in the inbox and also had another label applied, it will be in ‘All Mail’ and the other label after it is archived. In the example below, the email would be shown in the ‘All Mail’ and ‘Training sessions’ labels after clicking ‘Send + Archive’.
When is the Send + Archive button useful?
There are two key scenarios in which the ‘Send + Archive’ button is most useful.
Scenario 1: If you archive your emails
Some people prefer just to archive their emails, rather than filing them away into labels. If that’s you, this feature will be a huge time saver. You can use it on all email replies and clear your inbox fast.
Scenario 2: If the email already has a label applied
If the email you are replying to already has a label applied (like in the example above), it’s definitely worth using the ‘Send + Archive’ button. There are two reasons why the email might already have a label: (1) You have previously moved the email into a label, but it returned to your inbox because someone replied to the conversation (will only happen if you use conversation view), or (2) You are using filters to automatically label incoming emails. You can learn more about this latter method in my blog post on using Gmail filters to auto-label and file your emails.
[bctt tweet=”Could the Send + Archive button in #Gmail save you time and clicks?” username=”samvardanega”]
How do I get the Send + Archive button?
If you’ve decided to give the ‘Send + Archive’ button a go, here’s how you enable it:
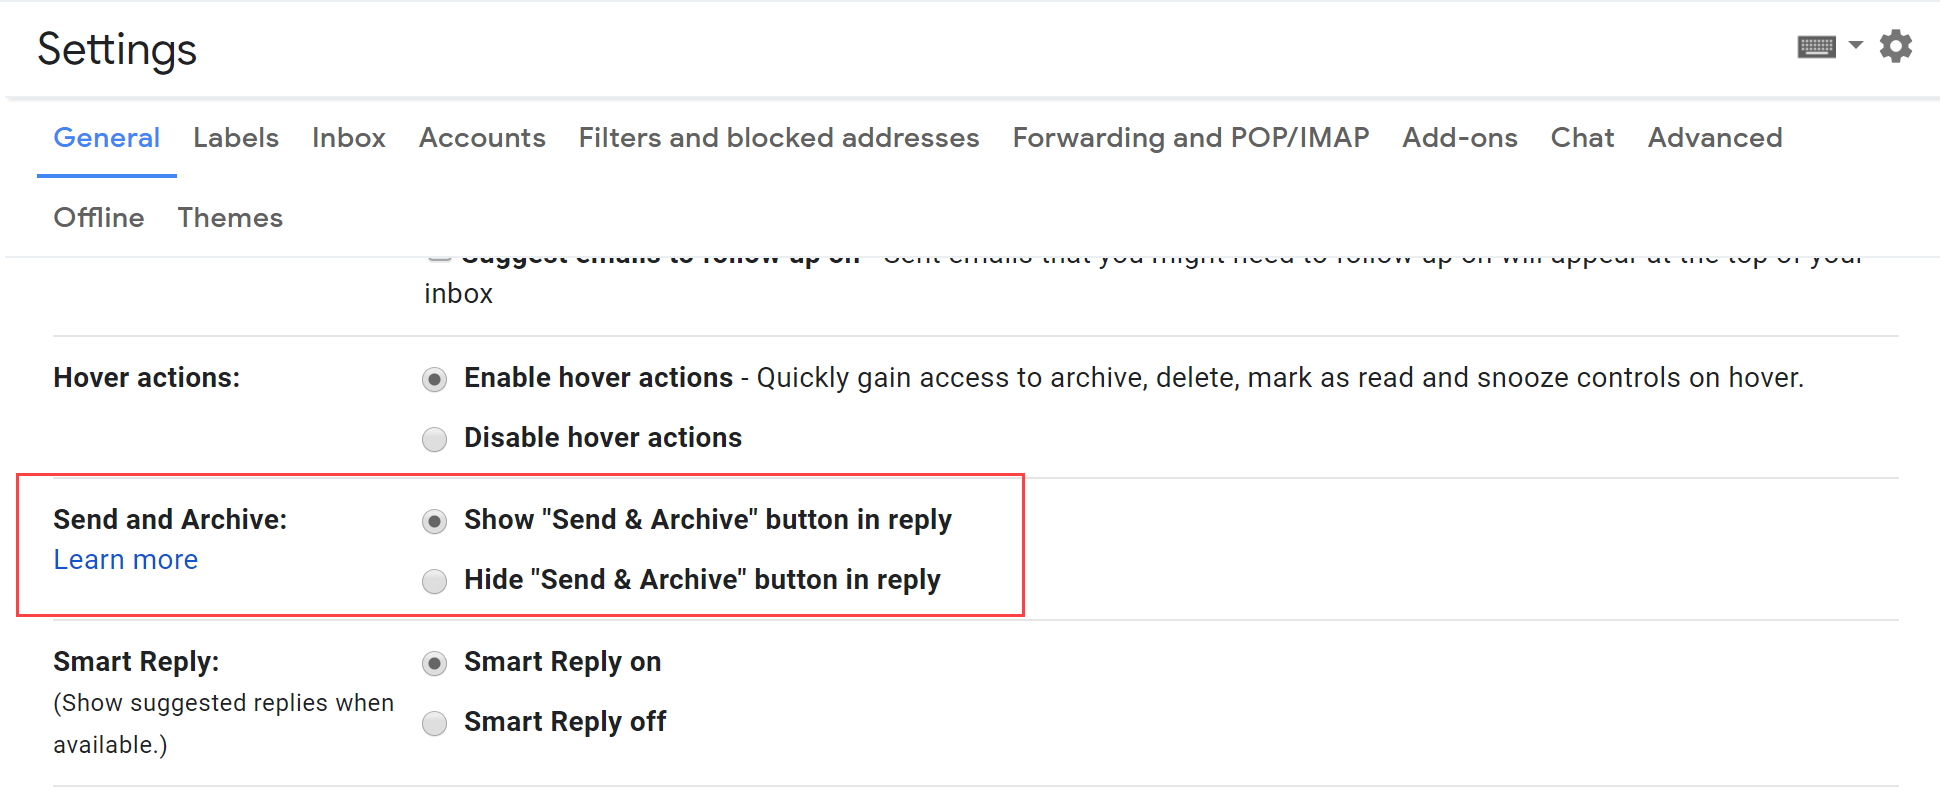
1. Click the Settings (cog) button > Settings.
2. In the General section, scroll down until you find the Send and Archive section.
3. Select the option to Show “Send & Archive” button in reply.
4. Scroll down and click Save Changes.
[bctt tweet=”The Send + Archive button is my new favourite #Gmail feature! Learn how you can use it in this post.” username=”samvardanega”]
Are you feeling overwhelmed by emails and want to learn how to better manage your Gmail Inbox? Check out our Get efficient with Gmail the SMART way online course!


