


This Pokemon Article was produced by Mark Herring from NZ. Mark is a Using Technology Better Certified Trainer. You can find out more about Mark via his blog and on twitter @markherringnz
NOTE: If you are concerned about security and the Pokemon App, we don’t use the Pokemon game to develop this lesson – you just use the images off the internet.
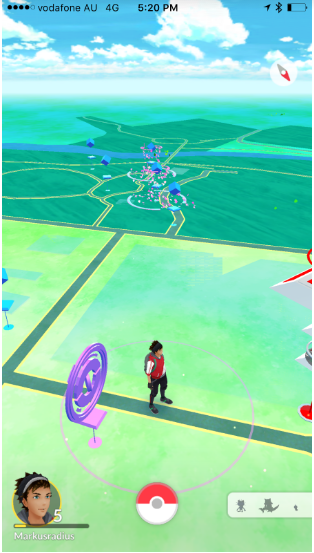
There’s a Pokemon craze that is sweeping the world and you can guarantee that quite a few of your students are into it, too. People everywhere are taking to the streets to search and locate those digital creatures called Pokemons through the ‘Virtual Reality’ technology that’s becoming so popular right now!
I’m working with some teachers in NSW at the moment and recently a teacher and I decided to create a Google Map that combined her Geography learning outcomes and her students’ obsession with Pokemon Go!
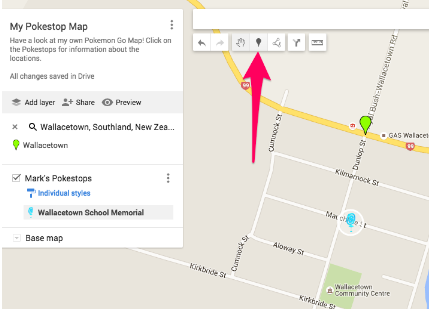
She wanted to develop their knowledge of geographical and historical landmarks around their school, connect with the local history they learned about last term and also build their navigational skills. What better reason do we need for a Pokemon project and how cool does this map look? And the learning that’s involved is focussed and authentic.
[bctt tweet=”Students’ obsession with Pokemon Go? Use these apps to connect your lessons (real-life experiences) like learning Geography.” username=”mikereading”]
In the real game, Pokestops are located on a map that players hunt down and use to collect items for the game. Our Pokestop Map uses the realistic looking icons, to give it that ‘Pokemon feel’ and here is a step by step guide.
[bctt tweet=”What better reason do we need for a #Pokemon project and how cool does this map look? #edtech #gafe #aussieEd” username=”mikereading”]
Note: You need to have a Google account to do this. If your school doesn’t have Google Apps For Education, you can still do this with a free gmail.com account.
1. To access your maps, start at Google My Maps.
This will lead you to creating your own map and adding your own title
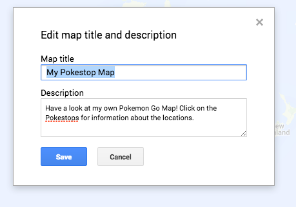
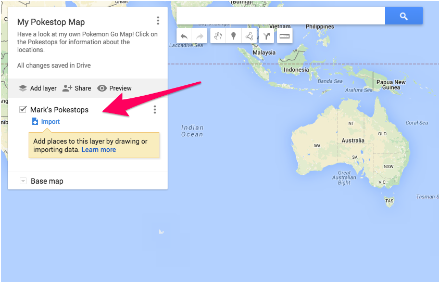
2.The next step is to add a title to a new ‘layer.’
This is where you will add your locations. It’s important that when you share the map with your students that they add their locations to this layer – it helps keeps everything tidy and together.
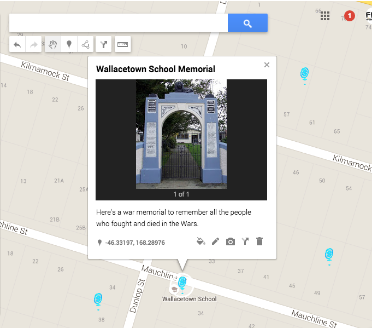
3. You can now add your first location by clicking on ‘add marker’
Once you have done you click on the Google map at the spot you want to place a pokestop. You can zoom in to the map to get the location as accurate as possible.
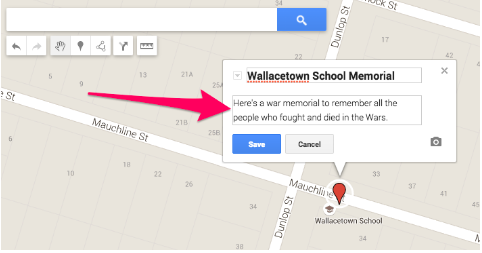
4. Next, add some information including some interesting facts, dates etc.
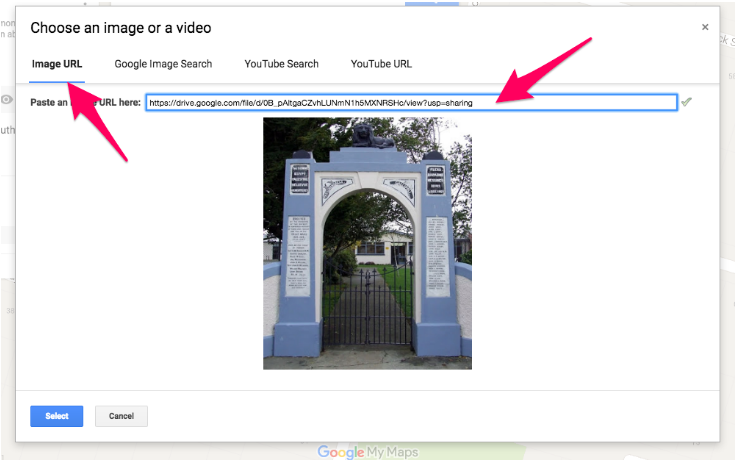
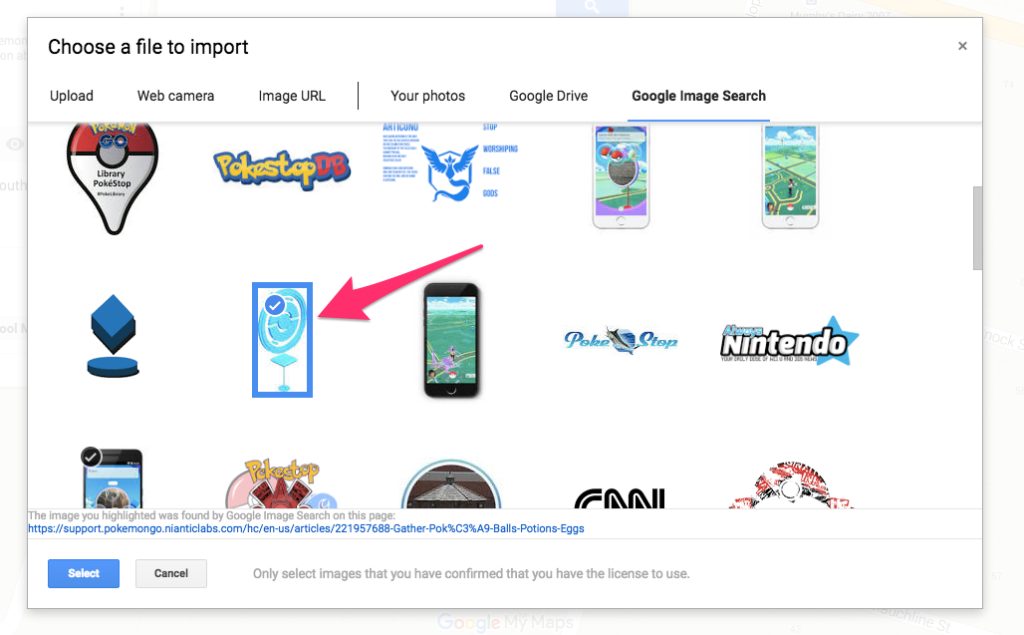
5. Now you can search for an image through the Google Search function.
If you have a photograph on your computer or in Google Drive, you can upload them and link the URL of the image.
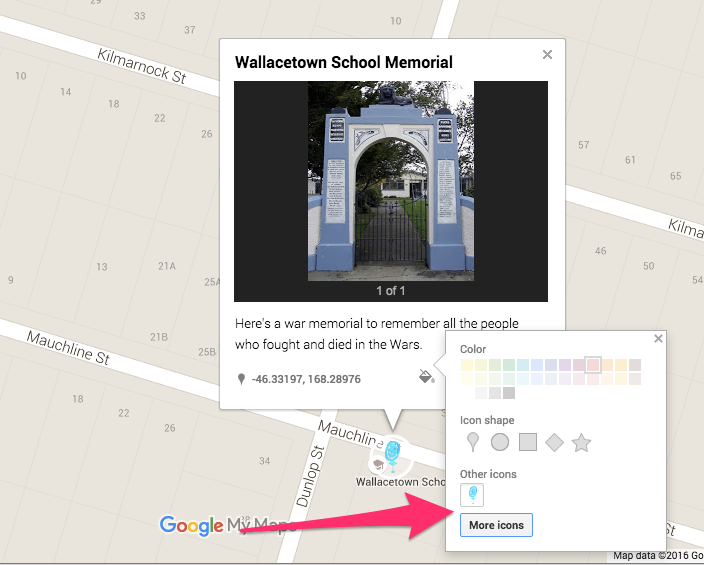
6. This next step is the fun part, and the element that gives your map the Pokemon look!
Click on the paintpot icon and change the style of the icon to ‘custom.’ You can search for the Pokestop icon by using the search terms, ‘Pokestop transparent.’
The key word ‘transparent’ is a great way to search for background-less images (called PNG files) that look great layered over other images or backgrounds. You can find this in ‘color’ when filtering your image searches.
Once added, the pokestop icon is now in the custom section and can be added by anyone shared with your map and using that layer.
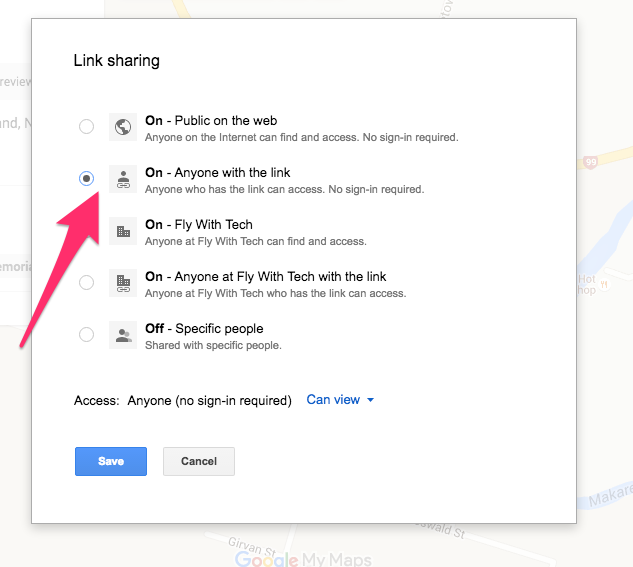
7. Your last step is to share the Pokemon map with your students.
You could add their account addresses here, or add it as a Google Classroom assignment. If your students don’t have Google accounts for you to share to, you can create a shortened link with Goo.gl and write the link on a white board for easy access – just make sure your share settings are set to ‘anyone with the link can access.’
Once you have created the locations the students can edit the information to include the Ws and an H (the who, what, where, why, when and how) about the landmark.
The beauty is that this connects the student’s understanding they developed from the previous term’s inquiry on local history.
If you want to engage and motivate – there’s nothing better than Pokemon Go at the moment. And when you connect an engagement tool with something meaningful – you get some super effective teaching and learning!
[bctt tweet=”As a teacher we need to find ways to make learning significant and valuable in our students’ lives.” username=”mikereading”]


