


Whenever I run a Google Drive workshop and ask people what their biggest frustration with Google Drive is, the overwhelming response is always ‘keeping it organised!’. That’s why I am so excited about Google Drive’s newest feature, the Priority page. The Priority page includes two sections – Priority page and Workspaces. In this blog post, I’ll explain what each section does, how they keep you focused and efficient and how you can use Workspaces to organise the files you use the most.
What is the Priority page?
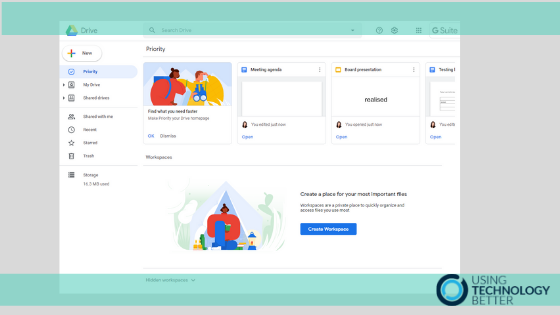
The Priority page sits above your My Drive in Google Drive.
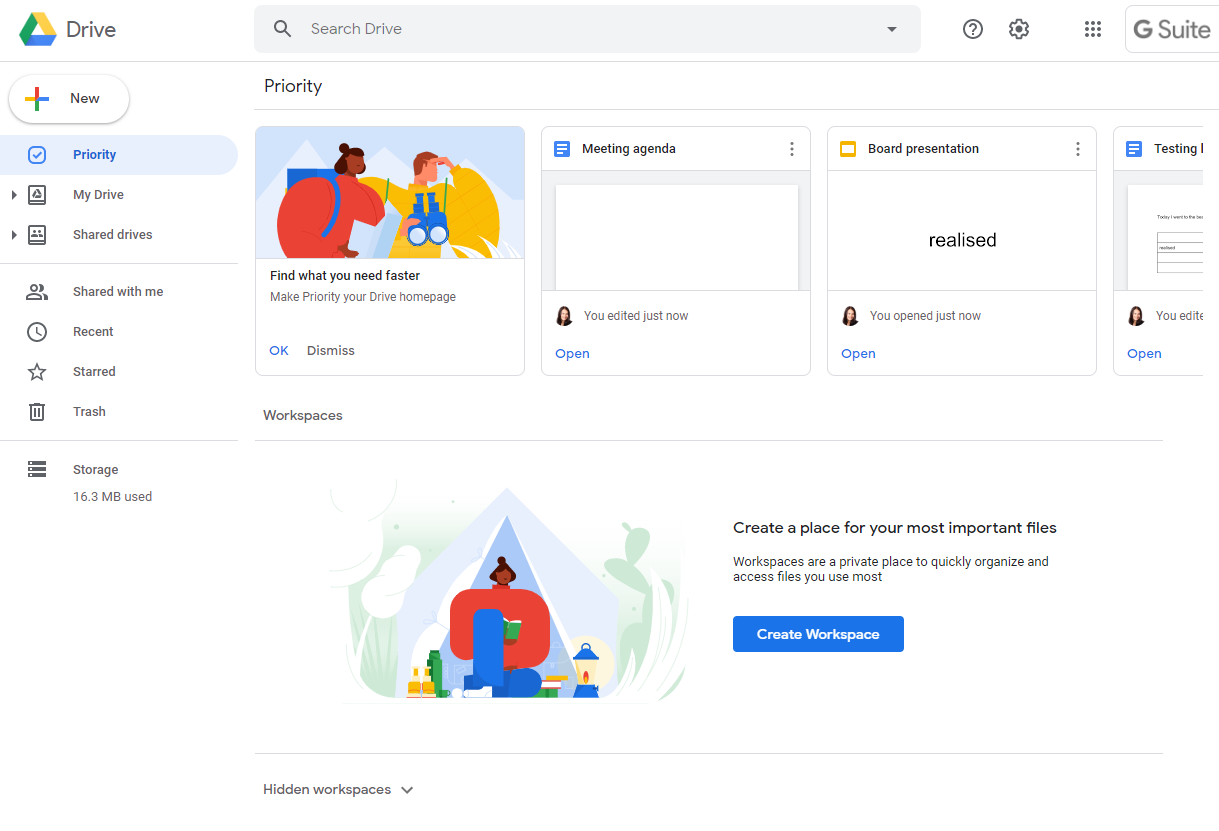
There are two sections on the Priority page:
- Priority: This is similar to the ‘Quick Access’ section you may have in your My Drive. It shows documents that are likely to be relevant to you at the given time. Google uses its machine-learning capabilities to determine this relevance. Documents that appear in Priority may include those that have comments, suggestions or approvals you need to respond to.
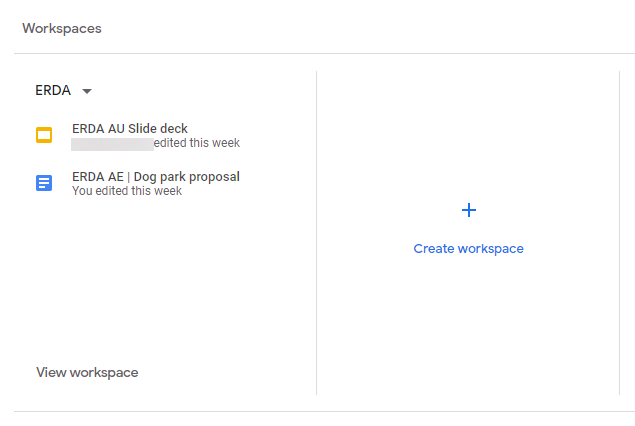
- Workspaces: This lets you create personalised, curated lists of files that you use often. You can add files from My Drive, Shared with me and Shared Drives to a workspace, making it a great way to gather together files that are stored across multiple locations. Workspaces are not a storage location like folders, they are more like categorised stars or bookmarks.
[bctt tweet=”Have you noticed the Priority page in #Google #Drive? Here’s an overview of what it is & how it can help keep you organised & efficient! #gsuite” username=”samvardanega”]
How does the Priority page help keep you focused and efficient?
As the name suggests, the Priority page can help you stay focussed on the files (and therefore tasks) that are your highest priority. By organising your most used important and frequently used files into topic-based Workspaces (e.g. by projects,clients, classes, tasks etc.) you avoid the need to search or go digging through folders to find the files you’re looking for. This both saves you time and avoids the likelihood that you’ll be distracted by other files along the way! Workspaces are particularly useful when you’re regularly using files that are spread across multiple folders, as it makes them all accessible in one place, regardless of who owns them or where they are stored. This means you’re no longer hindered by cumbersome folder structures, you can design a workspace system that works for you.
The Priority section of the Priority page also saves you time by surfacing documents that you’re likely to need, even if they are not part of your workspaces. I find it particularly useful how the Priority section displays files that require action (due to comments, suggestions or approvals), as it makes it easy to focus on all of these files in one place, rather than via email notifications.
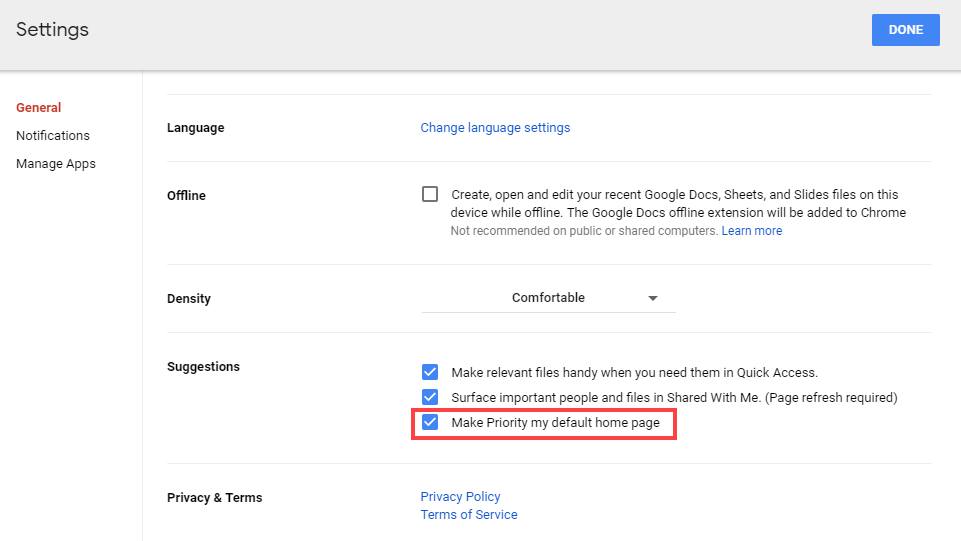
Once you have setup your Priority page, you might like to make it the default pages that opens when you access Google Drive. This makes it even more likely that you’ll stay focused on what’s important!
To set the Priority page as the default:
1.Click the Settings (cog) button > Settings.
2.Tick the option Make Priority my default home page.
[bctt tweet=”The Priority page in #Google #Drive has two features that can help keep you organised & efficient! #gsuite #gsuite” username=”samvardanega”]
Creating workspaces
Each workspace you create can have up to 25 files. Google Drive may suggest some workspaces that might be useful to you. However, if you’d like to create your own, follow the steps below.
1. Click the Create workspace button.
2. Name your workspace and click Create.
3. Your new workspace will open. Google may suggest some relevant files based on the name of your workspace. Click the suggested files you want to add, then click the Add selected files button. To add other files, click the Choose other files link and browse Drive for the files.
Tip: If no files are suggested, click the Add files button to browse for the files you want to add.
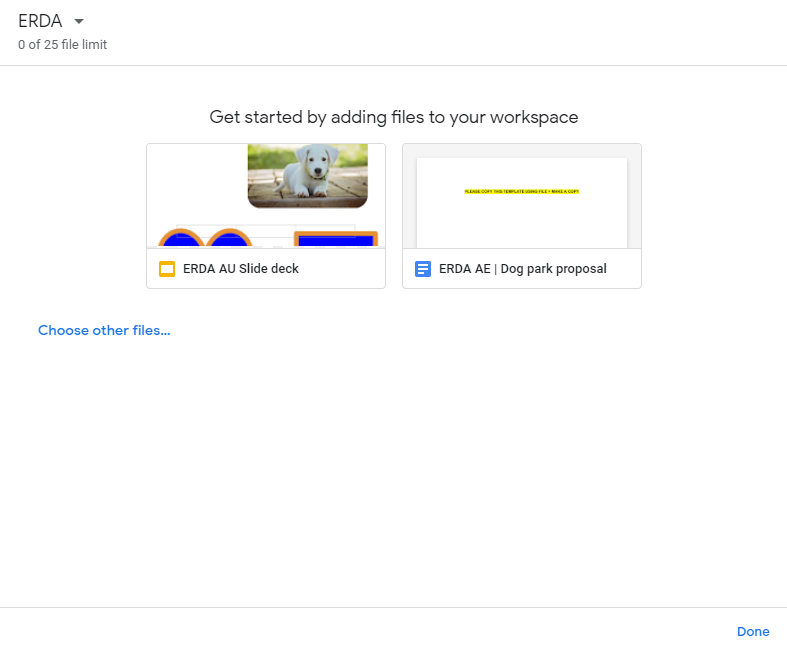
4. Click Done when you have finished adding files.
Your new workspace will be shown in the Workspaces section. The first few files in the workspace will be shown on the screen. Click on View workspace (or the name of the workspace) to view and open other files.
[bctt tweet=”TUse the Workspaces feature in the #Google #Drive Priority page to create personalised, curated lists of your most important & regularly used files #gsuite” username=”samvardanega”]
Adding and removing files from a workspace
There are two ways to add more files to a workspace.
- Open the workspace and click the Add files link in the top right corner.
- Right click a file in Drive and choose the Add to workspace option from the pop-up menu.
To remove a file from a workspace, you can either:
- Open the workspace and click the little three dots button on the right of the file you want to remove. Then choose the Remove from workspace option from the pop-up menu.
- Right click the file in Drive and choose the Remove from workspace option from the pop-up menu.
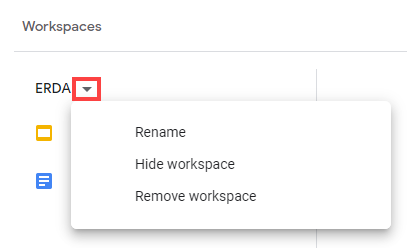
Managing workspaces
You can manage a workspace by clicking on the drop down arrow next to the workspace name. From here you can rename, remove or hide a workspace. Hidden workspaces are shown in the Hidden workspaces section at the bottom of the Priority page.
If you’d like more ideas for keeping your Google Drive organised, check out Lara’s post on The Life-Changing Magic of a tidy Google Drive and my post on organising Google Drive’s Shared with me.
Prefer to see the Priority page in action?
Check out this video from Donna.


