


With so many resources available online it’s important to know how to effectively manage and organise digital content that you rely on. Bookmarking frequently visited websites or documents is a great way to be more efficient when working online.
Here are five key things to know when you are using bookmarks in Chrome.
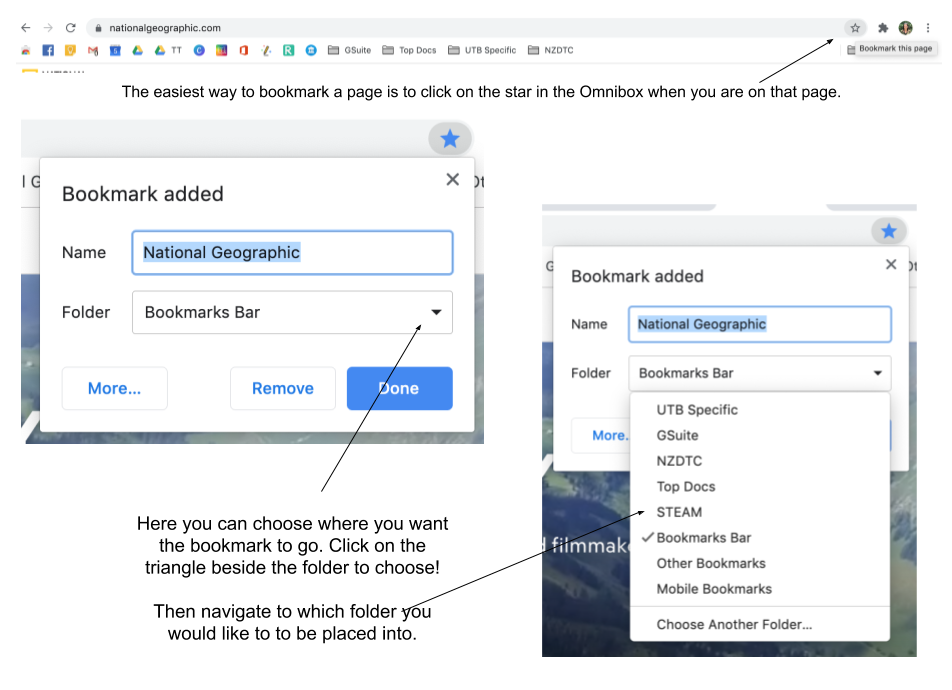
1. Bookmark your most visited Docs and websites
The simplest way to do this is to click on the star at the end of the Omnibox when you are in the Doc or site that you want to add a bookmark for. Then you can organise where that bookmark will live. If you choose Bookmark Bar you will see it under the Omnibox. If you choose Other Bookmarks, you’ll see that as a folder under your small profile pic and three dot menu.
NB: If you can’t see your Bookmark Bar skip ahead to tip 5!
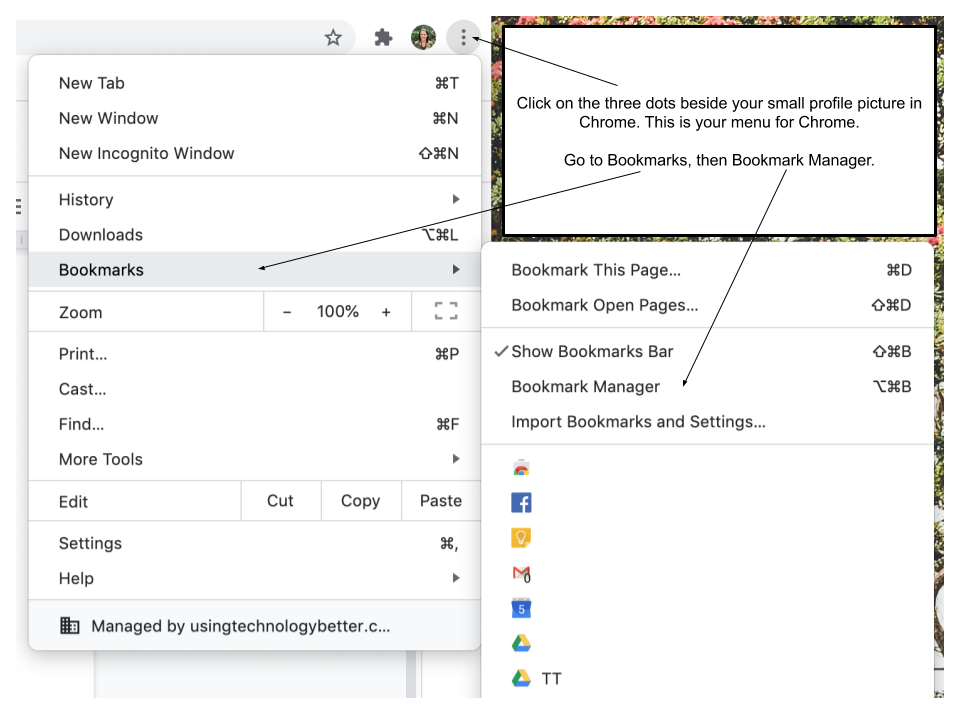
2. Get to know the Bookmark Manager
You can find the Bookmark Manager in your Chrome Menu.
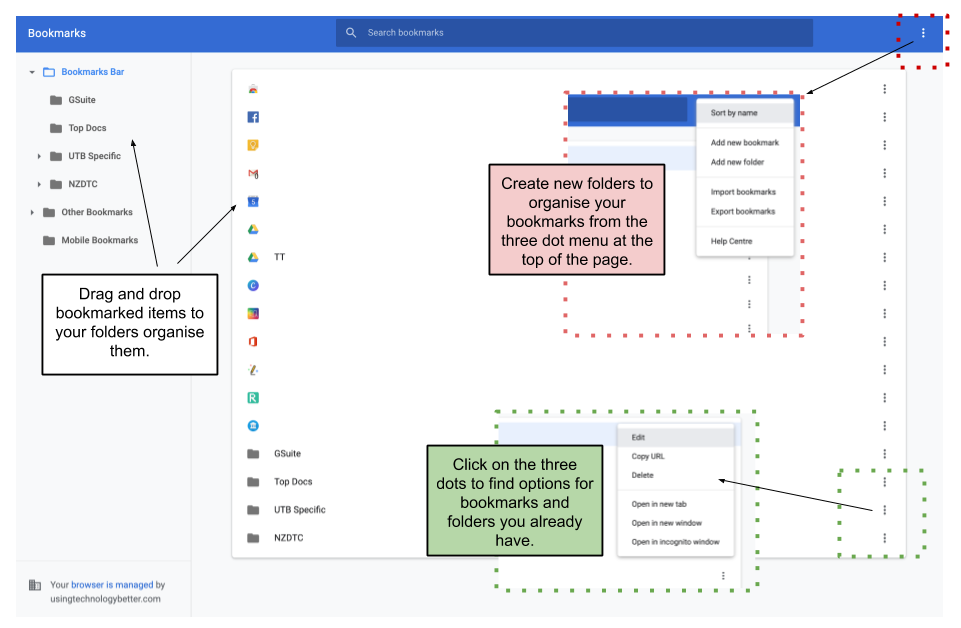
From here you can drag and drop your bookmarks into different orders, folders, rename them and more.
[bctt tweet=”Who knew it was so easy to organise and manage your Chrome Bookmarks! #utbPD #GSuite” username=”lara_kirk”]
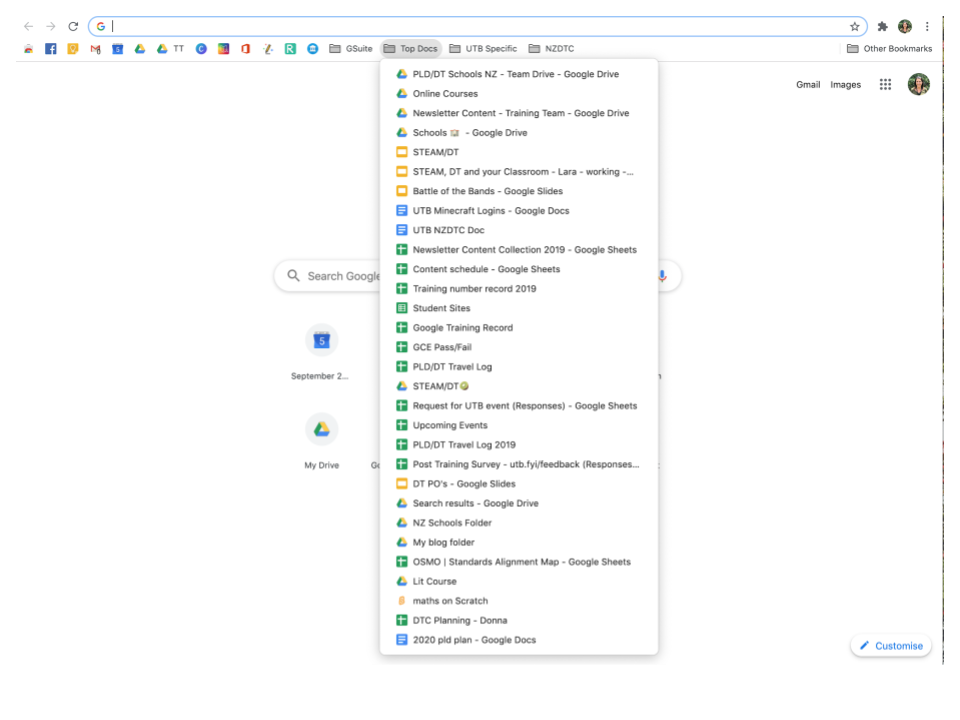
3. Create folders with documents or links that you use often
From within the Bookmark Manager you can create folders. If you place the folder in your Bookmarks Bar you have access to many places with just two clicks.
[bctt tweet=”Use bookmark folders to quickly navigate to loads of frequently visited Docs and websites! #utbPD #GSuite” username=”lara_kirk”]
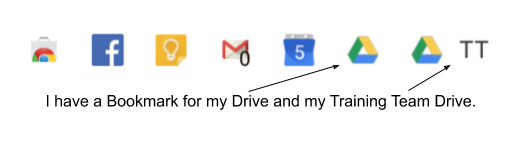
4. Save space by deleting or shortening the words
Many places that you want on your Bookmarks Bar have icons that are easily recognisable. You can delete all the words and just have the icon giving you heaps more space on your Bar. There’s a few ways to do this, the fastest way is to right click on the icon on the Bookmark Bar, click on ‘Edit’ and delete all the words – or shorten them.
[bctt tweet=”Increase the number of places stored on your Bookmarks Bar by deleting the text and just showing the icon! #utbPD #GSuite” username=”lara_kirk”]
5. Show or hide the Bookmark Bar
The Bookmark Bar is what you see under the Omnibox when you are in Chrome. If you have it set to show you will see it constantly when you are in Chrome. If you don’t, you’ll only see it when you open a new tab. You can find this option in the Chrome Menu. Three dots > Bookmarks > Show Bookmarks Bar.
Make sure you share this with your colleagues and students. Organising digital content in considered ways will lead to greater research skills and efficiency!
If you want to learn more tips and tricks in G Suite andChrome check out some of these blog posts:
G Suite – Sweet As!
Working offline in G Suite
5 great Chrome Extensions for teachers
Customise your Chrome Omnibox


