


Google Slides is one of my favourite tools when it comes to creating purposeful and relevant tasks for students within G Suite for Education. There are just so many ways you can utilise this tool, and using the master slides feature is one of the lesser-known gems.
One of Using Technology Better’s amazing trainers, Sam, has written two very helpful blog posts about how to get started with this tool – customising your own themes and creating templates.
In this blog, we’re going to take a look at how we can take the idea of templates and develop a bit more student agency along the way. Using the ability to create customised slides, you can create a variety of prebuilt slides and allow your students to choose the one they want to work on or the one that is best suited for the task they are working on.
[bctt tweet=” Create your own templates in #Google #Slides using the master slide #edtech #GSuiteEDU” username=”donnagolightly1″]
How do we do this?
Let’s take a look…
Step one: customise your slides using the master view option
- Create a new Google Slide deck. (use the slides.new option to create one super quickly – just remember to move it into the relevant folder to keep your Drive organised.)
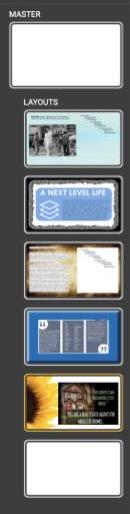
- Navigate to the master options:
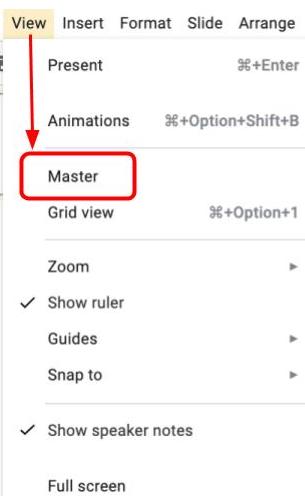
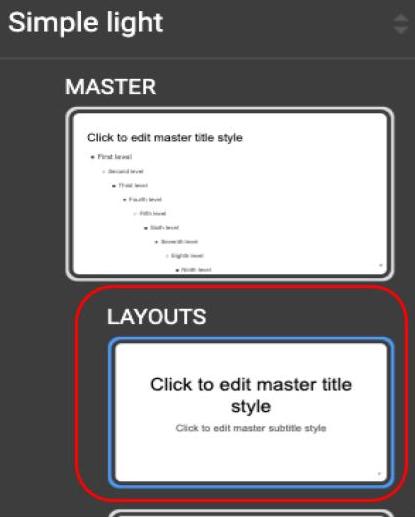
- Do not begin with the master slide – this will change every slide in the deck. Begin with the second slide which is the first of the ‘Layout’ slides.
- Delete the placeholders that are there and set it up the way you want it to look for your students.
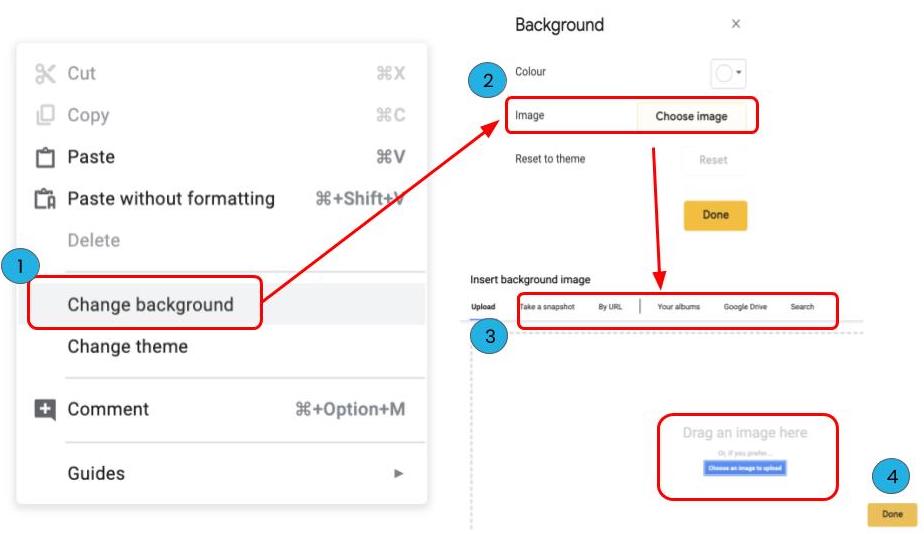
- Add a new background by right-clicking on the slide. You could make it a solid or gradient colour, or add an image.
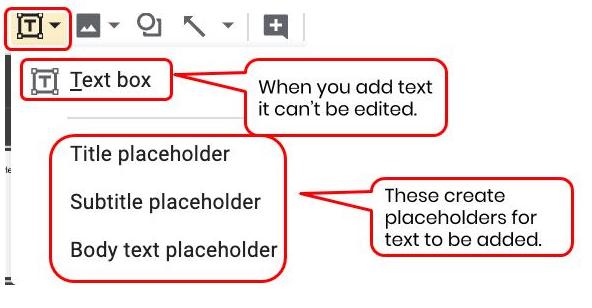
- You can add a text box that the students won’t be able to change – this is great for giving instructions. If you want to add a text box your students can write in, use the text placeholders.
- Once you have it set up with all the content you want on it you can rename it so the students will be able to differentiate between the slides a little more easily.
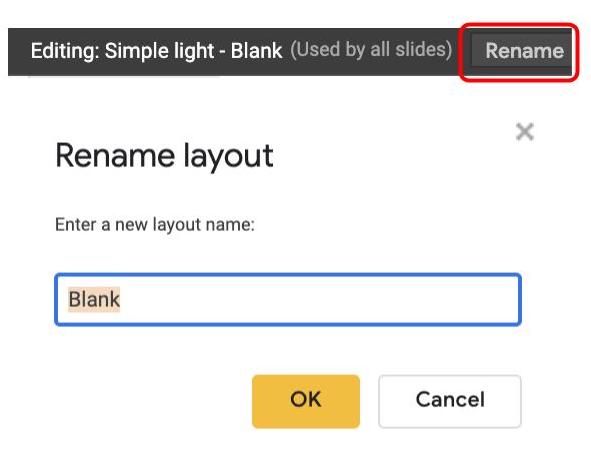
[bctt tweet=”Did you know you can rename layouts in the master slides #GoogleSlides #Edtech #GSuiteEDU” username=”donnagolightly1″]
- When have made all the different slides you want your student to choose between, delete the rest of the layouts.
- Note: you can’t delete the Master slide itself nor the final blank slide.
Step two: show your students how they can access the different templates
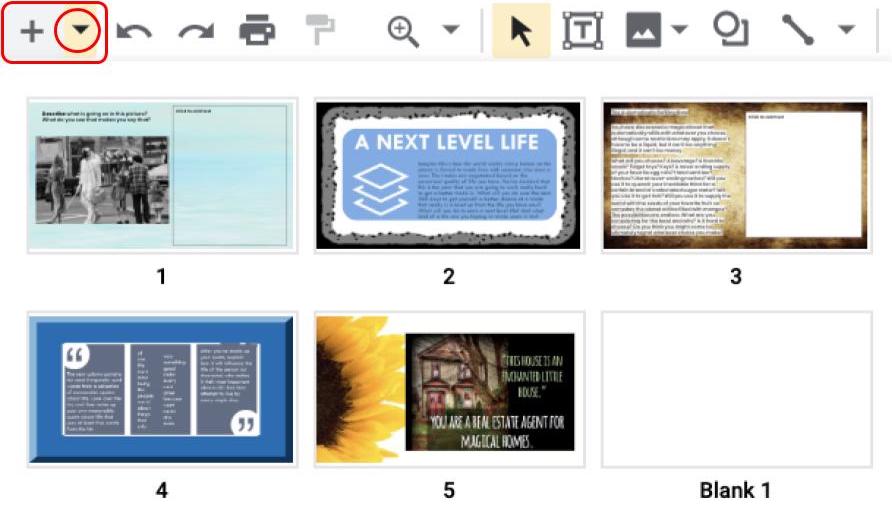
In this example, each slide is a different writing prompt. Some slides have text placeholders and some don’t. This is deliberate so the students all learn how to quickly add their own slides in also. We don’t want to be doing all the work for them!
- Share the slide deck with your students so they each have their own copy.
- If they have not created a new slide in the deck, show them how they can click on the tiny triangle next to the + and choose the template they want to use.
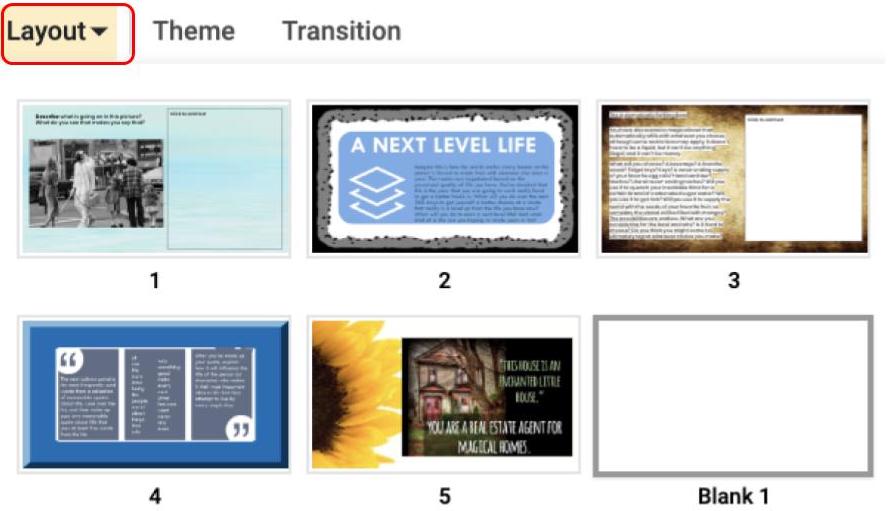
- If they already have a new slide created they can change the template by clicking on the ‘Layout’ button.
Now that you have mastered the master 😁 how could you use this technique to allow students more choice in their learning?
[bctt tweet=”Use master slide templates to give Ss more agency when using #GoogleSlides #edtech #GSuiteEDU!” username=”donnagolightly1″]
Maybe you could create different graphic organisers to help students organise their thinking. Or, maybe you could build on the writing prompt idea. You could even use the slides master to build your tasks and the students only add one when they have finished the previous task, or add the one that is appropriate for them to work on.
We’d love to see what you do with this idea. If you’re on twitter use the hashtag #utbSHARE to show us what you’re up to.
For more ideas on how to use Google Slides read our three-part series on developing student agency with Google Slides here: Part One, Part Two and Part Three.


