


Just what exactly is storytelling?
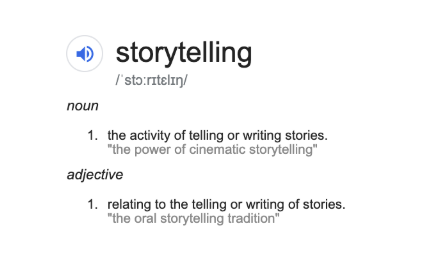
As a noun, most definitions read something like this, ‘the activity of telling or writing stories.’
As an adjective, storytelling means ‘relating to the telling or writing of stories’
But to me, the most interesting connection to the word is this statement,
‘Storytelling predates writing. The earliest forms of storytelling were usually oral combined with gestures and expressions.’
[bctt tweet=” What exactly does #storytelling mean? It’s more than simply writing down words!” username=”donnagolightly1″]
So why is it that in schools we more often than not simply ask students to ‘write’ their story. We know that in many cultures, their traditions and culture are passed on mainly through the rituals of oral, not written, storytelling.
With the access we now have to many forms of digital technologies in our classrooms, it’s time we moved beyond simply using these resources to write or publish our stories and provide students with opportunities to tell their stories in more creative, engaging ways.
Recently I was working with a group of nine and ten years old students. Their teacher had explained that there were a large number of students who were disengaged with the writing process and she was wanting to offer new ways they could ‘tell’ their story. What an exciting opportunity for me and what a fabulous teacher they had!
So what else could I offer to these students as a way to tell their story?
- their own voice – students can record themselves speaking their story
- drawing/design – there are many ways students can create characters, settings and storylines visually rather than simply writing down words
- coding – platforms like Scratch allow students to tell stories in many different ways
- animations – adding animations to characters can help to portray action lines
- stop motion – creating sequences is important in portraying stories
- green screen effects – story settings can be anywhere in the world and visuals and video can be used together
[bctt tweet=” Encourage your Ss to tell their #story by using #creative #digital tools!” username=”donnagolightly1″]
And just what was it that we did with those disengaged students?
Step one:
We talked about what a story was.
Too often we make assumptions that our students know exactly what it is that we want them to produce. In this instance, most, but not all, of the students could tell me the elements that we need to create a story. They were focusing on narratives so they needed:
- characters
- a setting
- a problem or some conflict
- a resolution or solution to the problem
- an authentic audience for their finished story
As we progressed through the process we kept coming back to these elements so that our stories retained a sense of cohesion and sense.
Step two:
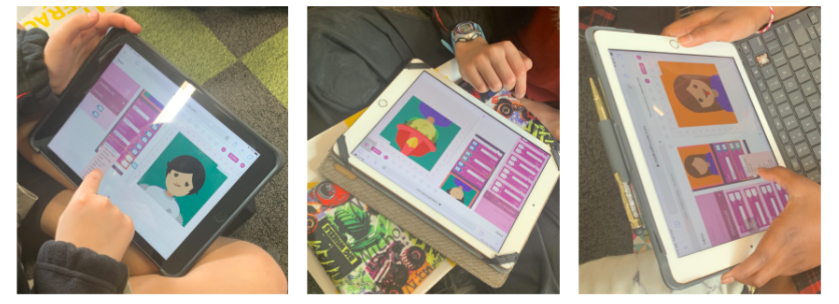
Rather than simply describing our characters with words we created them with some coding instead. Not only was the engagement factor greatly increased but the students were using some critical thinking skills along with problem-solving and debugging.
We used the madewithcode/emojify tool.
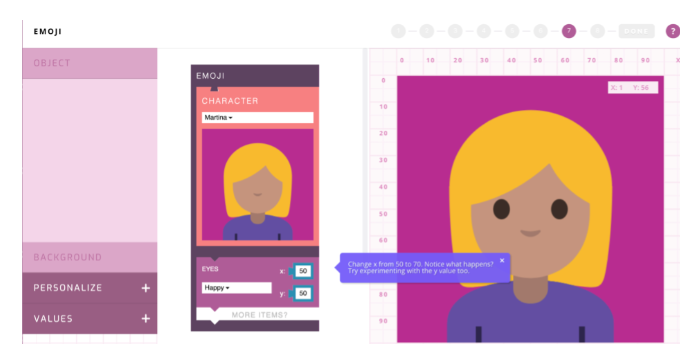
Madewithcode gets students thinking about just one step of the process at a time and also requires them to manipulate x and y axis. They can personalise their characters any way they like – depending on what their storyline is going to be.
Once they have finished they can save it as a standalone image.
Step three:
Once we had our characters we needed to consider our setting. This was a great opportunity to remind students about only using images that are licenced for reuse.
They searched for an image of where they wanted their story to take place, and because they were using iPads, they slid the toolbar across and tapped on ‘Labelled for Reuse’
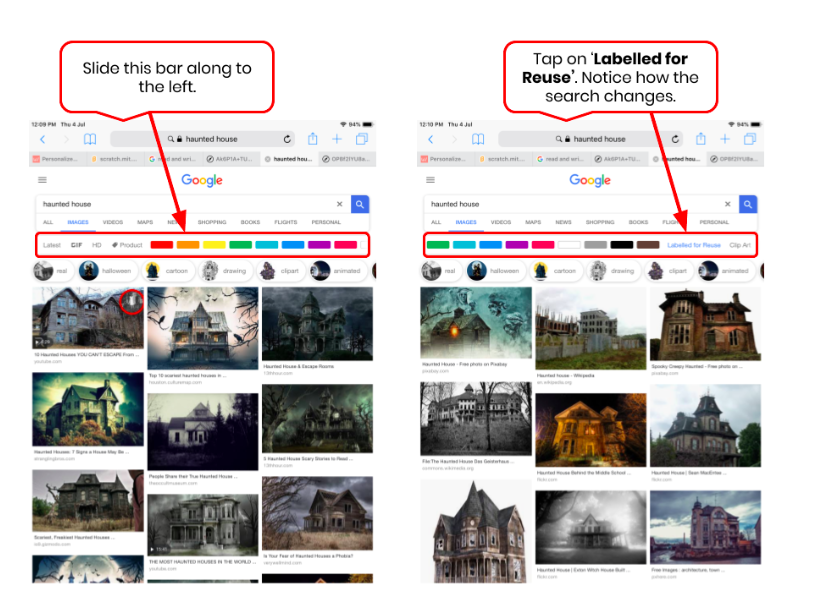
Once they had chosen the appropriate image they selected it and saved it to their photos. (On the iPad, it’s a long finger press hold and the option to ‘Save image’ will pop up. Tap on it and the photo will be saved to Photos.)
Step four:
With the characters and the setting sorted the next step was to put them together and ‘tell’ our stories.
With these students, I used Keynote because they were on iPads but you could use Powerpoint or even Slides to create similar outcomes.
(If you’re a visual person skip the written steps and watch the video below.)
- Open a new Keynote. Choose a white background and ‘wide’ as the size.
- Import the image of the setting and resize it so it covers the whole slide.
- Tap on ‘Arrange’ and lock it in place.
- Import the image of the first character (if using more than one).
- Tap on the character and select ‘Animate’.
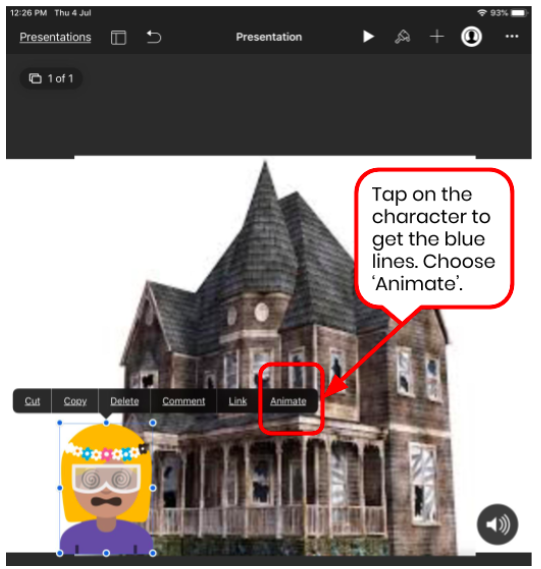
- Start with ‘Build in’ first. This is how your character will enter the setting.
- Next animate ‘Action’. This is what your character will do while it’s in that setting.
- Tip: Motion path will let you create a movement path for your character. Simply move it around where you want it to go and the character will follow that path.
- Finally, animate the ‘Build Out’. This is how your character will leave the setting.
- When you’ve finished setting the animations tap ‘Done’.
- Tap on the character again, tap ‘Animation’ but this time tap the lines to the left of the word ‘Done’.
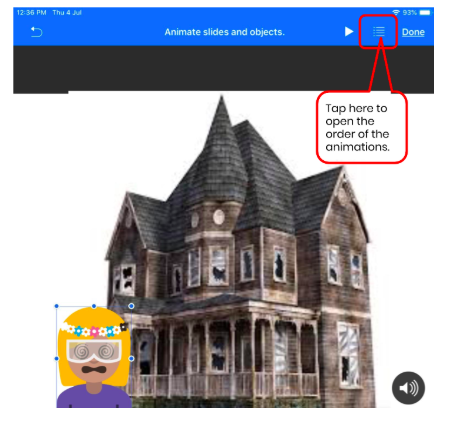
- Tap on the first animation. At the bottom of the menu tap on ‘After transition’. This means it will begin automatically when you play the slide.
- On the next animation choose ‘After Build 1’.
- On the third animation choose ‘ After Build 2’.
- Tip: Notice at the very bottom you can add a delay between animations if you don’t want them to happen straight away.
- Add voice and tell your story!
- Tap on the ‘Record Audio’ option (under the + tab)
- Tell the story – thinking about expression, pace and volume. Don’t forget to consider background noise also.
- Tap ‘Insert’ to save the recording.
- Go back to the animation menu in the top right-hand corner – you’ll now see the recording at the bottom.
- Drag the recording to the top and set it to begin ‘After transition’.
- Tap on the next animation – change it to begin ’With Build 1’, (this means it will begin at the same time as the voice recording does).
- Tap each of the other transitions and change to after the one before them.
- Tap ‘Done’.
- Play!
[bctt tweet=” Use #Keynote animations to tell your story. Ss can record their voice over top! #AppleEdu” username=”donnagolightly1″]
28 students were all fully engaged for an entire hour and a half! Some great characters were created who appeared in mysterious places while performing humorous actions.
And who were their authentic audiences? Their peers, teachers, parents and their community.
To do something similar with your students you may need to step through the process more slowly depending on the time you have available. You may want to tweak things to suit your situation – but have a think about ways that your students could tell their stories where just writing the words on paper, or on a screen, isn’t the focus.
For more ideas on how you could use your iPad check out 3 ways to use your iPad without wifi or 3 ways to use screen recording.


