


Looking to capture student voice? Gather feedback or get students to explain their learning? The screen recorder on iPad has got you covered!
In this article, I’m going to spill the beans on a super handy feature that’ll make your recording students in class a whole lot easier: the screen recorder on your iPad. But wait, there’s more! Not only can you record what’s happening on your screen, but you can also capture student voice alongside it. What an incredible way to showcase what’s going on in your classroom? Let’s dive in and learn how to harness this amazing tool.
Step 1: Get the screen recorder ready.
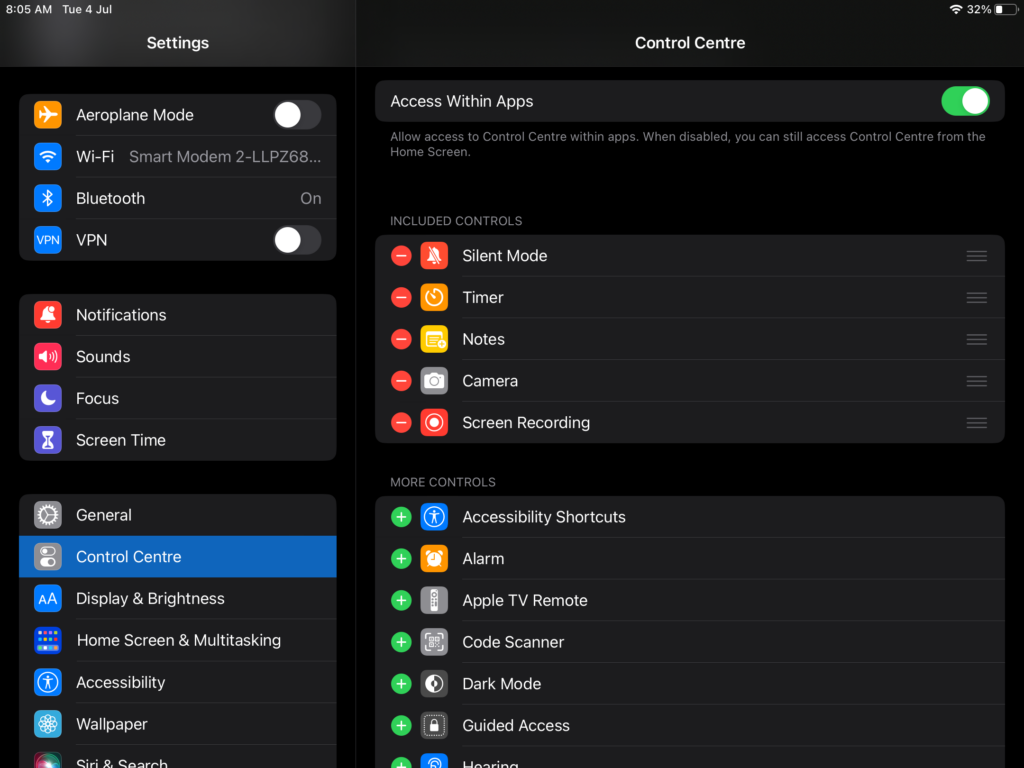
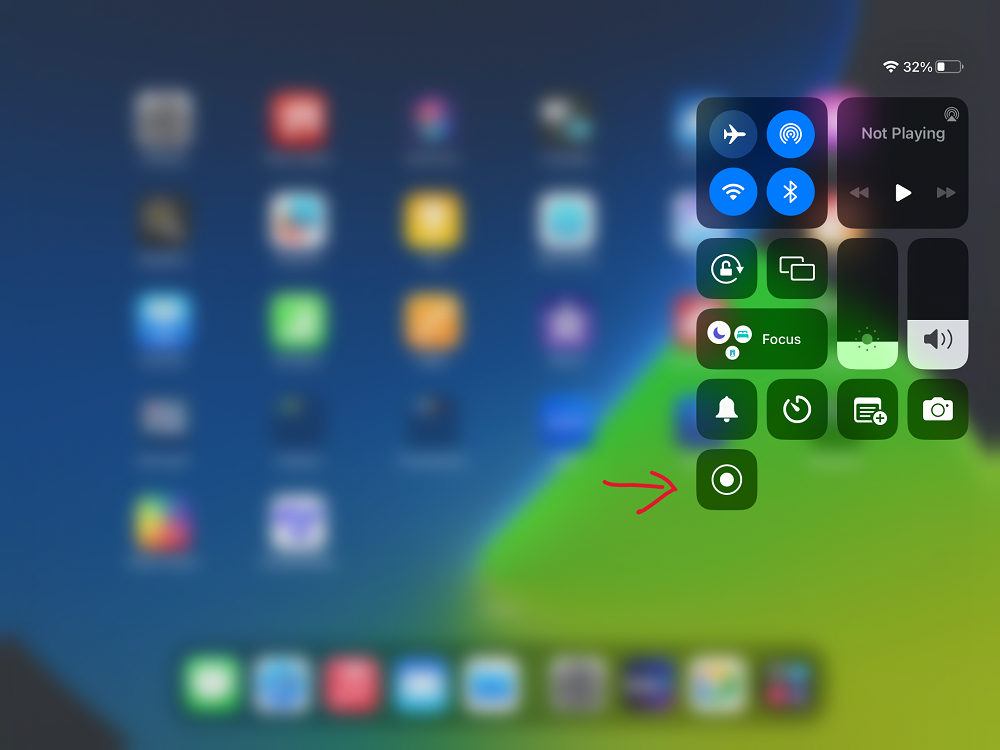
First things first, let’s make sure you have the screen recorder readily accessible on your iPad. Open the Settings and press Control Centre from the menu. Make sure that Screen Recording is listed under included controls – if it is not, press the green + button to add it. The Control Centre is accessed by swiping down from the top right corner of your screen. You’ll find a bunch of nifty icons there, but what we’re looking for is the Record button. It looks like a circle with a dot inside. Tap it, and voila! You’re all set.
Step 2: Adjust your recording settings
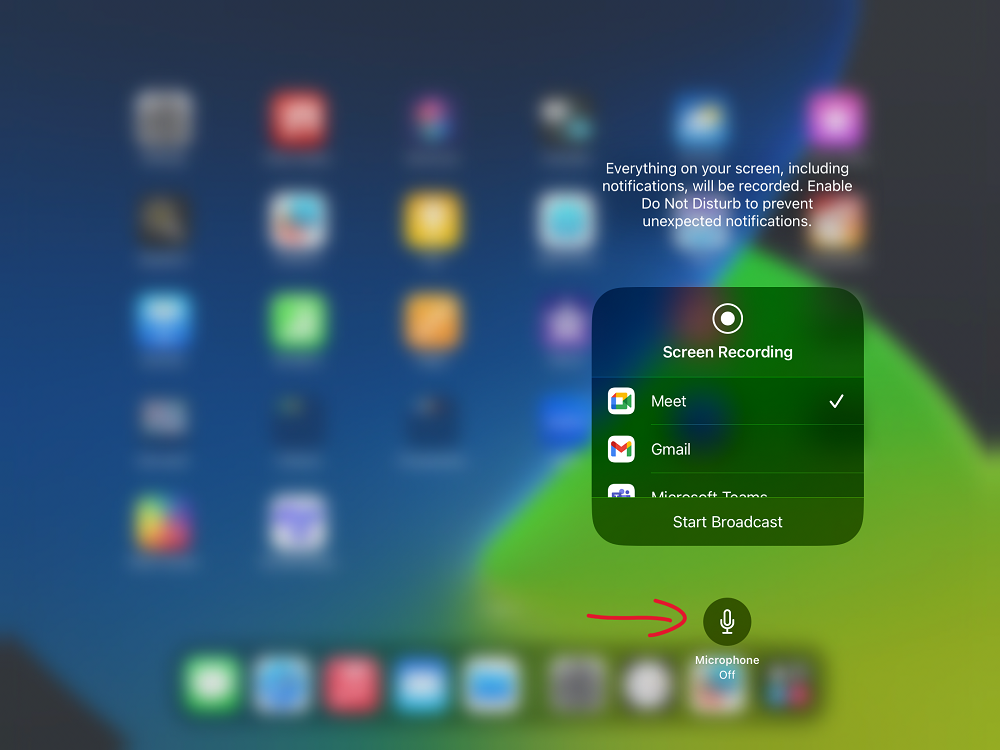
To capture your voice, make sure the microphone icon is enabled. I’ve been caught out with this before and you don’t want to miss out on that crucial commentary, right?
Press and hold on the Record button and make sure that Microphone is on! If it is off, just tap to turn it on.
Step 3: Ready, set, record!
With the microphone setting sorted, it’s time to hit that record button and let your voice shine. Tap the Record button, and you’ll see a countdown from 3 to prepare yourself. Once it hits zero, your screen recorder will spring into action, capturing everything that happens on your iPad screen.
Remember, you’re not limited to capturing just your voice. You can include any sounds that happen around you, like background music or even the chirping of birds outside your window. Just be mindful that it doesn’t distract from the main focus of your recording.
Step 4: Share and save your masterpiece.
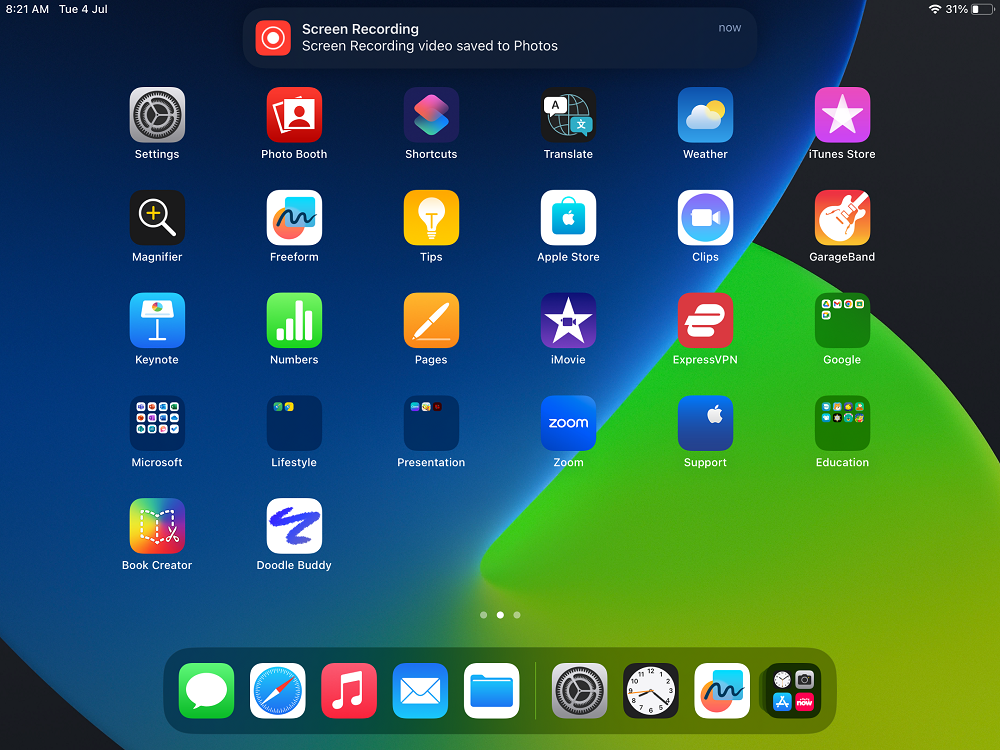
When you’re done recording, tap the Red status bar at the top of your screen.
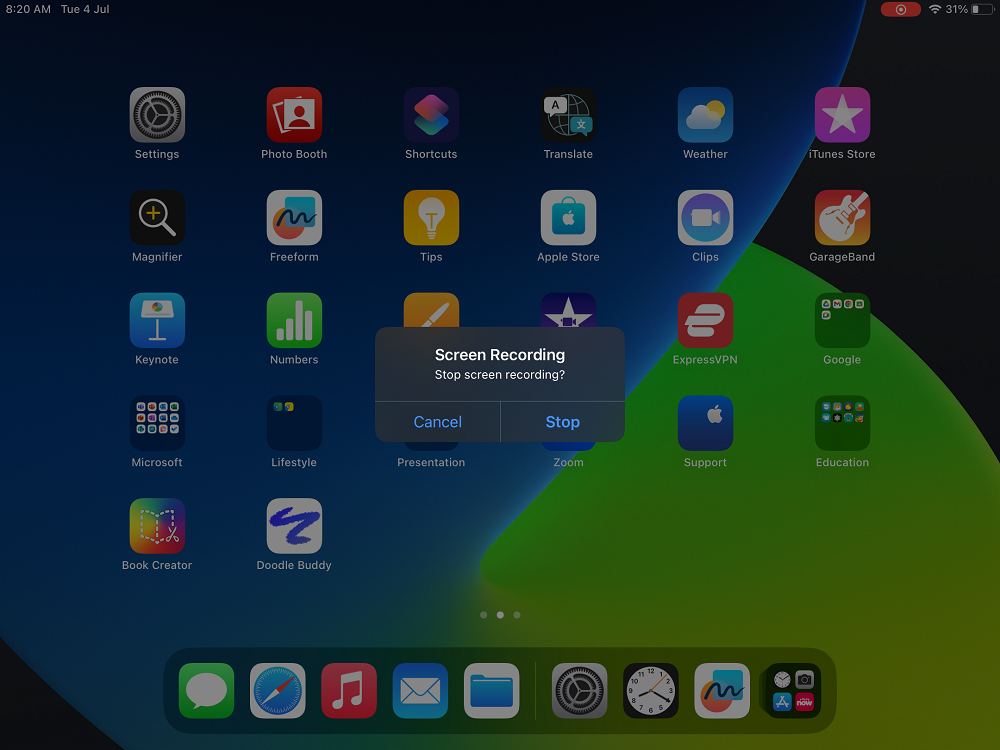
You’ll see a pop-up notification asking you to Stop your recording. From there, you will see a pop-up notification telling you that your recording has been saved to your Photos app.
If you want to spice things up a bit, you can edit your recording by opening it in the Photos app but that is for another blog!
Step 5: Show off your recordings.
Now that you’ve captured your screen and voice, it’s time to share with the world (or just your class, or parents, if you prefer). You can upload your videos to platforms like YouTube, Google Drive, or even your school’s learning management system (Hero does this very well).
And there you have it, folks! Recording your voice while capturing your iPad screen is an absolute game-changer when it comes to explaining concepts, demonstrating processes, or simply showing off your tech skills. Whether you’re creating tutorials, presentations, or vlogs, this feature will help you and your students stand out from the crowd.
If you want some more iPad tips, check out this blog by Kelly.
For self-paced learning with great courses on iPad tools, check out our Learn on Demand platform.


