


As a teacher, I am always looking for ways to integrate digital tools, especially in the STEAM space, so that meaningful learning experiences can take place. Ultimately, I want to be able to combine a variety of applications and devices together and develop some coding to gather data and control external devices. Workbench provides the backbone to be able to do that. In this series of five blog posts that are accompanied by how-to videos, you will learn how to link to an external device and read and write data.
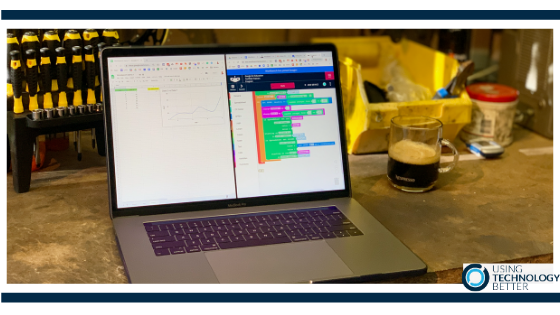
Workbench was acquired by Google last year and brings some great features that integrate well into the G Suite for Education workspace. Here you are able to access pre-populated lessons and integrate coding with any activity. The coding space in Workbench has a Blockly workspace or canvass that resembles Scratch, so it is readily familiar with students and teachers and it works super well on Chromebooks as well as other laptops. This blog is the first in a series that shows how to use some of the features in Workbench for Education.
[bctt tweet=”This blog post will show you how to access Workbench #googleedu #workbenchedu” username=”adifrancis”]
One of the superb features in Workbench is that you can add devices that can interact with the code. This means that you can write code to control a drone, a Sphero, a micro:bit, SAMLab modules and Google Sheets. We can gather data live from these devices and record them straight into a spreadsheet.
In this first 4:28 minute video, I will introduce you to Workbench. The quick tour will show the resources that you can access, how to link with Google Classroom and the programming canvass.
Want to learn more? Then keep an eye out for the next blog where we add a device to our programming canvas in Workbench or check out our online courses.


