


Keeping track of emails can be tricky – when an email is out of sight it is also often out of mind. Creating custom coloured labels to flag your messages is a great method for keeping track of emails you need to action or have delegated. In this blog post, I’ll show you how to implement a custom label solution to suit your needs.
Want to watch the video instead? Check it out here or scroll down to the bottom of the page.
Step 1: Decide on your label set
Before getting started creating labels for tagging, plan the names that will work for you. I take inspiration from the Gettting Things Done methodology and use tags like ‘Follow up’, ‘Action’, ‘Action now’, ‘Waiting’, ‘To read’, ‘To read’, ‘To call’ etc.
Step 2: Create the labels
Create each label following the steps below.
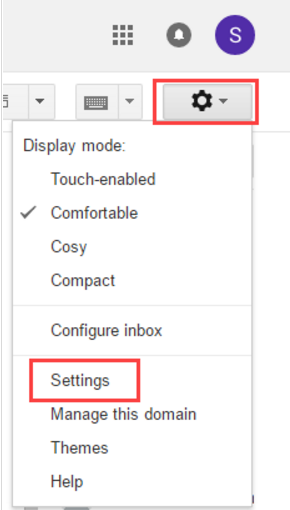
1. Click the Settings cog > Settings.
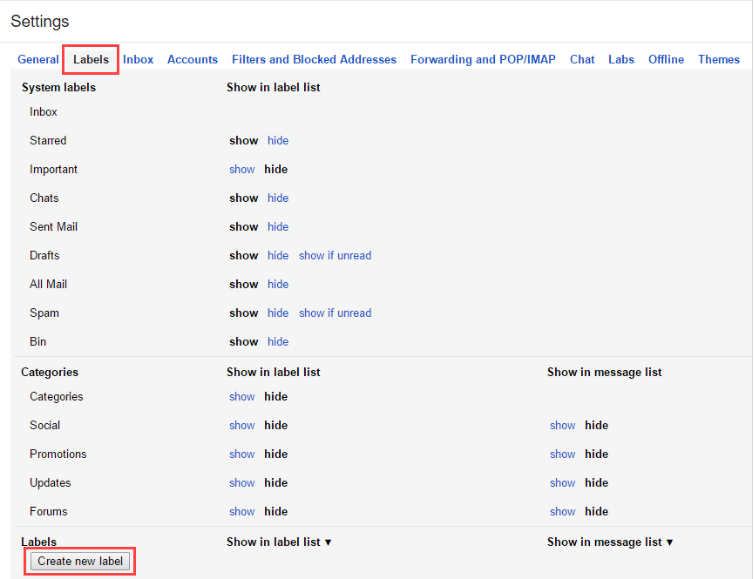
2. Select the Labels tab.
3. Click the Create new label button (at the top of the Labels sub-section).
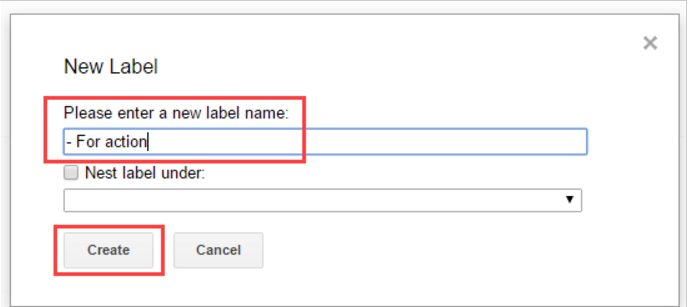
4. Give your label a name and click Create.
Tip: A great idea is to add a symbol (such as a – or >) to the start of the label name. This makes the label display at the top of the list, meaning it does not get lost amongst your many other labels.
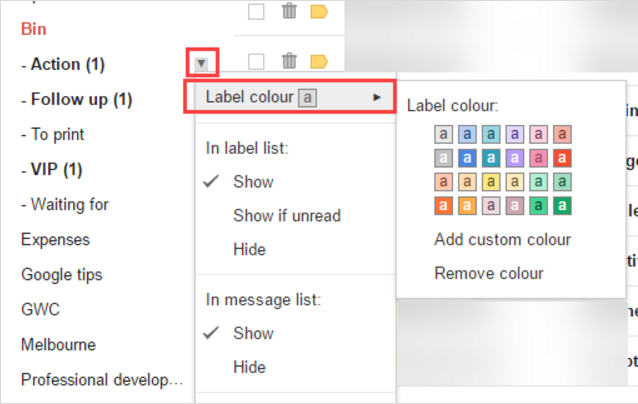
Step 3: Give your labels colours
Assigning a colour to your tagging labels makes them stand out. To assign a colour to your label:
1. Hover over the name of the label in the label list.
2. Click on the arrow that appears to the right of the label name.
3. Hover over label colour and then select a colour.
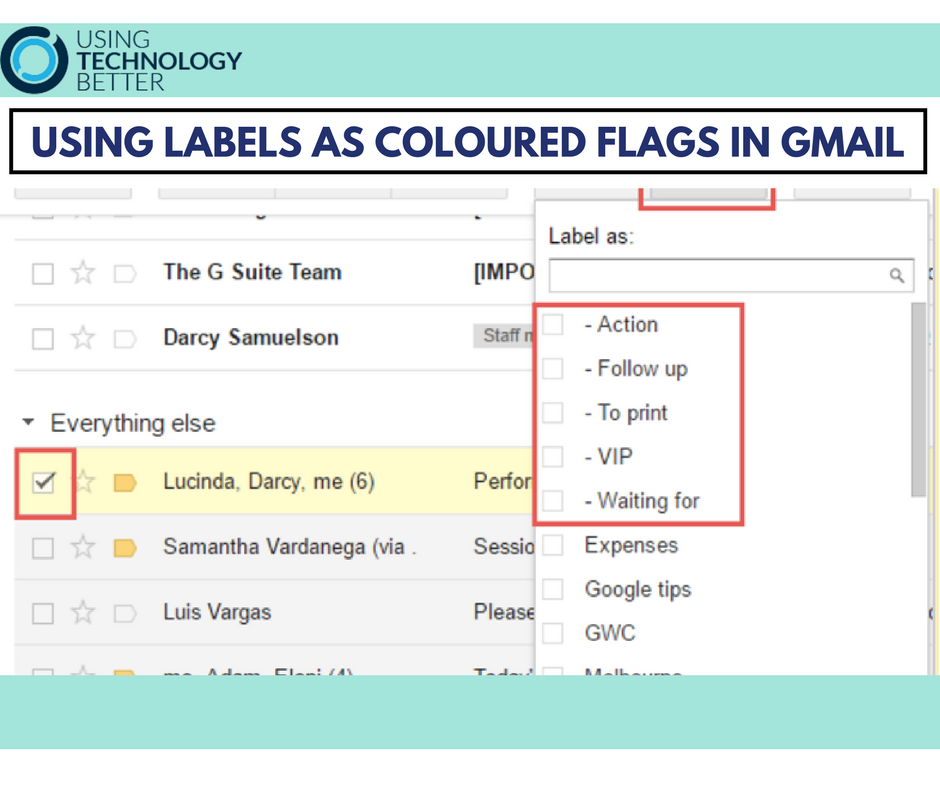
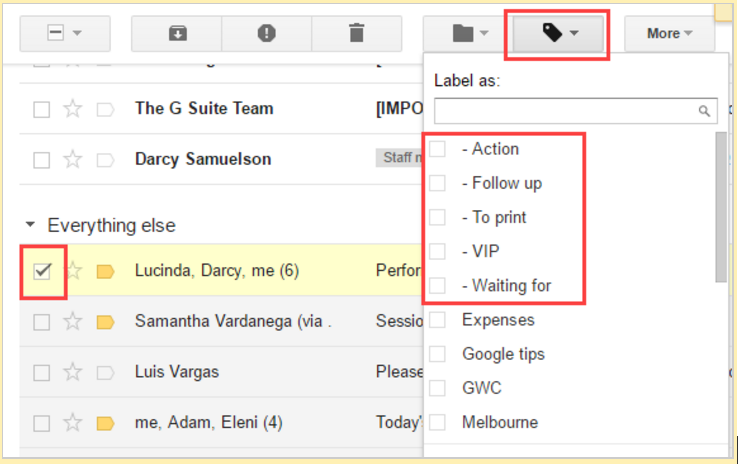
Step 4: Flagging received emails
When you receive an email that requires a flag, apply a coloured label by:
1. Opening or selecting (ticking) the email.
2. Clicking the Label button and choosing the appropriate label from the list.
[bctt tweet=”Here is how to use coloured labels as reminder flags in Gmail!” username=”samvardanega”]
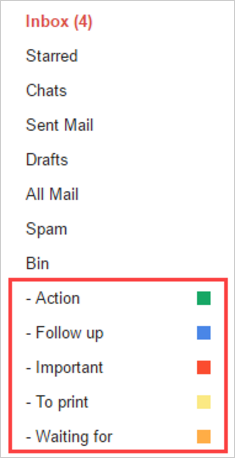
Step 5: Viewing flagged emails
Click on the label name in the label list to view all the emails with that tag in the one place. This is really useful to quickly see at glance things you need to follow up on or are waiting for. It is good practice to review all of your tagging labels each day.
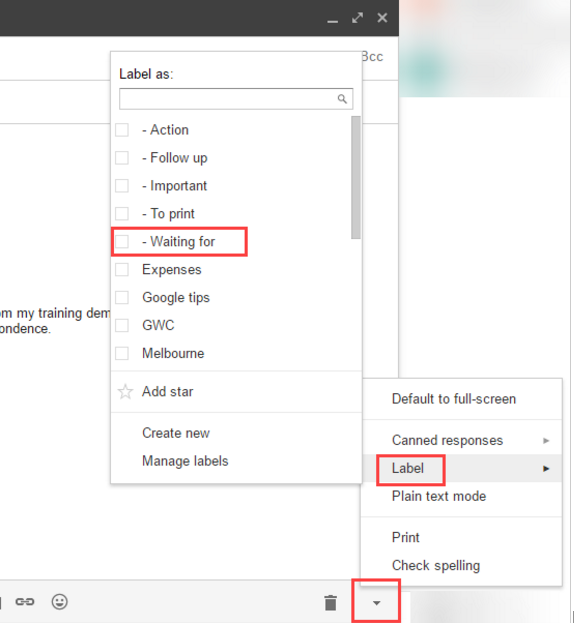
Labelling emails being sent
Labels are also great way to keep track of emails you send. How often do you send an email to someone, only to remember a couple of weeks later they have not replied? Applying a ‘Waiting for’ or similar label when sending an email helps ensure you don’t forget about it. To apply a label when sending an email:
1. Compose the email.
2. Before sending, select the arrow on the right of the compose window. Select Label and then pick the label you want to apply to the email.
3. Send the email.
Note: The recipient of the email does not see the label.
[bctt tweet=”Do you need a system in Gmail for tracking emails you need to action? Here’s a solution” username=”samvardanega”]
Learn more efficiency tips!
Tired of opening your inbox and being overwhelmed by a seemingly never ending list of emails? Frustrated with trying to keep your inbox organised and find what you’re looking for amongst the chaos? Our Get efficient with Gmail the SMART way online course can help you take back control of your Gmail inbox for good!
Prefer to see this in action?
Check out the video below.


