


Managing the never ending avalanche of emails that arrive in our inbox can sometimes feel like a full time job in itself! One strategy that can help you overcome this is using email filters to automate email management and keep less important emails out of your inbox. In this post, I’ll explain what email filters are, discuss how to plan your approach to filtering and show you how to setup some useful filters in your Gmail account.
What is an email filter?
In Gmail, a ‘filter’ is a predefined rule that automatically actions an email for you. You can use filters to automate a range of actions, including:
- Skipping the inbox (auto-filing through archiving).
- Marking an email as read.
- Applying a star or label.
- Auto-forwarding or deleting an email.
- Replying to an email with a canned response.
[bctt tweet=”Tired of the never ending avalanche of emails? Take back control with #Gmail filters.” username=”samvardanega”]
When are filters useful?
Filters are most useful for dealing with low priority and predictable emails that don’t require your urgent attention. Examples include:
- Subscription emails (usually, there is no urgency to be notified about them).
- Uber and taxi receipts (these can often be filed and do not require attention).
- Auto-generated emails (e.g. helpdesk tickets, payslips).
- Regular reports (these can often be filed and reviewed at your leisure).
- Newsletters (these can often be filed and reviewed at your leisure).
Filters can also save you time by pre-labelling emails that you need to see in your inbox but will file or archive later. For example, emails from clients can be pre-labelled with a label specific to that client. Then, when you have finished with the email, you can simply click the Archive button to remove it from your inbox, but still see it in your chosen label (learn more about the power of the Archive button here).
[bctt tweet=”When are #Gmail filters useful? Find out in this post & learn how to set them up.” username=”samvardanega”]
Plan your approach to using filters
Before you get started creating filters, decide when and how you want to filter your emails:
- What sort of emails can skip the inbox? (Hint: If you receive a type of email regularly that is unimportant and doesn’t require an action other than filing, it’s probably a good candidate for a filter).
- If emails skip the inbox, where should they be filed? (Hint: It’s a good idea to create your label structure in Gmail before you create any filters to automatically label or move emails).
- What sort of emails can be pre-labelled? (Hint: If you have labels specific to clients, projects or other identifiable themes, it is likely you can do some pre-labelling).
- What sort of emails can be auto-actioned? (Hint: If you repeatedly perform the same action on a specific type of email, such as deleting it or forwarding it onto someone, it’s probably a good candidate for a filter).
Create your filters in Gmail
There are two key steps in creating filters in Gmail. The first is to define the criteria you want to use for the filter (for example, a sender address, subject or keyword). The second is to choose what actions you want the filter to perform automatically (such as applying a label, archiving, forwarding etc.).
The quickest way to start creating a filter in Gmail is from an email of the type you want to filter.
1. Open the email that you want to filter.
2. Click the three dots button at the top of the email > Filter messages like these.
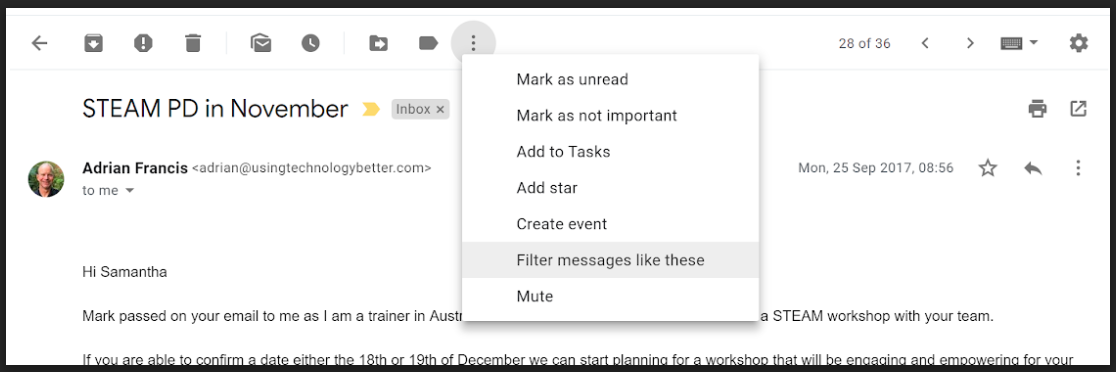
3. The first screen that appears is where you specify the criteria. Gmail will pre-populate some fields based on the email you created the filter from. However, the criteria Gmail defines may not always be what you want, so be sure to check it carefully.
Note: If you use the ‘Subject’ field, be aware that the keywords you put in the subject must exactly match new emails. If the subject will change for each email (e.g. with a new date or request number), it is better to put the keywords in the ‘Includes the words’ field instead.
Here are some example criteria:
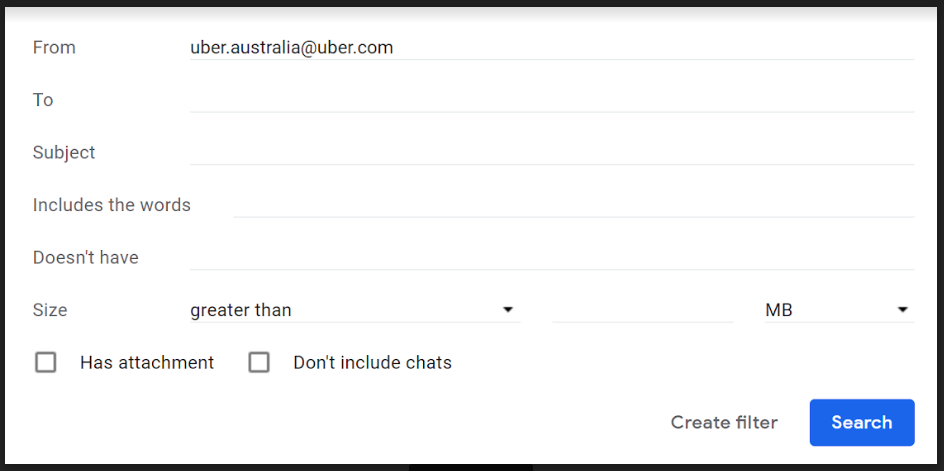
Filtering all emails from a specific address
In this example, the filter will apply to all emails from the address uber.australia@uber.com.
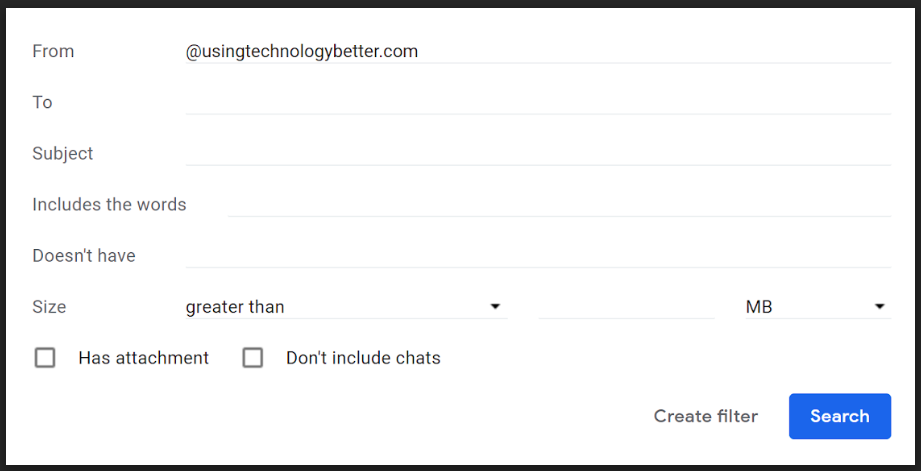
Filtering all emails from everyone at a specific organisation
In this example, the filter will apply to all emails from people with an @usingtechnologybetter.com address.
4. When you have finished defining your criteria, click Create filter.
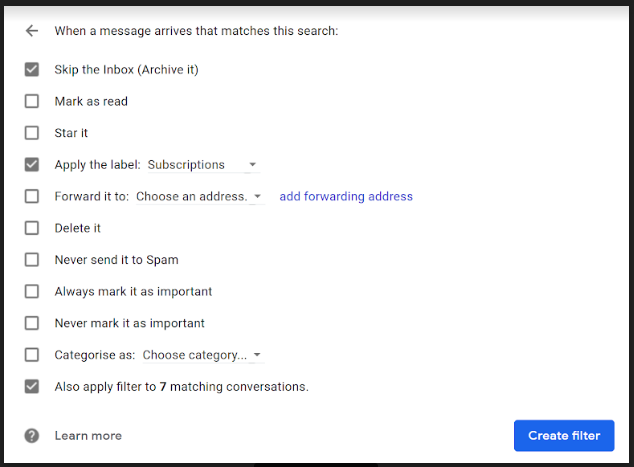
5. Define the action you’d like to apply to all future emails that meet the criteria.
If you don’t want to see emails in your inbox (i.e. you want them to go directly into a label), tick the Skip the Inbox (Archive it) option).
If you do want to see emails in your inbox (i.e. you just want to pre-label them), do NOT tick the Skip the Inbox (Archive it) option.
6. If you want to apply the filter to existing emails, tick the Also apply filter to matching conversations option. This is a great way to help clean out your inbox!
7. Press Create filter to save your new filter. It will then be applied to all incoming mail that meets the criteria you set.
[bctt tweet=”Here’s a step-by-step guide for setting up filters in #Gmail.” username=”samvardanega”]
Modifying and deleting filters
If you need to modify or delete a filter, click the Settings (cog) button and then the Filters and Blocked Addresses section. You can also create new filters from here by using the Create a new filter button.
Email filters is one of the topics covered in our Get efficient with Gmail the SMART way online course. If you want to take back control of your inbox, sign up for the course today!


