


In the second post in this two-part series, we’ll show you how to transfer Google Drive data from a consumer Google account (i.e. your own personal Gmail account) to another Google account (personal or G Suite). This is great for those teachers or students who began using their personal Google Drive for school purposes and now have a school G Suite account.
Part 1 covered how to transfer Gmail and Google Drive data from a G Suite for Education account (i.e. a school account) to another Google account (personal or G Suite).
Part 2 (this post) will cover how to transfer Google Drive data from a consumer Google account (i.e. your own personal Gmail account) to another Google account (personal or G Suite).
Transferring Google Drive data from a consumer Google account to another Google account
The method below is appropriate to use when you want to transfer files that are in a consumer Google account, or for files that could not be copied by the Transfer your content tool covered in the first blog post.
Note: This method will only work if your school allows you to share files outside of your domain.
1. Put all the files that need to be transferred into a Google Drive folder(s) and share that folder with your other Google account, giving it edit access.
2. Login to your other Google account.
Note: The remainder of this process works best if you are using a separate Chrome profile for each of your Google accounts.
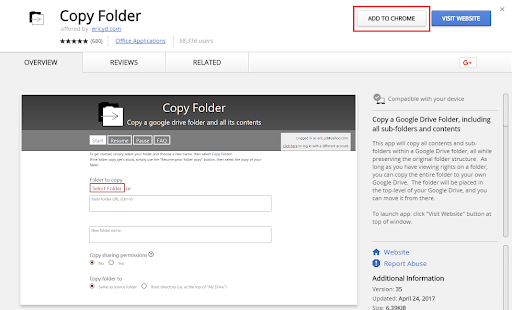
3. Find the Copy Folder Chrome app in the Chrome Web Store (use the link provided here). Click Add to Chrome to install it.
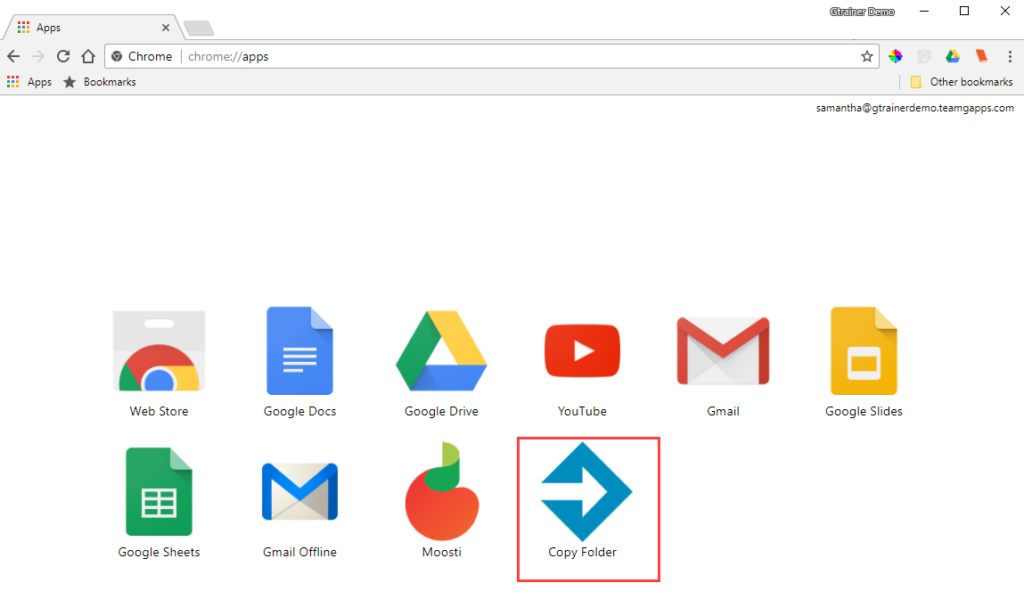
4. Open the Chrome apps page (chrome://apps/) and click on the Copy Folder icon.
5. When prompted, allow the app the permissions it needs to run. The app will then open, as shown below.
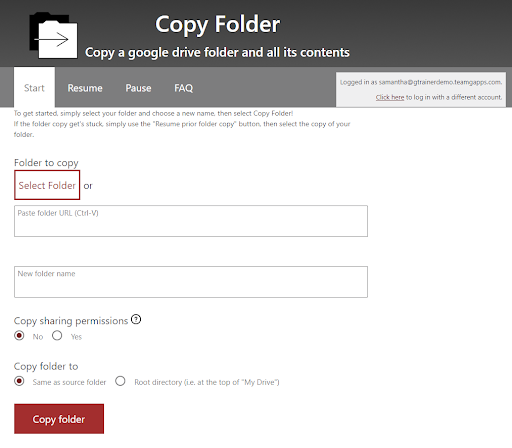
6. Click the Select Folder button and browse or search for the folder you shared in step 1.
7. Leave the Copy sharing permissions option set to No.
8. Choose where you want to copy the folder to (if in doubt, choose the root directory).
9. Click the Copy folder button to start the copy.
The copy will run in the background, so you can continue working while it completes. A summary of the copy status will be shown when the process is finished.
10. When the copy is complete, return to your school Google account and un-share the folder(s) you shared in step 1.
The great thing about this tool is that it does not add the words ‘Copy of’ at the beginning of the folders and files it copies. If you have any questions or experience any issues with the Copy Folder app, check out the FAQ section in the app.


