


When I am at my workstation I run two monitors to be more efficient, as this gives me two workspaces to work in. Split-screen mode allows you to do this on a single screen by dividing your computer screen into two halves so you can view two different windows at the same time. Not only does this allow more screen real estate but it makes workflow more efficient. Both a PC running Windows 10 or 11 and a Mac will let you do this.
On a PC running Windows 10 there are a couple of ways to enable the split-screen function. First, you will need to have a few windows open on a single desktop.
Option 1: You can either hold the Windows key down and tap the right or left arrow key. This will move your active window to one side. All other windows will appear on the other side of the screen. You just choose the one you want and it becomes the other half of the split-screen. You do need to click on each window to make them active, but you can now see more information on your screen.
Option 2: If you have a touch screen device, you can drag a window to the side, and it will dock there like a split-screen.
It is also possible to have four split-screens by holding down the Windows key and clicking the up key once you have split the screen. This will make your workspace 25% smaller, but you will be able to see all four windows at the same time. I do find that problematic on a small laptop, but if you have the ability to plug in an external screen, then you can have four quite workable spaces in front of you at any time.
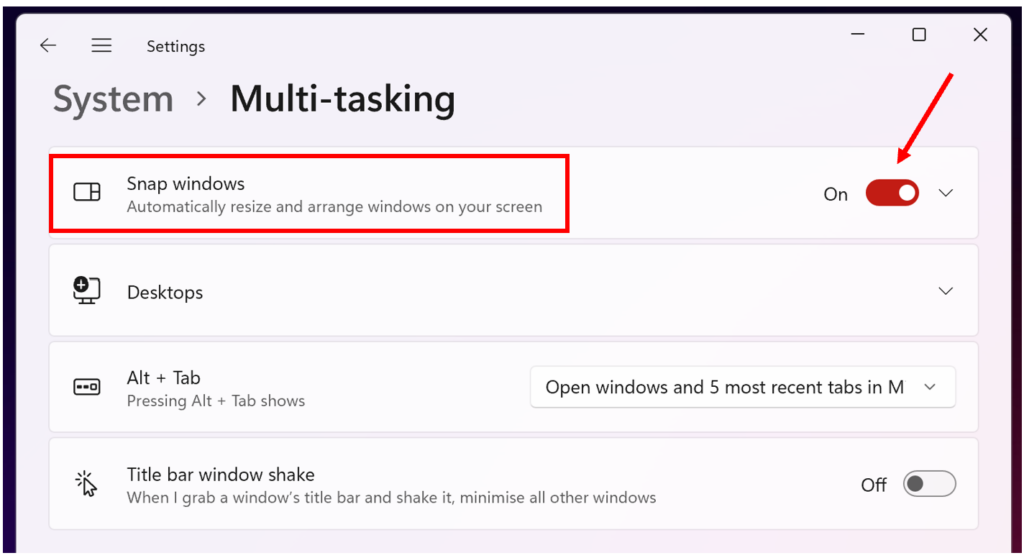
Windows 11 has a stack of efficiency features built in and Multi-tasking is one of them. To run different combinations of split screens you need to enable the ‘Snap windows’ feature.
Step 1
Hold down the windows key + I (the letter i) to open the System settings. Click Multitasking
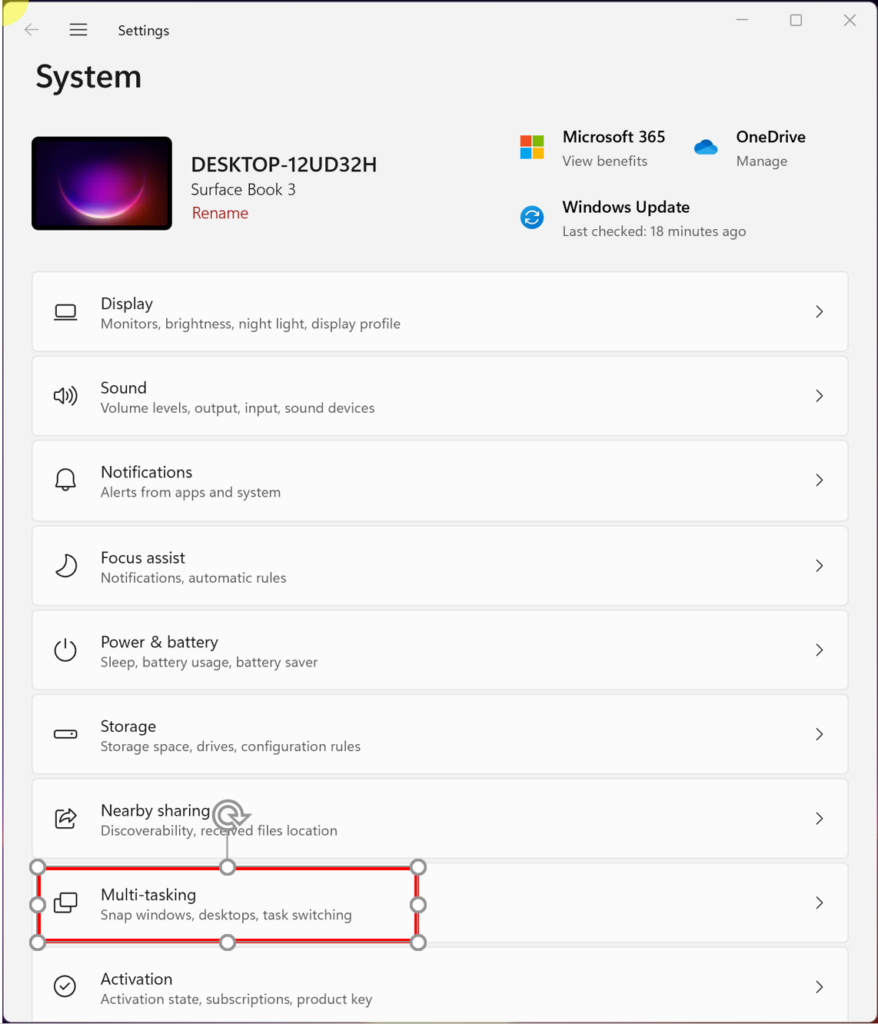
Step 2
Enable Snap windows
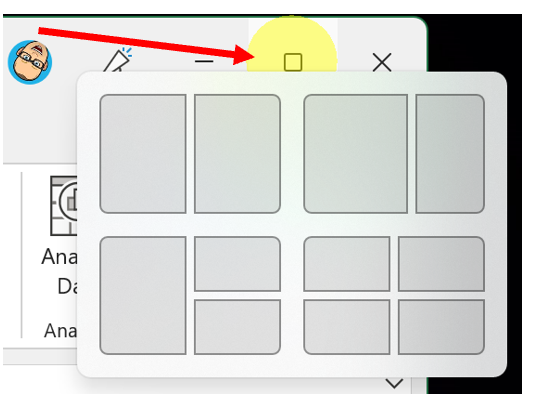
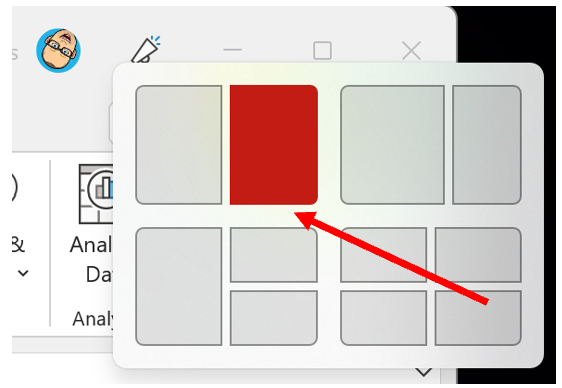
You have the choice of how you can split your screen, the good thing is the process is the same regardless of how you wish to split the screen.
Step 1
Move your cursor to the maximise button and select how you want to split the screen, click on your selection.
Step 2
Other open applications will now be displayed as options to occupy the other ‘split’ areas. Select the desired application.
Step 3
To resize each split, move your mouse to the gap between the splits and drag resize.
If you are using multiple desktops in Windows 11, each desktop will remember how you have split your screen and your applications will be kept in those views.
On a Mac there are three steps to follow:
Step 1
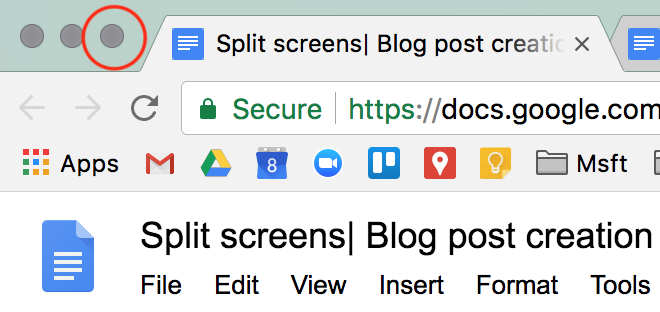
In the upper left hand corner of a window, there are three dots. Hold down the full-screen button, which is the dot on the right hand side.
Step 2
When you hold this button down, the window will shrink allowing you to drag it to the right or or left side of your screen.
Step 3
Release the button. Then to add a window on the other side, just click on it and you can begin to work in split-screen mode.
Be aware that some programs will not work in split mode, such as Final Cut Pro.
When you are working in split-screen mode, only one side of the screen will be ‘active’ at any one time. This means that you will need to click on the side that you need to work on to activate it. You can also drag the centre divider to change the size of the split, allowing you to have one side larger than the other.
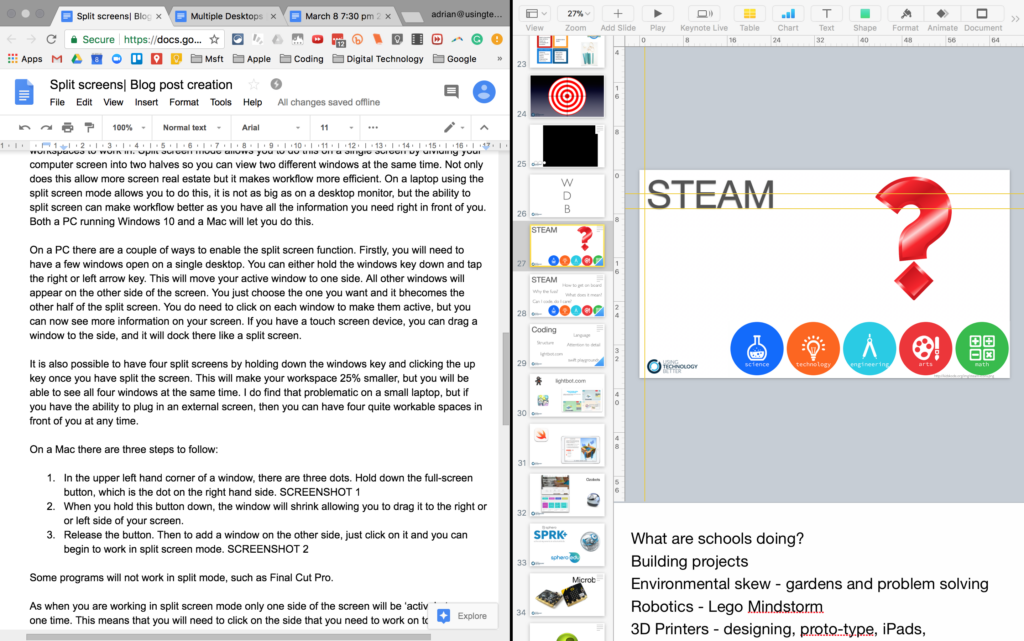
The advantage of split-screen mode over multiple desktops is that you can see all the things you are working on in front of you. I tend to use this if I am summarising an article, researching or needing some figures from a spreadsheet while I am writing a report. I can easily scan one side of the screen while continuing to work on the other side.
If you want to fit even more on your screen, then you can increase the screen resolution.
Of course you can have split-screens across multiple desktops if you want. It is up to you to develop a workflow that helps you be more efficient and split-screen mode is definitely one function that can help this.
If you want to learn how to multitask on an iPad and other iPad tips, click here to watch a 4 minute video.


