


Over the past year education methods have undergone a radical transformation thanks to Covid.
Overnight (quite literally!), many teachers were forced to radically change the way they delivered the curriculum.
Without the luxury of face to face contact, teachers had to find new ways to connect with students and new ways to deliver differentiated, personalised learning.
Born out of necessity, the demand for screen recording increased dramatically.
Today we’re going to unpack a little more to uncover screen recording’s true potential, whether it’s a remote, hybrid or in-person environment.
Want More? Read this post on what screen recording is and its benefits in the classroom here.
Dive into the 3 top applications of screen recordings:
1 Give Clear Instructions (so you can stop repeating yourself!)
2 Give Clear Communication (so the meaning won’t get lost in translation!)
3 Give Engaging Feedback (that’s meaningful and encouraging for your students!)
4 Give the Freedom of Choice (so students can complete tasks using the methods that suit them)
Give Clear Instructions
(so you can stop repeating yourself!)
How many times have you given an instruction, for someone to ask only moments later, “What am I meant to do?” Frustrating, right?
By creating a quick screen recording with simple step-by-step instructions you can easily eliminate this common bugbear.
Vmaker Screen Recording Tool
Brought to you by the same people who created Animaker, Vmaker is the new screen recording tool that allows even more flexibility for recording quick ‘how to’ soundbites. Vmaker is a great way to make quick screen recordings that can be shared with students that are easily filed to be reused again and again. Magic!
Here’s How Vmaker Works
1 Sign up on the Vmaker site with your Google or Facebook account.
2 Download the app version for your particular device or install the Google Chrome extension.
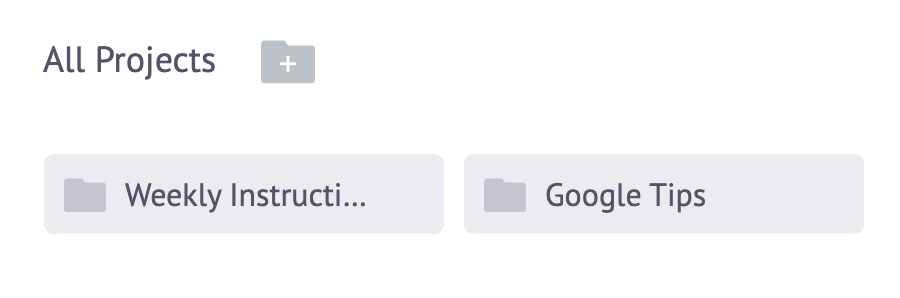
Helpful Hint: You can create an orderly filing system by creating folders for all your recordings. Make it easy yourself in the long run by setting up folders from the start to make it easier to find what you need later on down the track.
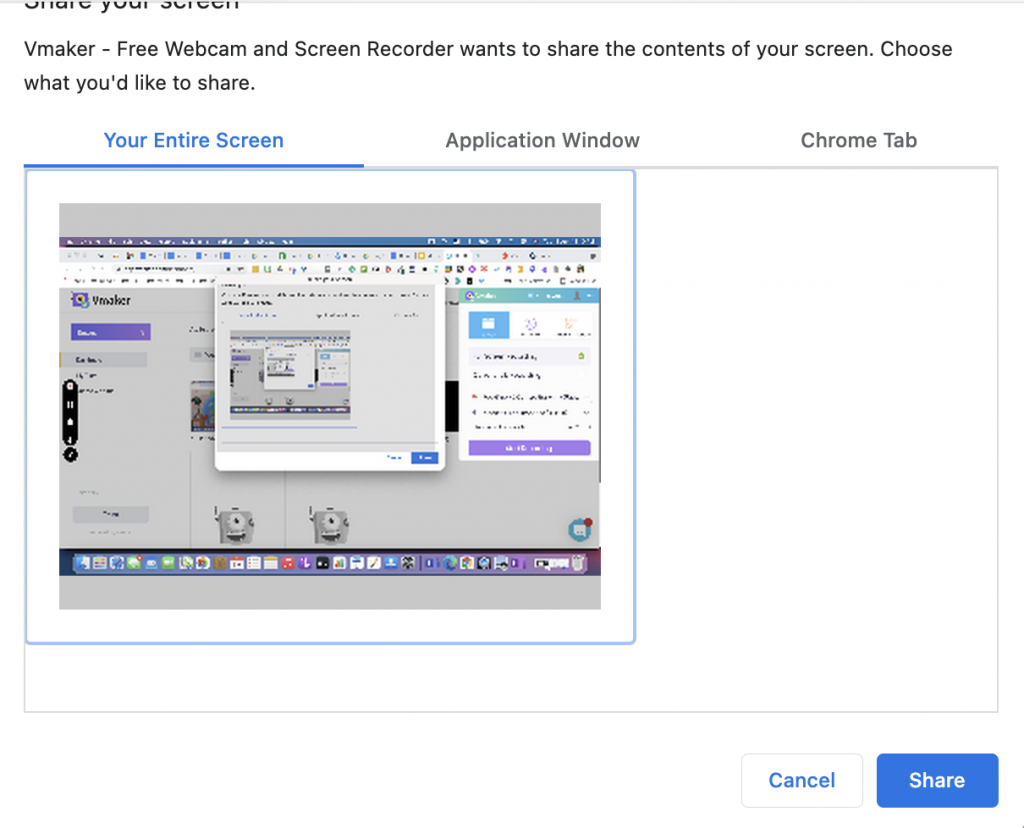
3 Choose what you’d like to record and whether you want to use a) your screen b) your webcam and microphone c) just the screen and microphone or d) just your webcam.
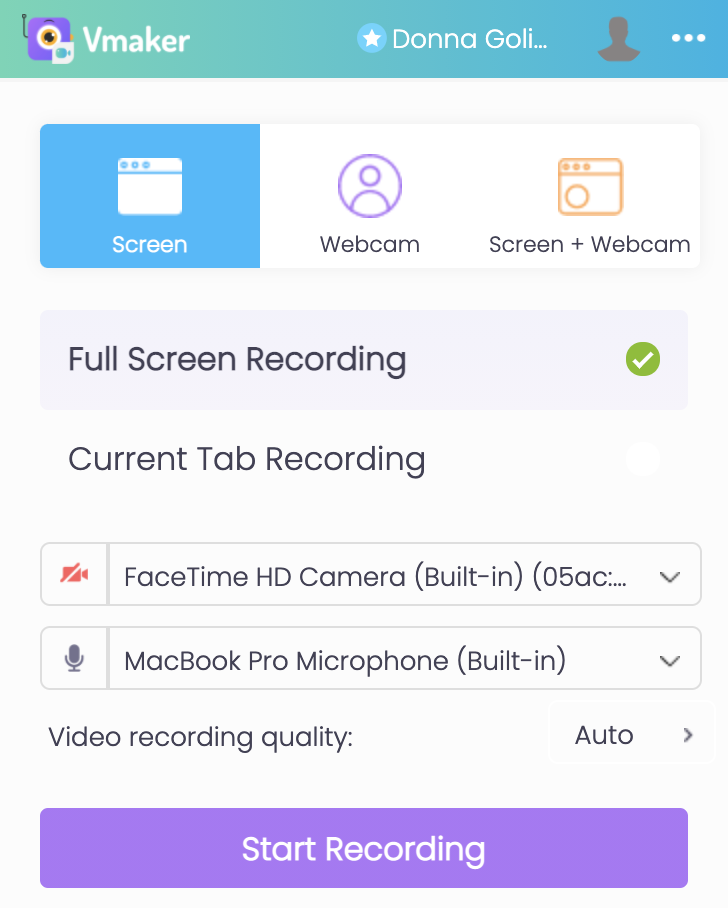
4 Just like other screen recording tools you can choose to record your whole screen, a window or just a tab.
5 Hit the purple Record button to record your first project.
5 Vmaker will give you a 3, 2, 1 countdown which is handy to ensure you’re in the right place at the right time once recording starts.
Helpful Hint: In the paid version there is a pen tool you can use to highlight certain elements as you’re talking. When you turn the pen off, the lines disappear. This is great for highlighting elements you want to draw attention to as you’re talking about them, which then disappear when you move onto the next part of your presentation.
6 Once you’ve finished recording you have some options to edit. You can trim it, crop it, flip or rotate it. And you can also edit the name of the recording.

7 Sharing your finished recording is as simple as sending a link or inviting others to view it. You can also download them if you’d like.
Bonus Extras
→ Vmaker works both offline and online, so you’re not dependent on being connected to the internet to make your screen recordings.
→ Vmaker enables you to see how many times each recording has been viewed.
→ Vmaker allows you to use the webcam with a choice of background options and the option to emphasise your mouse clicks by enlarging them.
Give Clear Communication
(so your intention won’t get lost in translation!)
How often have you delivered tailor made learning only to find your students are still confused and unsure of what’s required of them.
Often it’s not because they don’t know what to do, it’s because they lack the confidence to do it.
Helping students develop the confidence they need to take ownership of their learning and to execute student agency all begins with the relationship the teacher develops with their students.
Students need to feel confident doing what’s been asked of them. And they need to feel ok about making mistakes.
Conveying exactly what you mean (without things getting lost in translation) by text alone is a challenge. Unless you load up every paragraph with a series of emojis to convey just the right tone of voice, students will inevitably get the wrong end of the stick.
Emojis can be a great way to help convey a tone of voice in written instructions or feedback, but screen recording is a far more effective medium that includes the full spectrum of communication cues that means your message and its meaning won’t get lost in translation.
Remember the communication equation that shows us words make up only 7% of the communication puzzle, with tone accounting for 38% and the remaining 55% is body language. This is where screen recordings can be such a beneficial tool to avoid misunderstandings.
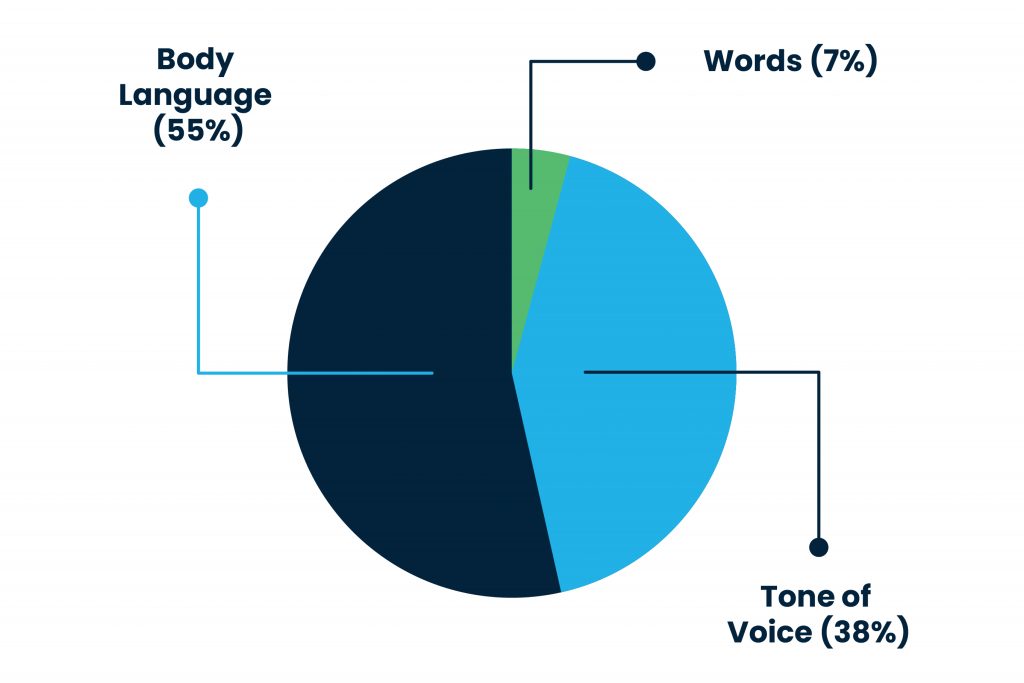
Non-verbal cues (tone of voice and body language) make up the majority of the communication pie, while the written word alone only accounts for 7% of the communication equation.
A screen recording tool gives students all the pieces of the communication equation. Not only can they hear the internation in your voice, they can also see your facial expressions and body language. This will reassure them making a mistake or being uncertain is ok.

By receiving all the vital non-verbal communication cues from a screen recording your students will feel supported to become more independent in their learning journey.
Give Engaging Feedback
(that’s meaningful and encouraging for your students!)
To give student feedback directly onto the page and in a number of ways, use the Book Creator app.
Here are a few great feedback options that will make your life easier using Book Creator:
- type written feedback;
- use the pen tool to draw or add comments on top of their work;
- leave a voice message that’s often quicker than typing and includes intonation that conveys your message more effectively than the written word can;
- leave a video so students can benefit from receiving vital non-verbal cues that the written word alone can’t give.
Want More? Check out more great ways to give meaningful feedback with Book Creator here.
Give the Freedom of Choice (so students can complete tasks using the methods that suit them)
Enabling students to complete tasks in the way that works for them makes learning accessible to everyone.
Seesaw is a great app that gives students a wide range of multimodal tools to complete learning tasks. Not just a tool for the junior years, Seesaw is just as beneficial for older students too.
Seesaw offers a number of mediums students can use, that includes:
- Text
- Voice recordings
- Video
- Drawings
- Uploaded files
- Camera
- Or any combination of the tools above
Want More? Get more out of your tech tools to design tailor made learning in your classroom with our Learn on Demand online courses, or discover how your school can apply for MoE funded PLD (NZ only).


