


Google Forms are a brilliant tool for gathering information from people – the ability to then sort and filter this data in Google Sheets makes it an even more powerful tool.
However, sometimes our users don’t quite read our minds well enough and can give us information in a way that messes with the results we get. A couple of really popular uses for Google Forms is for teachers to get access to students files and also for gathering feedback. You can limit how much typing your user needs to input by using ‘Pre-filled links’. This reduces the opportunity for data to be entered in multiple ways and makes it much easier for you to sort and filter later on.
[bctt tweet=”Use prefilled links in Google Forms to make sorting and filtering easier later!” username=”lara_kirk”]
Here’s how you can do it:
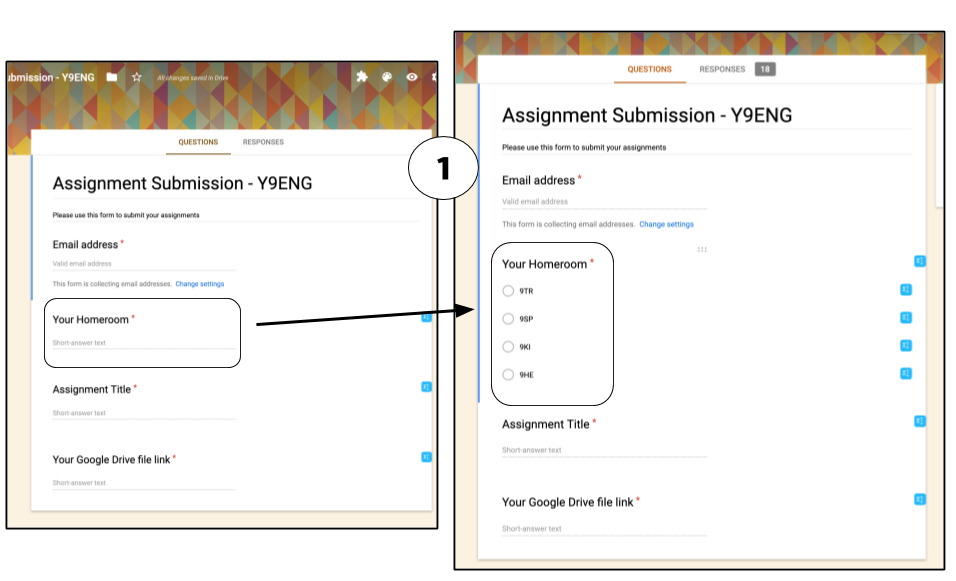
1. Create a form and think about how you can limit the amount of typing your user needs to do.
E.g, Instead of asking them to enter their homerooms, use a multi-choice list instead.
9TR could be written in numerous ways if your students were to type it in – 9tr, 9Tr, 9tR, 9 t r …..
2. Click on the three dots between SEND and your profile picture. Choose ‘Get pre-filled link’.
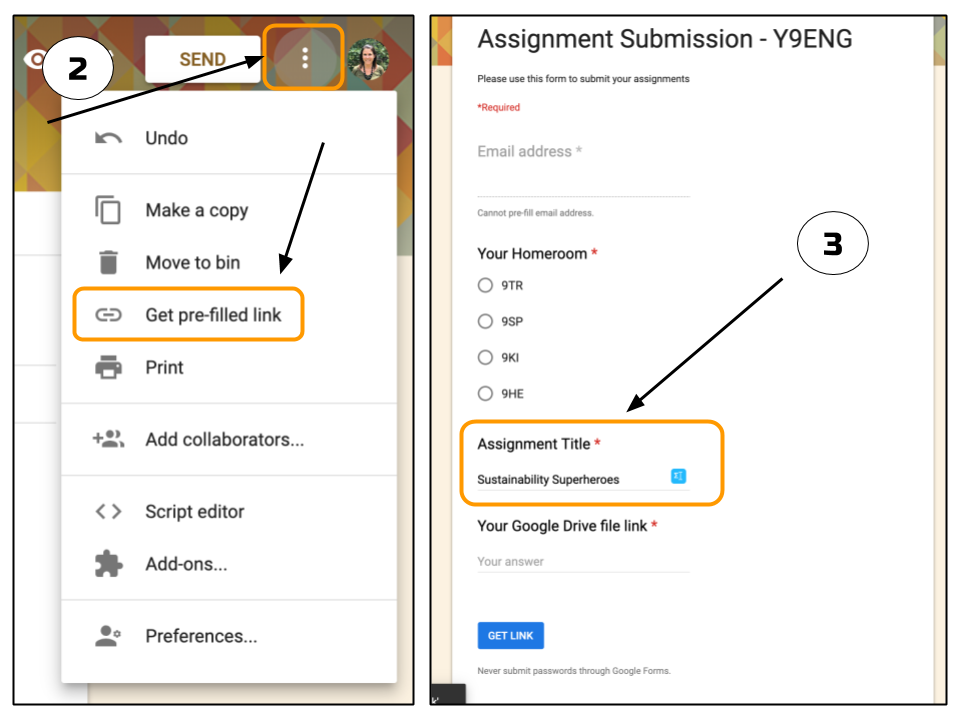
3. Fill in the parts that will be the same for each of the users you are sending this to.
4. Once you’ve clicked on ‘Get Link’, the black box at the bottom of your screen will change and you can click to copy the link. Share that link with the users of this Form.
When you go back to the form you’ll see that your pre-filled responses are no longer there. They do not save to the form.
Using pre-filled responses will make it so much easier for you to sort and filter data later.
Sorting and Filtering – brief tips and examples from this form.
Sorting by Assignment
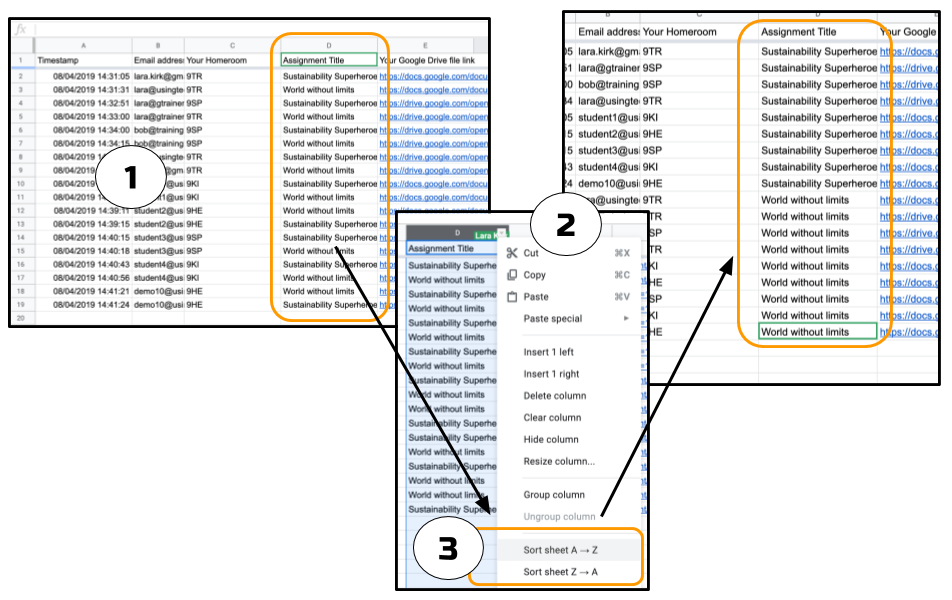
1.Click on the column you want to sort by. In this example I’ve chosen the ‘Assignment Title’ column.
2.Click on the drop down arrow that you see at the top of the column once you’ve selected it.
3.Go to ‘Sort sheet A-Z’ and your assignments will be grouped alphabetically.
Filtering by Homeroom
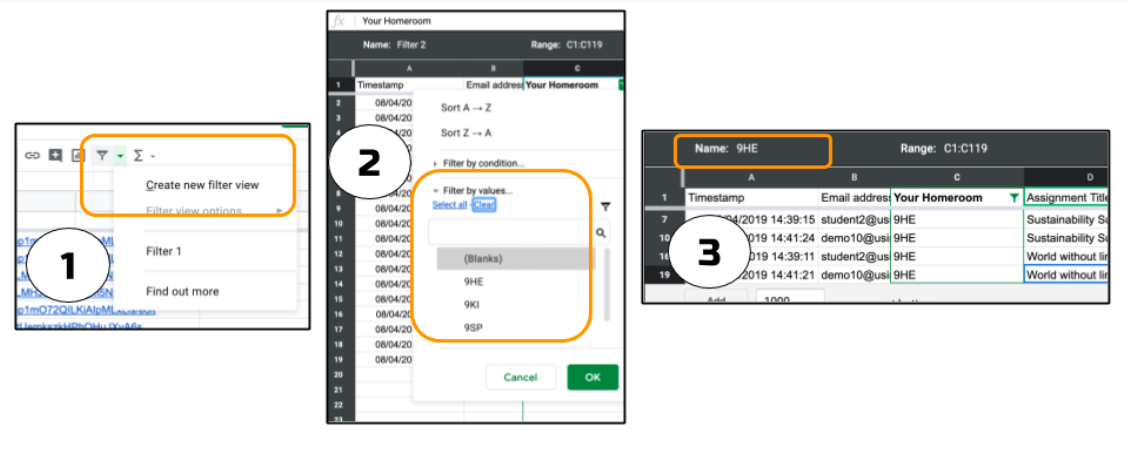
1. Go to the filter menu and select ‘Create new filter view’.
2.Clear all selected values then choose just one – click OK.
3.You will now only see the information relating to that class. Name the filter view in the space above column A.
4.You can close this filter view and open it again at any time by going back to the filter menu.
If you want to know more about sorting and filtering check out Adrian’s awesome blog post here – he’s made a great video that helps you to understand the difference between the two.
Want to know even more? Check out our online courses here.


