


I’m always telling teachers that my favourite educational app on the iPad (aside from the Apple apps such as Pages, Keynote, and Notes) is Book Creator, especially with the soon to be released updates such as browser editing and online publishing!

The number of creative apps for use in the classroom is staggering and the links we can make with literacy are easy. Book Creator is a great way to collate those creations and share a class collection with others as a combined project.
Here’s an example of how students can create their own poetry image and add their work to a combined class project to share with others.
[bctt tweet=”You can use the Airdrop feature on iPads to create collaborative projects with your students. See how here!” username=”markherringnz”]
Create some content on another app and ‘App-smash!’
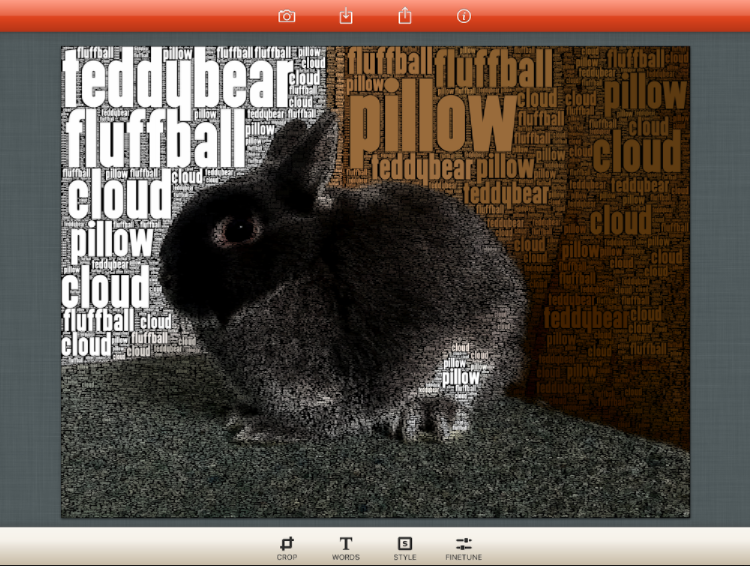
This app, called Wordfoto (you can download the app here, on iTunes) creates images overlayed with text. Students can add their own poetry to images that fit the subject. It’s a great way to share their writing.
To create their poetry image, students should open the WordFoto app and add their image from either their camera roll or take a new photo using the camera. They then enter the individual words to suit the image. In this example the students are asked to develop their vocabulary of similes, using the starting phrase, ‘Like a…’ They then add words that finish the simile.
To combine student’s pages, you can use the Airdrop feature to send Book Creator files from the student’s iPad to the teachers as an ePub file.
Follow these steps;
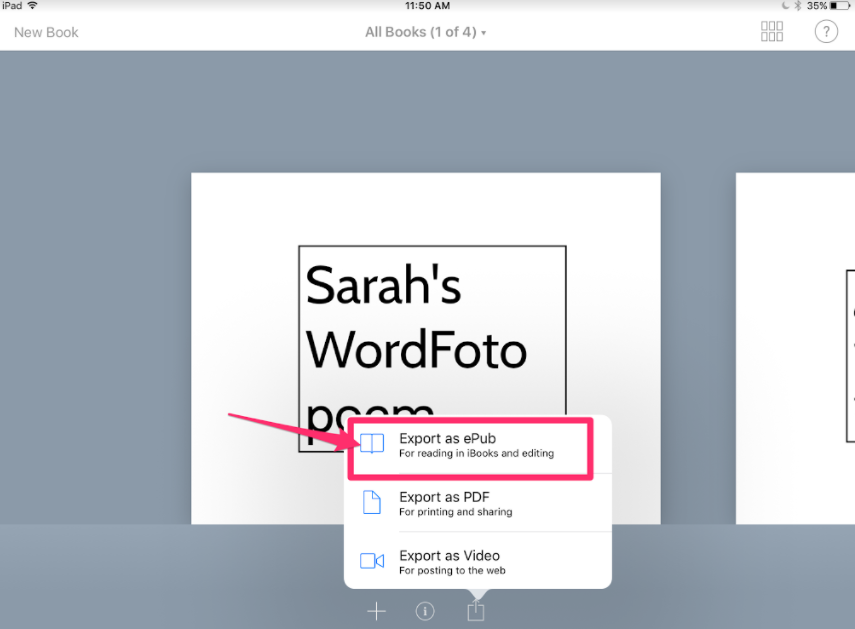
Open the student’s library of books in ‘My Books’. Click the share button underneath the book and select ‘Export as an ePub.’
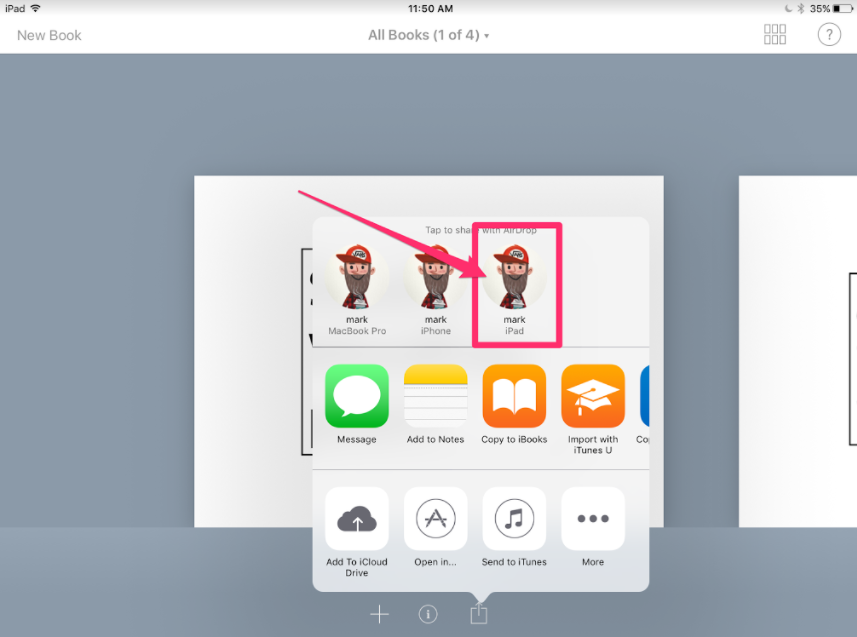
Select Airdrop, then chooses the teacher’s iPad to send to. Make sure that both the student’s and teacher’s iPads have the ‘Everyone’ option selected for Airdrop before attempting to share.
Once the teacher’s iPad has received the ePub they should select ‘Book Creator’ to open the file. This will open the book in their Library within Book Creator.
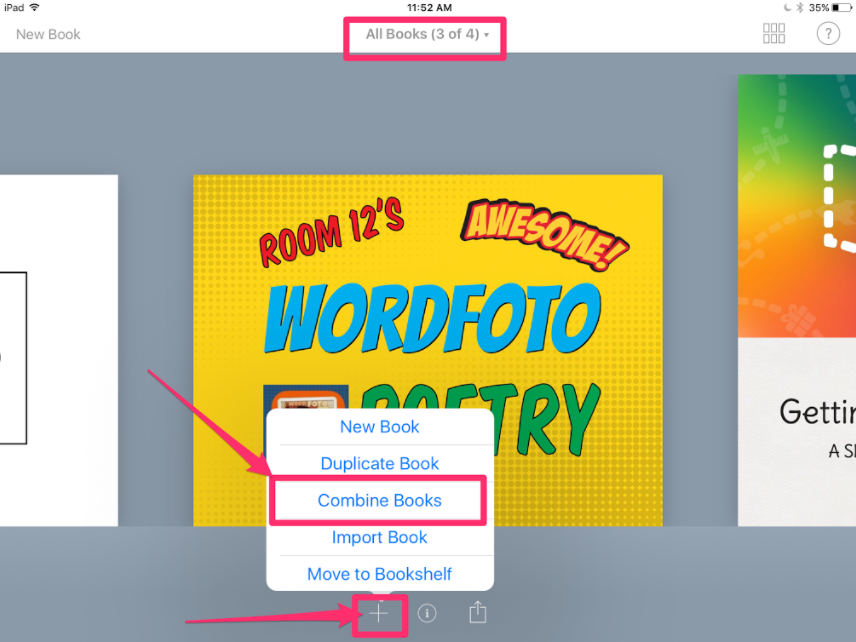
Next, the teacher should start a book with a title page for the combined book. Then select the plus button underneath the book from ‘All Books’ and then ‘Combine Books.’
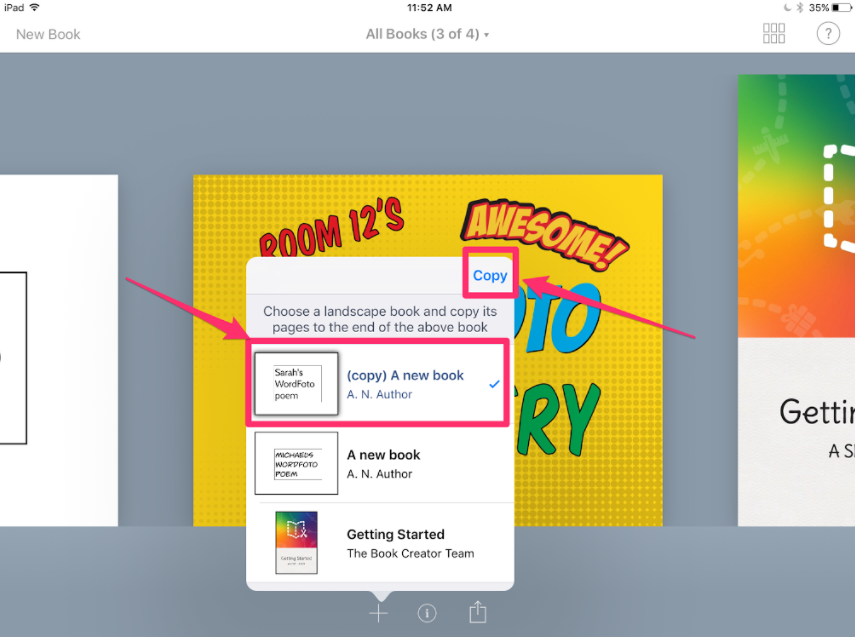
Now select the book you’d like to add to this title page book. The student’s book will be combined and added as additional pages.
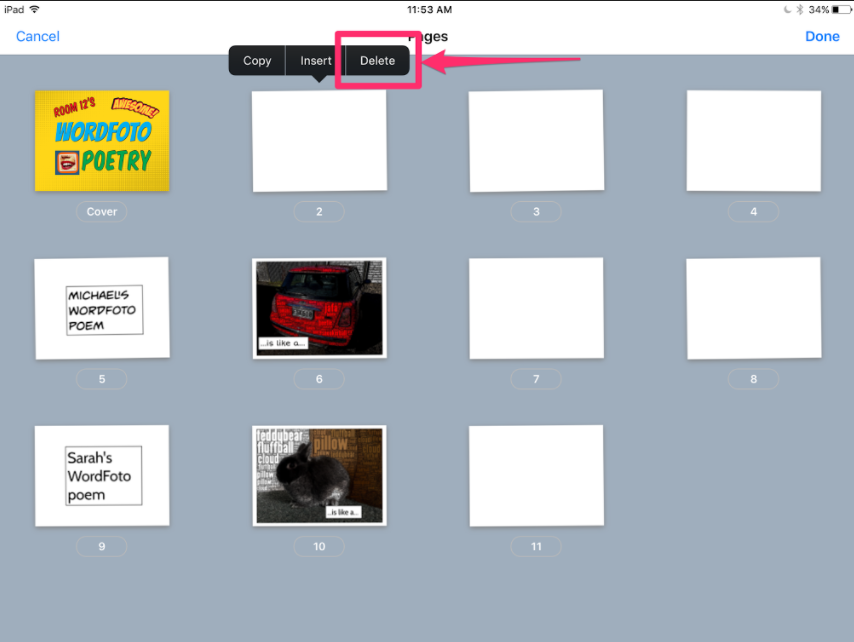
Once all of the student’s books have been Airdropped and combined, the teacher should delete any additional blank pages (including the student’s title pages) that are not needed. Do this by selecting ‘Pages’ to open the pages view, then ‘Edit’ in the top right-hand corner. Next, select the pages you don’t need and press delete. Repeat these steps until all the unwanted pages are gone. Now you’ll have your combined book ready to share with others!
These combined books are a great way to create some stunning class projects when you have students working in groups to create different chapters of a book.
[bctt tweet=”When students each create a chapter of a book in collaborative groups, classes can create some stunning eBooks using @bookcreatorapp !” username=”markherringnz”]
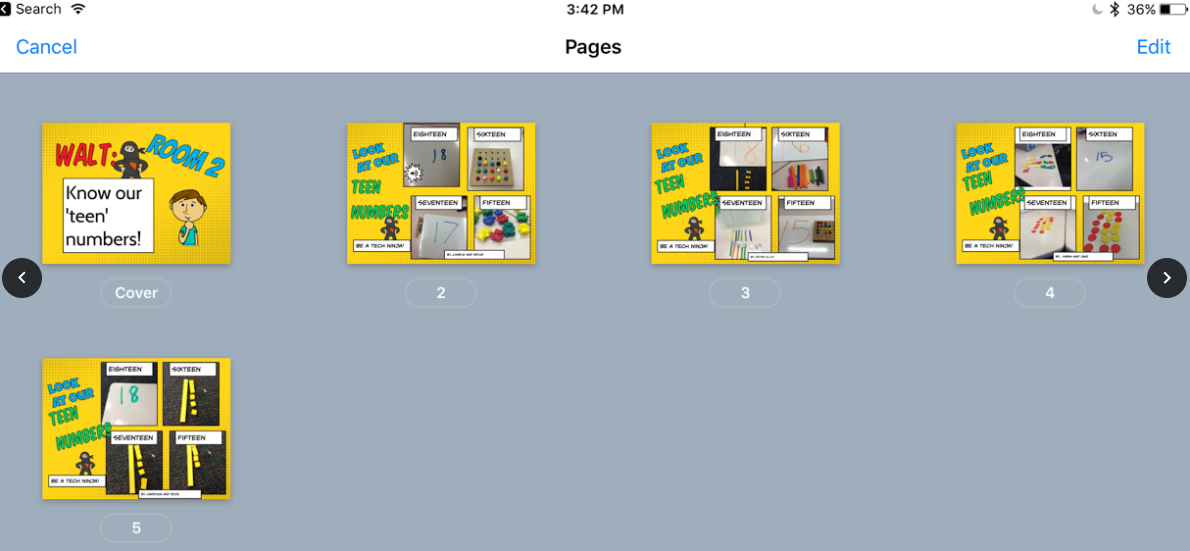
Below is a short collaborative maths book that a small group of 6-year-olds have made in pairs. Each page was created as a template by the teacher and then Airdropped to the students who completed the page and Airdropped them back.
Are you interested in knowing more about how to use Book Creator and other apps to ‘power up the pedagogy’ in your classroom? Contact us here to talk about how we can help support you and your school.


