


Google Docs is designed to be a collaborative tool and has made the lives of many teachers around the world much easier. It’s a tool that allows for multiple uses and has a huge variety of applications in the classrooms of today.
You can:
- create a document, share it with colleagues and all work on it at the same – and we know that many hands make light work.
- create a document and share it with your students so that they can all record their thinking in one place, on one document.
- create docs and share them with other students in order to work on a task collaboratively, even when they are in different places.
But there are times when you have created a document, you want to share it, but you actually don’t want other people to be able to make changes to your original. For example, you may have created a maths resource which you’re happy to share with other colleagues, but it’s specific to your students and they would need to make some subtle changes in order to use it with theirs.
Below are four different ways you can share Google Docs with others in ways they can’t alter your original.
[bctt tweet=”Four ways to share a Google Doc so other people can’t alter the original” username=”donnagolightly1″]
1.Make a Copy
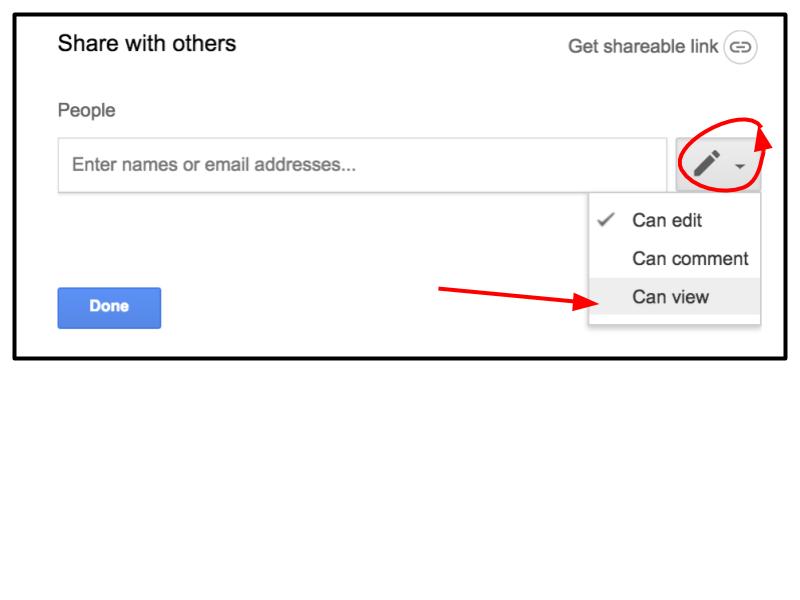
You could share your completed Doc View Only. When you click on the ‘Share’ button ![]() in the top right hand corner of the document click on the pencil icon and choose ‘Can View’.This means that anyone you share the doc with can see what is on it but they can’t do anything to it.
in the top right hand corner of the document click on the pencil icon and choose ‘Can View’.This means that anyone you share the doc with can see what is on it but they can’t do anything to it.
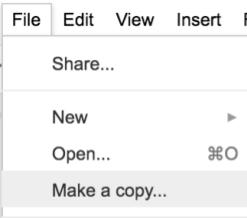
To make their own copy so they could edit it, they would then click on File and Make a Copy. They would then own that copy and could make whatever changes they wanted.
Your original Doc stays in your Drive in the folder you had it located in at the point in time that you shared it.
2.Replace /edit with /copy
[bctt tweet=”Replace /edit in a Google Doc url with /copy to force copying when sharing” username=”donnagolightly1″]
Every time you create a new Google Doc, it makes a URL link specific to that document only. There are two ways to access the link for your document:
- Click on the ‘Share’ button again and you’ll see a link option.
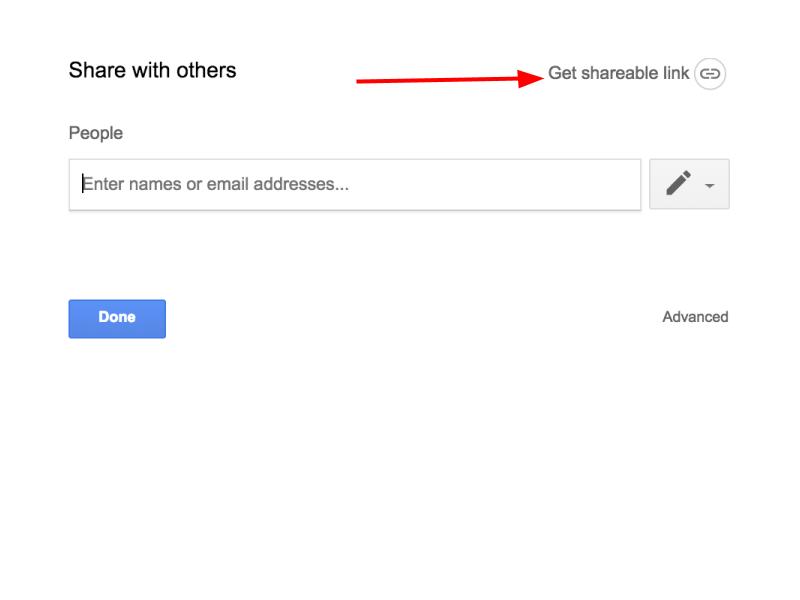
- Click on the tab to open the dialogue box that will give the unique link to your doc. Copy the link.

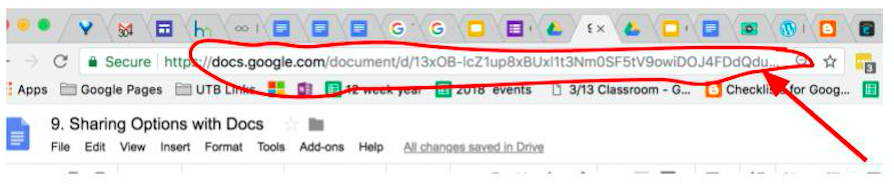
- For example: https://docs.google.com/document/d/13xOB-lcZ1up8xBUxl1t3Nm0SF5tV9owiDOJ4FDdQduE/edit?usp=sharing
- Where you see the word ‘edit’ highlight it and replace it with ‘copy’
- https://docs.google.com/document/d/13xOB-lcZ1up8xBUxl1t3Nm0SF5tV9owiDOJ4FDdQduE/copy?usp=sharing
The other way to get the link is to simply copy it from the omnibox at the top of your page.
When you share this link the recipient won’t see your actual doc. They’ll see this:
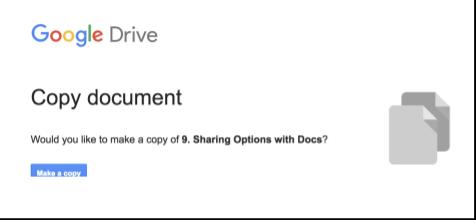
When they click on ‘Make a copy’ it will create a new copy of the Google Doc in their Drive which they will then own and can edit it however they like.
3.Replace /edit with /template/preview
[bctt tweet=”Replacing /edit in a Google Doc url with /template/preview shows a preview before copying.” username=”donnagolightly1″]
The downside of using the method above is that whoever you’re sharing the Doc with can’t necessarily see what it is that they are making a copy of. If they have just received a link, and it takes them to ‘Make a copy’ they don’t see the actual document until after they have made a copy.
Another way to share your work that does allow them to see it first is to use the same method as above, but change the word ‘edit’ to ‘template/preview’.
For example: https://docs.google.com/document/d/1Im9nGcjI6SJkWzolYPzpI6iBUAAGLlPglzes2_IHnyI/edit
becomes
https://docs.google.com/document/d/1Im9nGcjI6SJkWzolYPzpI6iBUAAGLlPglzes2_IHnyI/template/preview
The person that you have shared the link with now sees a preview of the Doc and in the right hand corner there will be a blue button that says ‘Use Template’.
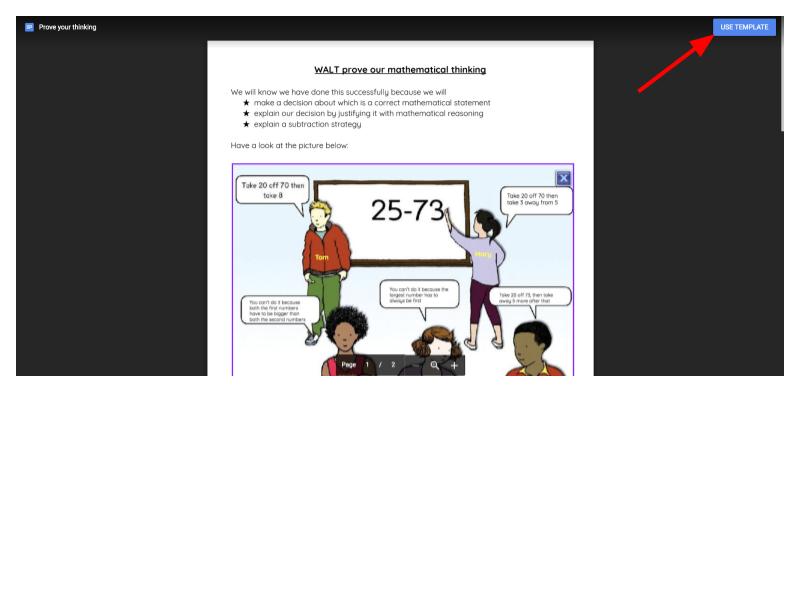
When the ‘Use Template’ button is clicked a new copy of the document is created in the Drive of the person who opened the link. That copy is no longer owned by you and can be edited by the new owner.
4.Replace /edit with /preview
[bctt tweet=”Replace /edit in a Google Doc url with /preview to remove toolbars” username=”donnagolightly1″]
If you want to share the Google Doc so that it can be seen but the intention isn’t for people to be able to make a copy, you can change the link so the recipient only gets a preview image.
This allows the document to load faster and is a less cluttered view – they won’t see the menu bars or buttons.
For example: the original link:
https://docs.google.com/document/u/2/d/1Im9nGcjI6SJkWzolYPzpI6iBUAAGLlPglzes2_IHnyI/edit
becomes
https://docs.google.com/document/u/2/d/1Im9nGcjI6SJkWzolYPzpI6iBUAAGLlPglzes2_IHnyI/preview
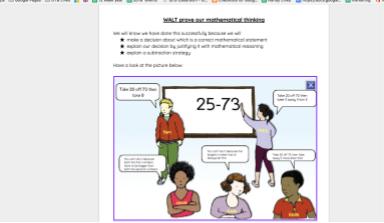
Notice there is no toolbar and there is nowhere to select ‘File’ or ‘Make a copy’. To see any updates to the document the user would need to refresh the page as they won’t happen in real time when shared this way.
Bonus
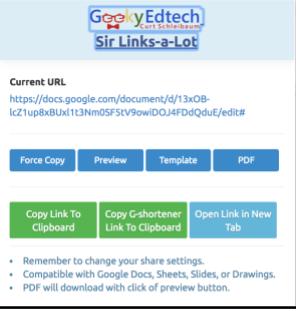
If you want a really quick way to make the changes above you could use the Chrome extension Sir Links-a-Lot.
Once you have installed it, have the Doc open that you want to share and click on the extension. The following options will pop up – you can even download the document as a PDF quickly.
I like that it prompts you to check the sharing permissions on the Doc, as this is something that is easy to overlook and can often result in a flood of emails from others requesting access.
So there you are, four quick, but slightly different, ways to share your Google Docs. These tips will also work for you with Google Slides, Google Sheets and Google Drawings.
Which one you use will depend on the purpose of your Doc and how you intend it to be used.
For more tips and trick on how to use Google tools effectively check out our website here.


