


One of the most frequent questions I am asked by people who are transitioning from Outlook to Gmail is “How do you schedule an email in Gmail?”. Gmail now has this functionality built in, and it is very simple to use. Alternatively, you can use the Chrome extension called Boomerang for Gmail that provides this functionality (and a lot of other great features!). In this blog post, I’ll show you how to use both options.
[bctt tweet=”Want to schedule an email in #Gmail? Here’s two options!” username=”samvardanega”]
Option 1: Gmail’s Schedule send feature
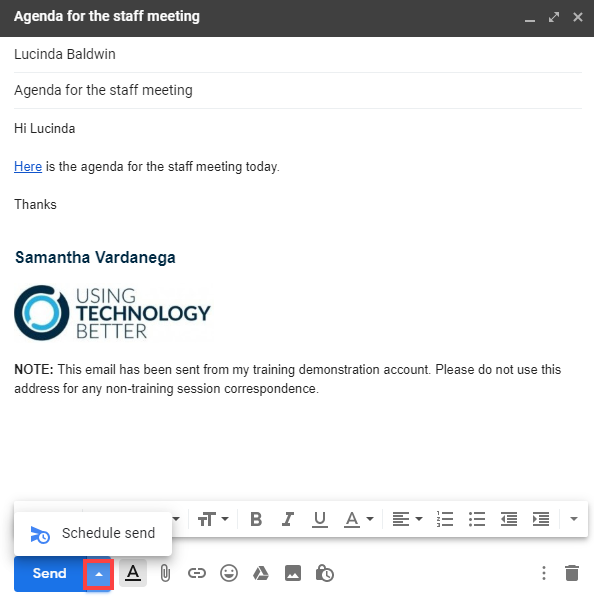
1. Compose an email.
2. Click the arrow on the right of the Send button, then click Schedule send.
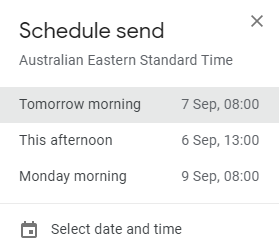
3. Choose when you want to send the email. You can either select from one of the suggested options, or click Select date and time to choose your own.
Tip: When selecting your own date and time, you need to manually type in the time.
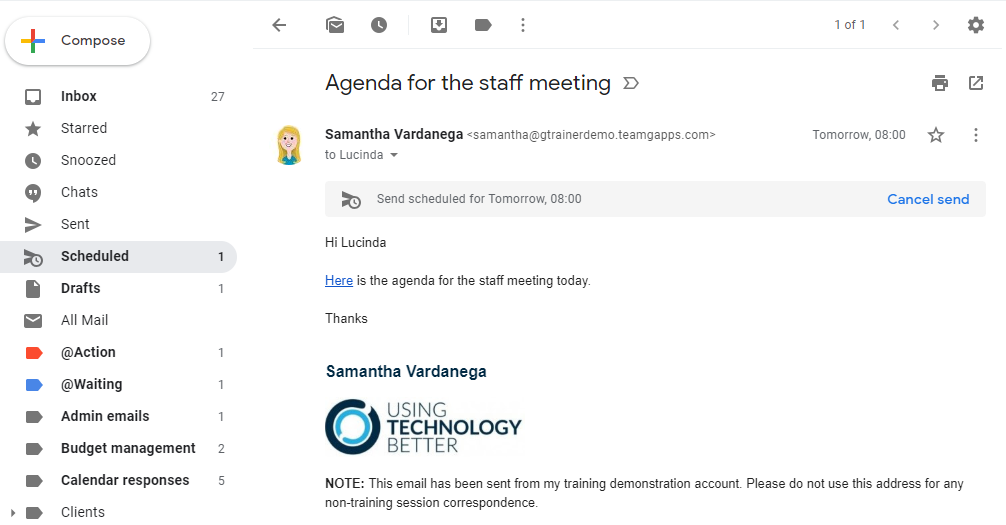
4. The email will be shown in the ‘Scheduled’ label until it is time for it to be sent. If you want to cancel the scheduled send, open the email and click Cancel send.
Note: The ‘Scheduled’ label will be hidden until you schedule an email. Then it will show in the top section of your label list.
[bctt tweet=”Here’s how to use the Scheduled send feature in #Gmail” username=”samvardanega”]
Option 2: Boomerang for Gmail
Step 1: Install Boomerang for Gmail
1. Visit https://www.boomeranggmail.com/ and click the Add this to your Gmail button.
2. Click the Add extension button (or similar) to add the extension.
3. Your Gmail will load in a new tab and a welcome tour will be shown. Click Next to work through the tour.
Note: The free version of Boomerang will allow you to schedule a maximum of 10 emails per month. If you want to use it more, check out their subscription information.
Step 2: Schedule an email to be sent later
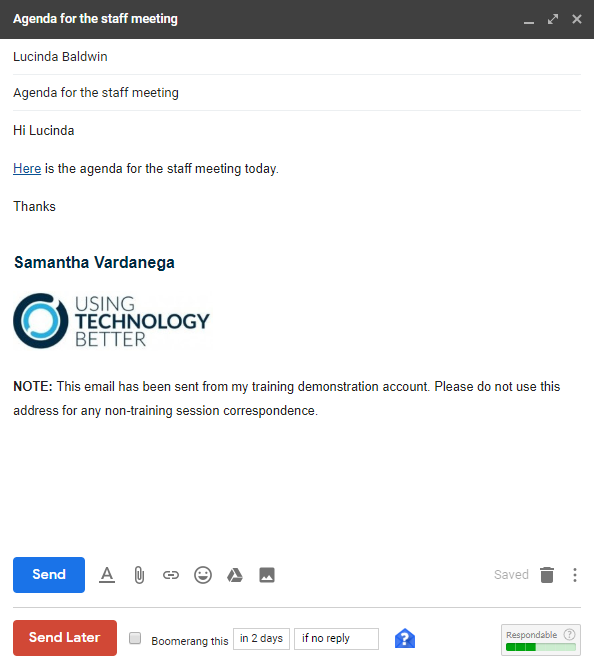
1. Compose an email.
2. Click the Send Later button at the bottom of the compose window.
3. Choose the time you want to send the message at.
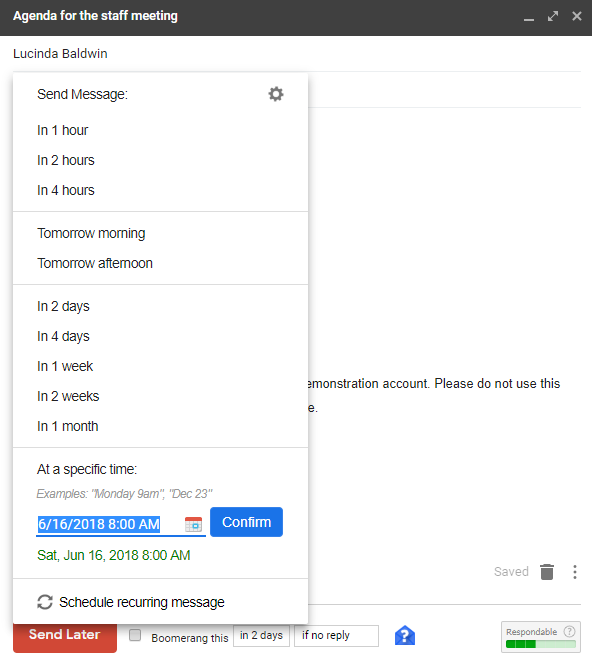
4. The message will be scheduled.
Note: The first time you use Boomerang to schedule a message, you may be prompted to give Boomerang permission to your Gmail account. This is required for the extension to function. You may need to select your scheduling settings again after granting these permissions.
[bctt tweet=”The Boomerang for #Gmail extension lets you schedule an email to send at a later time” username=”samvardanega”]
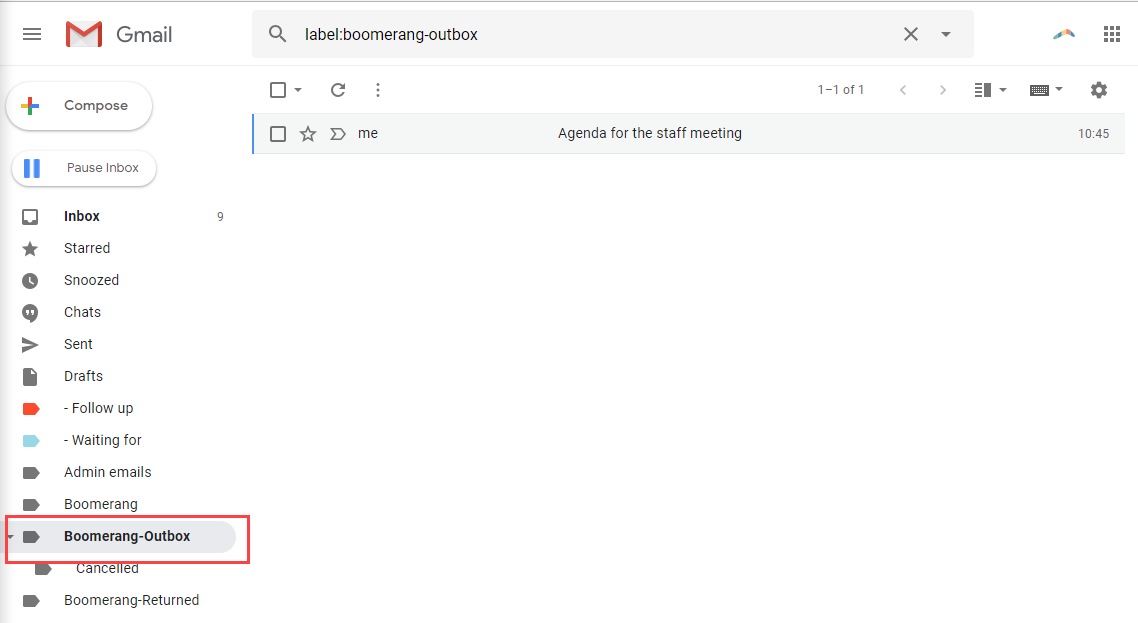
5. The scheduled email will be shown in the Boomerang-Outbox label until it is sent.
Are you feeling overwhelmed by emails and want to learn how to better manage your Gmail Inbox? Check out our Get efficient with Gmail the SMART way online course!
Want to see a video of this feature? Check out this one from Boomerang for Gmail.


