


Personalise letters in less time with this super effective mail merge add-on for Google Workspace in Google Docs.
One super effective mail merge add-on for Google Workspace in Google Docs is autoCrat first covered in this earlier post: Top 7 Mail Merge Add-ons for Gmail & Google Drive.
This same technique can also be used to personalise any other type of document that is kept in Google Docs.
Step 1: Get your data & letter template ready
To perform a mail merge in Google Drive, you need to have the following:
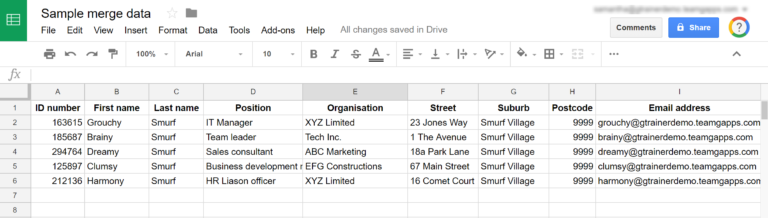
1. A Google Sheet that contains the data you want to merge into the letter.
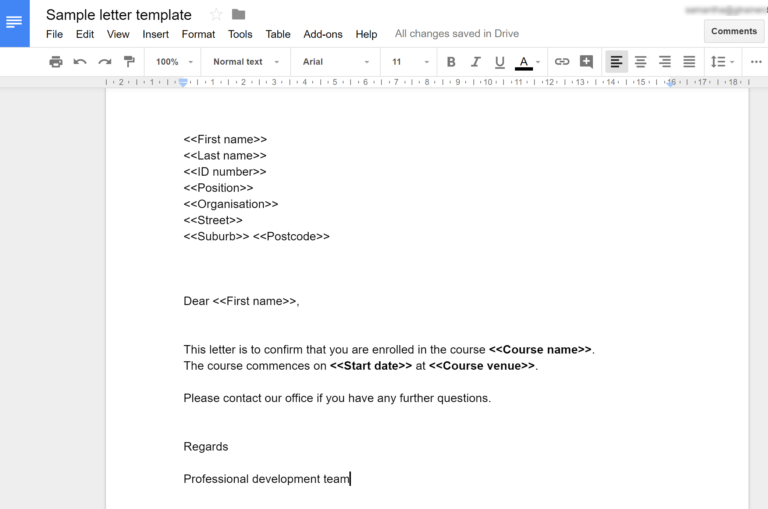
2. A letter template in Google Docs that has merge tags using a <> format. Put a merge tag wherever you want personalised information to go. Try and match these tags to the column headings in your spreadsheet to speed up autoCrat configuration.
An example spreadsheet and document template are shown below.
Step 2: Install the autoCrat add-on
To install the autoCrat add-on:
3. Open the Google Sheet with your data.
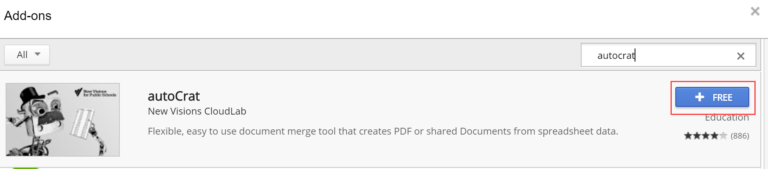
4. Select the Add-ons menu > Get add-ons.
5. Search for ‘autoCrat’ using the search box in the top right corner.
Once you have located autoCrat, click the +Free button to install it.
7. Choose the Google account you want to use autoCrat with and allow it the permissions it needs to run.
Step 3: Configure autoCrat to create and email letters
These instructions will configure autoCrat to create a PDF letter from the merge data and email it to recipients.
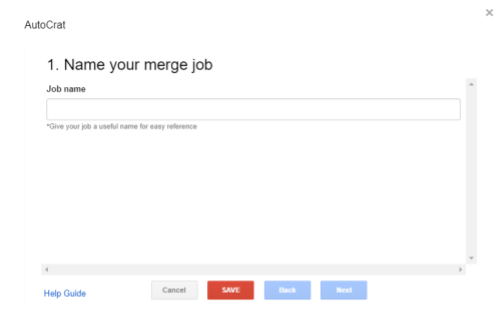
1. In the Google Sheet, select the Add-ons menu > autoCrat > Launch or Open.
2. Click New job.
3. Give the job a name that reflects the letters you are creating. Click Next.
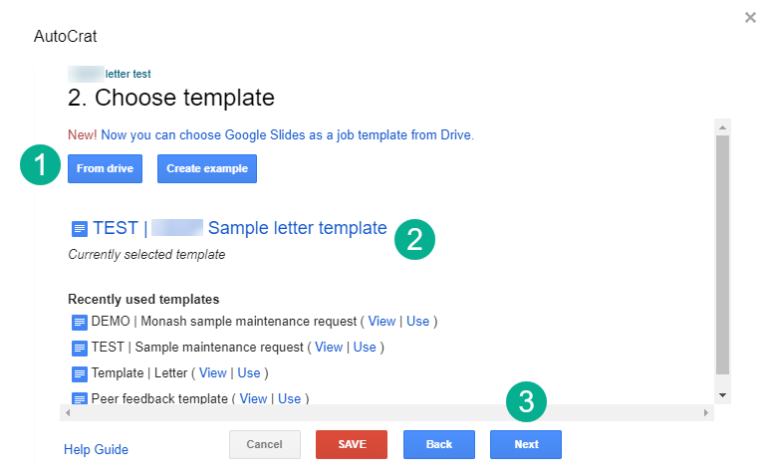
4. Click the From drive button. Search for the Google Docs letter template that has your merge tags. Click on it and then click Select. The name of the template will be displayed on the configuration screen. Click Next.
5. Change the Merge tab box to the name of the tab containing the data.
6. Using the drop-down boxes on the right of the configuration screen, match the merge tags to the column headings in your spreadsheet. An example is shown below.
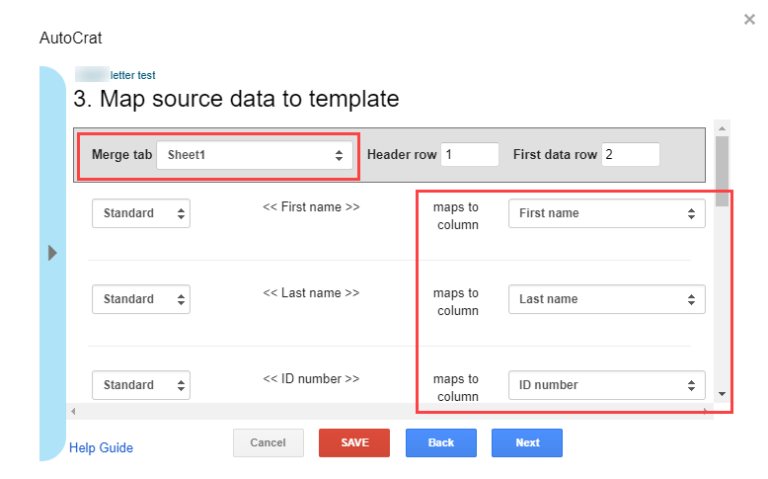
7. When all the tags and columns are matched, click Next.
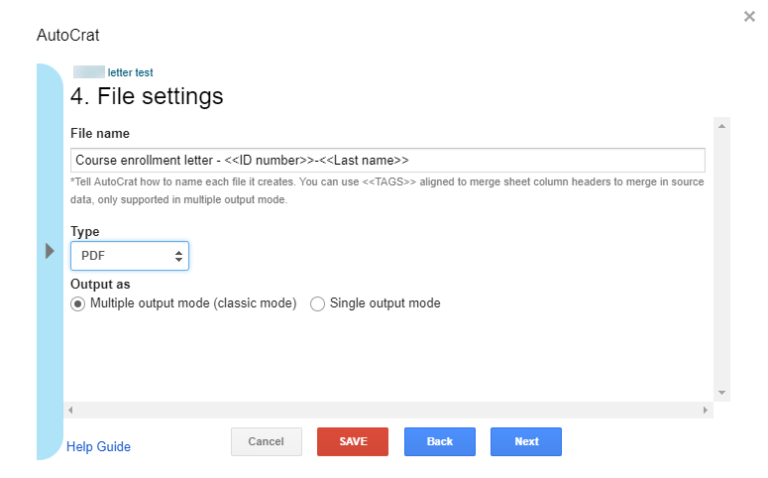
8. Enter the name you want to give to the PDF files that are generated. This can be a combination of regular text and column headings from your spreadsheet. An example is shown below.
Note: The column headings must be encased in tags << >> and be written exactly as they appear in the spreadsheet (not in the Google Doc).
9. Change the Type box to PDF. Choose if you want to put each letter in an individual document (multiple output mode) or together in a single document (single output mode). Click Next.
Note: In this scenario, the PDFs are going to be emailed to recipients. As such, individual documents are the most appropriate choice.
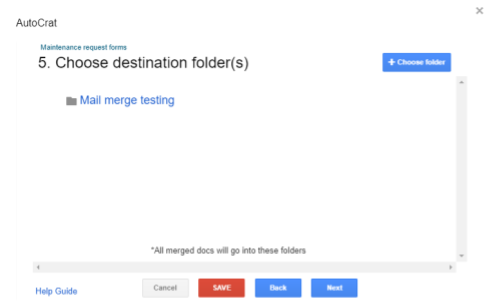
10. Click the +Choose folder button and search for the Google Drive folder you want to store the generated PDFs in. Click on it then click Select. Click Next.
11. Click Next to skip the dynamic folder reference screen.
Note: For future reference, this setting can be used to put merged documents in different folders, e.g. by location, department, course, person etc.
12. Click Next to skip the merge condition screen.
Note: For future reference, this setting can be used to perform a document merge only on specific rows in the spreadsheet, e.g. those after a certain date.
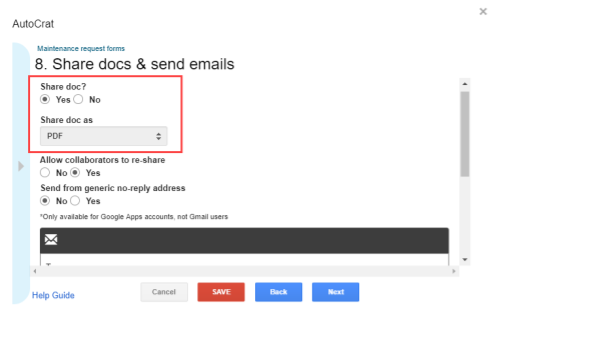
13. Change the ‘Share doc?’ setting to Yes.
14. Ensure the the ‘Share doc as’ setting is set to PDF.
Note: For future reference, you can also choose to output files as Google Docs. You can then share these via Google Drive.
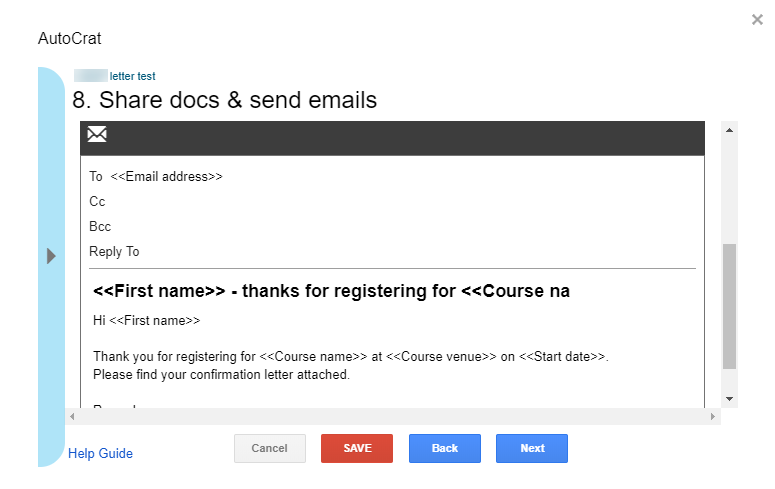
15. Scroll down until you see the email template box. Use this box to compose the email you want to send to the recipients along with the PDF file.
In the To field, use the name of column heading in your spreadsheet that contains the respondent’s email address, encased in tags << >>.
- Enter information in the CC, BCC or Reply to field, if required.
- The subject and the body of the email can also contain column headings from your spreadsheet. Again, they must be encased in tags << >>.
Note: Any column headings be written exactly as they appear in the spreadsheet (not in the Google Doc). An example is shown below.
16. When you have finished composing your email, click Next.
17. Leave the options on the Add/remove job triggers screen set to ‘No’ and click Next.
Note: For future reference, you can use the form trigger to configure autoCrat to run every time someone submits a Google Form (e.g. to automatically send them a registration confirmation or similar). The time trigger can be used to force autoCrat to run at a regular time interval.
18. Click Save.
The autoCrat configuration is now complete.
Step 4: Preview the merge
After you have saved the autoCrat configuration, you will be taken to the Existing jobs screen. From here, you can run, edit, preview and delete your merge job. It’s a good idea to preview your merge before running it. This gives you a chance to identify and correct any errors before the real merge takes place.
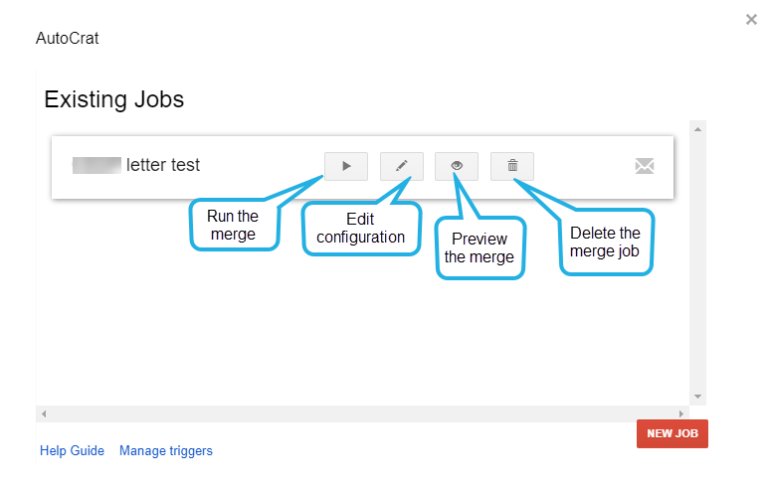
Click the Preview button to test your merge.
Note: This will not actually run the entire merge. It will show you a summary of what will be merged and let you preview the first merged letter and email.
Step 5: Run the merge
1. Click the Run button to start the merge.
2. The merge will begin and a progress screen will be displayed.
3. When the merge is complete, close the autoCrat window.
4. You will notice that autoCrat has added some additional columns to your spreadsheet to record the results of the merge.
The merge Doc URL contains the link to the PDF that was generated.
The Document Merge Status field will show the status of the merge for each row in the spreadsheet, including the status of the email sending.
You will also find all the sent emails in your Sent Mail label in Gmail and the PDF files in the Google Drive folder you specified in during configuration.
Note: If you want to re-use your spreadsheet for another merge, you must first delete the information that autoCrat puts in the extra columns.
Want to learn more about using autoCrat to perform merges?
Check out the autoCrat website and user guide.
Does your organisation need assistance with automating processes using Google Drive?
Contact us to discuss our customised consultation and training services.


