Now that all Office 365 Education users have access to Microsoft Forms – a great new feature for creating surveys and quizzes – anyone with an Office 365 Education account can create a Microsoft Form.
Creators can choose to limit respondents to their school or make the form available to anyone. Forms can be viewed and completed on any computer, tablet or phone. This makes Microsoft Forms suitable to use with students, colleagues, parents and the wider community.
Microsoft Forms also has a powerful in-built quizzes feature which includes self-grading and automatic feedback.
Read on to learn how to create a self-grading quiz to use with your students.
1 Create a quiz in Microsoft Forms
2 Add questions to your Microsoft Form quiz
3 Select a theme for your Microsoft Form
4 Change your Microsoft Form’s settings
5 Preview your Microsoft Form quiz
6 Share the Microsoft Form quiz with your students
6 See responses to a Microsoft Form quiz
7 More information on Microsoft Forms
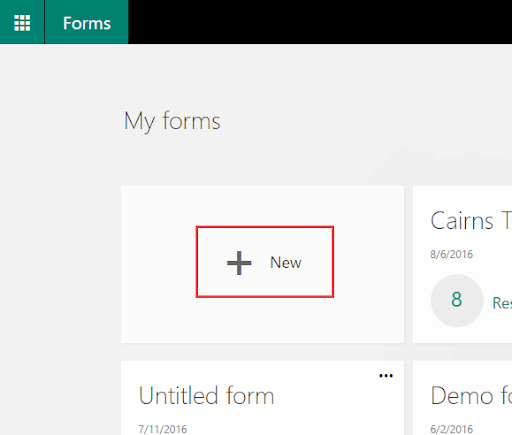
Create a Quiz in Microsoft Forms
1. Visit http://forms.microsoft.com and sign-in with your Office 365 Education account.
Note: Microsoft Forms is only available to education users.
2. Click New to open a new form.
3. Click in the Untitled form section and give your quiz a name and description.
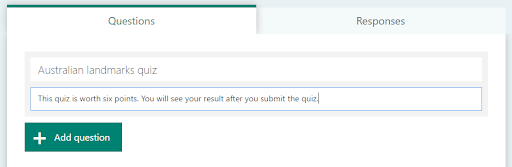
Add Questions to Your Microsoft Form Quiz
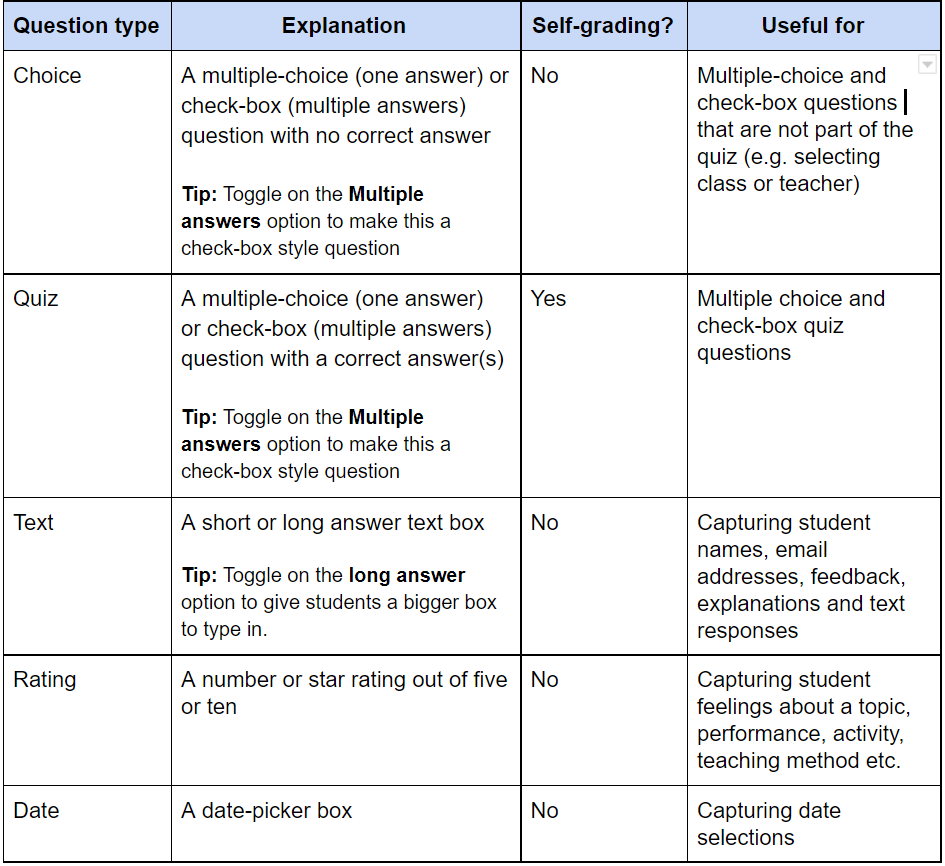
1. Click the Add question button and select the appropriate question type. Use the table below to help you choose.
Tip: Your quiz can include a mixture of self-grading and non-self-grading questions. Just remember that only the self-grading ones will be marked automatically!

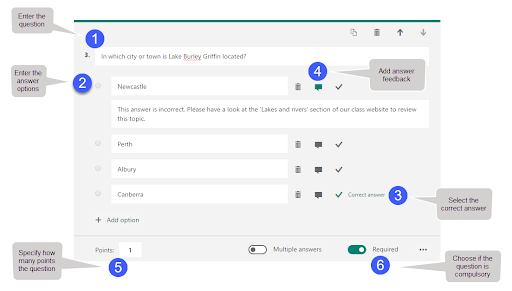
2. Complete the question information as shown in the image below.
Note: This assumes you are using a multiple-choice question. The options to select will be a bit different for other question types.
3. Repeat steps 4 and 5 for each question you want to add to your form.
Select a Theme for Your Microsoft Form
A theme adds some colour and fun to your quiz!
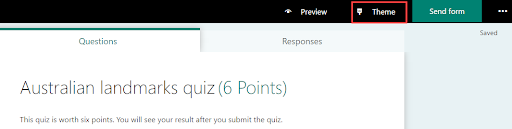
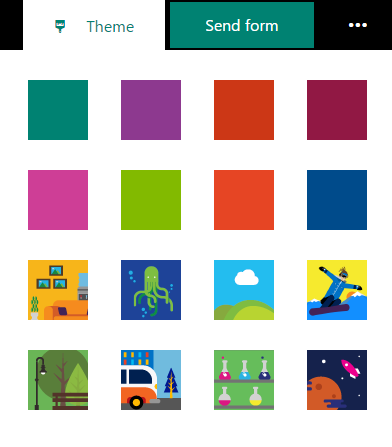
1. Click the Theme button at the top of the screen.
2. Find a theme you like and click to select it. Click the Theme button again to close the themes pane.
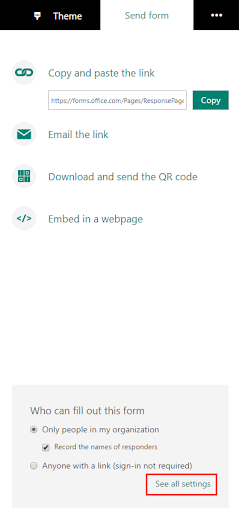
Change Your Microsoft Form’s Settings
1. Click the Send form button at the top of the screen.
2. Click the See all settings link at the bottom of the pane.
3. Choose the settings appropriate to your circumstances. Here are some tips to help you (follow only those relevant to you!):
- Want to make your quiz anonymous? De-select the Record the names of responders option’
- Only want students to complete your quiz once? Select the Allow only one response per person option.
- Need your quiz accessible outside your school? Select the Anyone with a link option.
- Want to close your quiz at a specific date and time? Select the Apply deadline option and choose a date and time
- Want each student to see the questions in a different order? Select the Shuffle questions option. However, be aware that this will also shuffle questions like ‘Name’, ‘Class’, etc.
- Don’t want students to see the correct answers? De-select the Display the correct answers after responders submit the form option.
Want students to see how many points a question is worth? Select the Show question points to responders option.
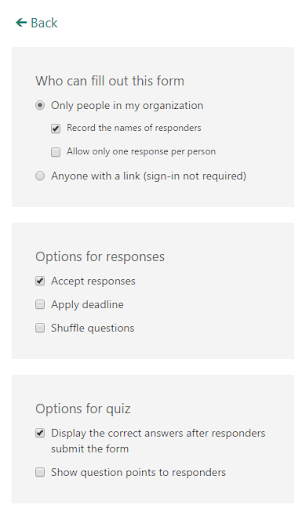
4. Click Back when you have finished configuring your form settings.
Preview Your Microsoft Form Quiz
Now that your quiz is ready to go, it’s time to check everything looks correct.
1. Click the Preview button at the top of the screen.
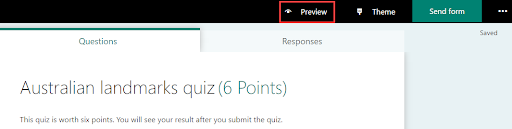
2. Use the Computer and Mobile buttons to see what your quiz will look like on different devices.
3. If you want to test the quiz, you can fill it in now.
4. Click the Back button when you are done previewing.
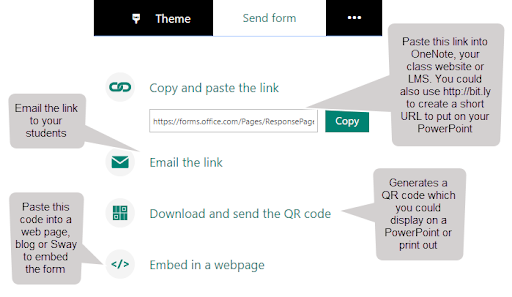
Share the Microsoft Form Quiz with Your Students
The Send form button includes several ways you can share your quiz with your students. Use the image below to help you choose the best option.
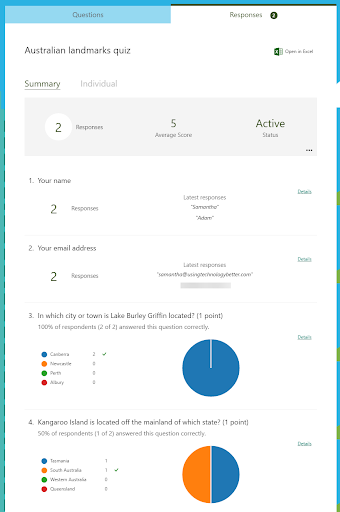
See Responses to a Microsoft Form Quiz
You can see your student’s responses to your quiz on the Responses tab.
- The Summary section shows the average score and a graphical representation of all responses. These are both updated in real-time when each student submits their quiz.
- The Individual section displays each student’s individual answers, their grade and the time taken to complete the quiz.
You can also choose to download the responses into Microsoft Excel if you want to undertake deeper statistical analysis.