


Now that many schools are using Google Workspace for Education as their main platform, one of the most common frustrations we hear from these teachers is that they miss the ability to create borders on their Google Docs – like they could in Microsoft Word.
And although there is no page border tool in Google Docs, there are a couple of workarounds that allow you to create borders in Google Workspace.
Follow the simple steps below to create a colour page border in Google Docs using the table options and Google Drawings.
How to Create a Colour Page Border with Table Options
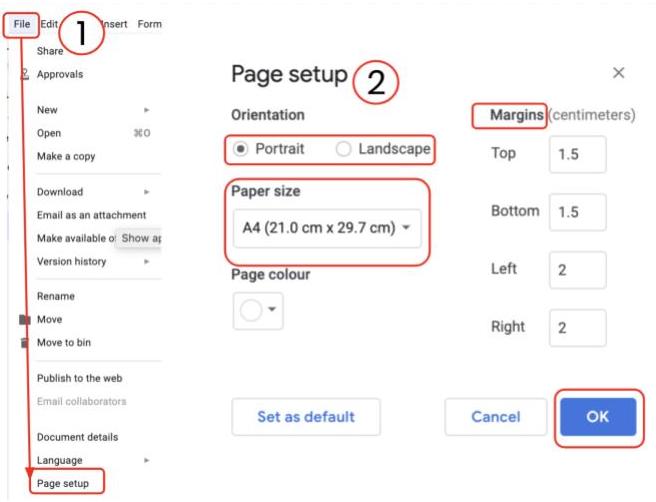
1. Set the page dimensions to the size you want your document to be.
2. Once you have the Doc set up how you want, insert a one column x one row table to the top of the page.
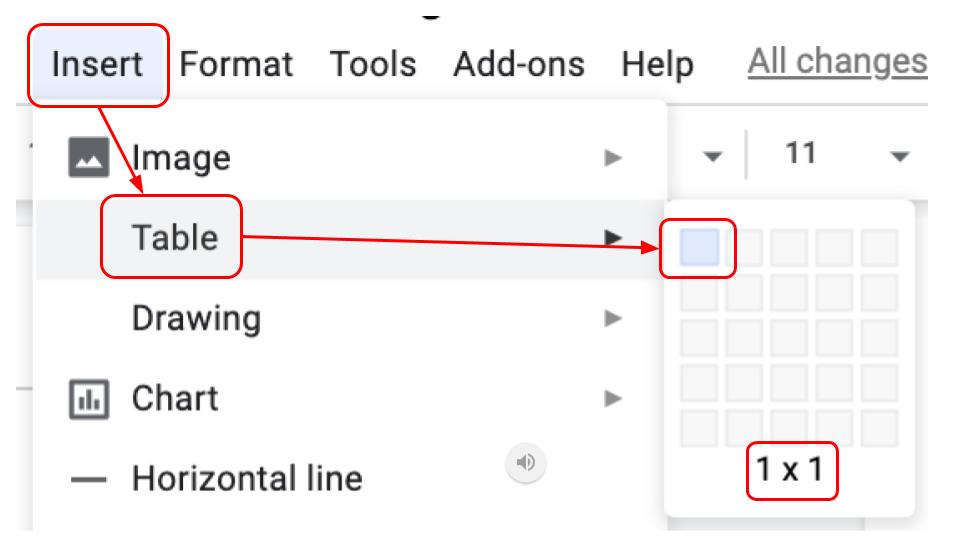
Put your cursor inside the table and tap enter as many times as you need to extend the table down the doc.
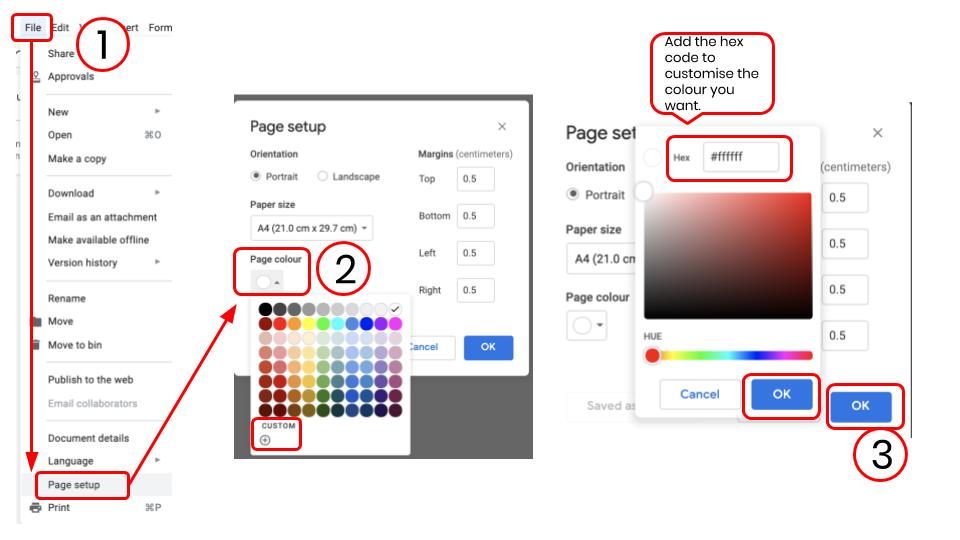
3. Now change the page colour to whatever colour you want your border to be. You can choose a default colour or use the custom option to get the exact shade you want.
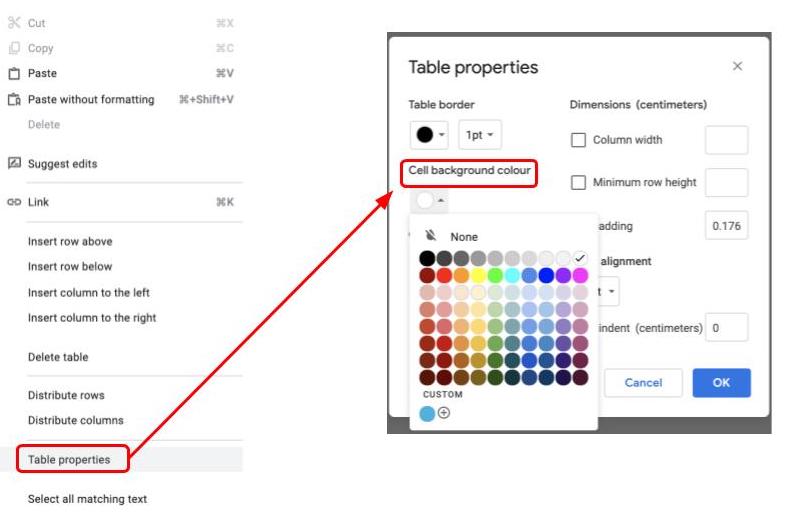
4. Click inside the table that you created in step two. Right click and select Table properties.
Choose Cell background colour and make it white.
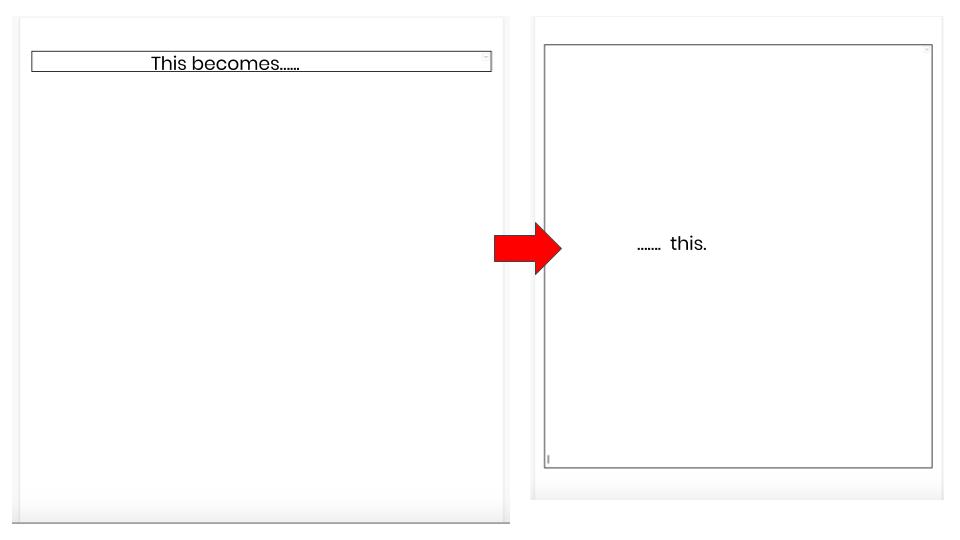
Add your text and information inside the table.
You know have a Google Doc with a colour border.
If you want to adjust the size of the border at the top of the Doc, head back to your page set up and adjust the top margin size.
If you want to be a bit more creative you can use the Google Drawings tool. These will give you more options and your borders can become more intricate but it will mean your students add their text in the Drawing – not directly on the Doc.
Create a Beautiful Border with Google Drawings
1. Decide whether you want your Doc to be portrait or landscape. Set all the margins to 0 – unless you want to have a small white border outside of your colour border.
Note: look back at step one on the first set of instructions if you can’t remember how to do this.
2. Open Google Drawings on top of your Doc.
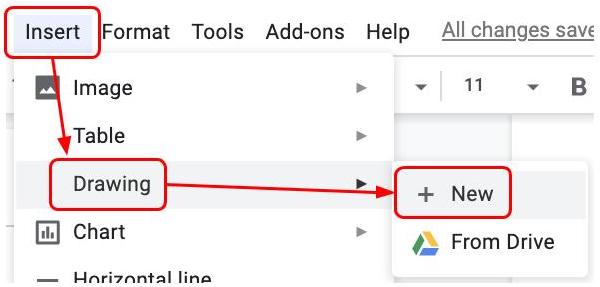
3. Once your Drawings canvas is open insert an image. Select Insert > Image > Search.
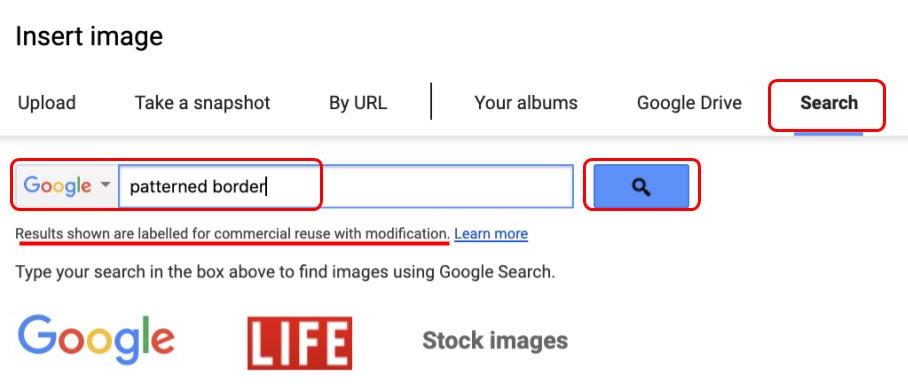
Note: Searching this way will bring up results you are legally allowed to use. Notice that by default they are labelled for commercial use with modification.
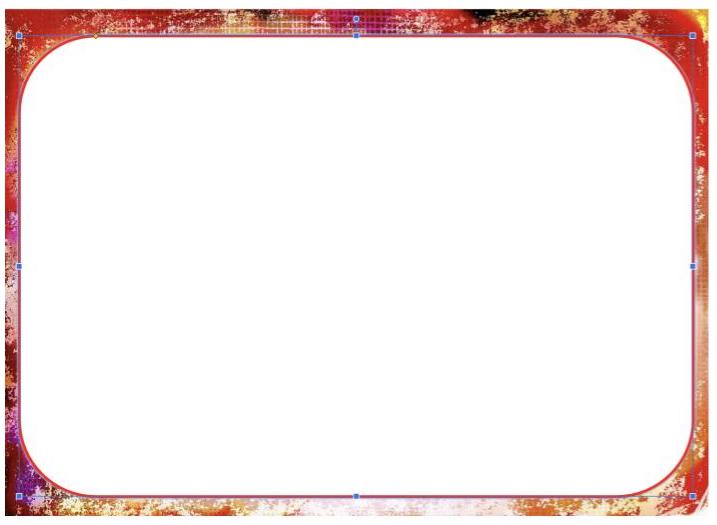
Once your image is loaded in your Drawings, stretch it fill the entire canvas.
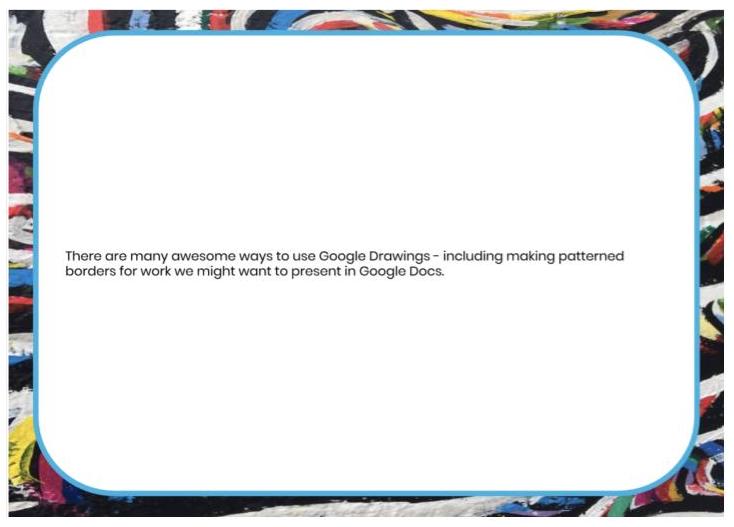
4. Now choose a shape that you want for the text space. I like the rectangle with rounded corners, but it’s entirely up to you.
Add that shape on top of the pattern.
Fill the shape with white and enlarge it to the size you want their writing space to me. The great thing about doing this inside Google Drawings is that you have the red guidelines that help you align the object neatly within your working space.
Save and close when you have it looking the way you want it.
5. Now, remember that in step one you made your margins all zero – so now you can stretch the Drawings to cover the whole Doc.
To add your text, double click, open the Drawings and write away! Just save and close when you’re finished.
There we are – a couple of ways you can add a border to your Google Docs. Have fun with your students making your work more interesting with visual effects.
For other innovative ways to use Google Docs check out more of the UTB team’s blogs here


