


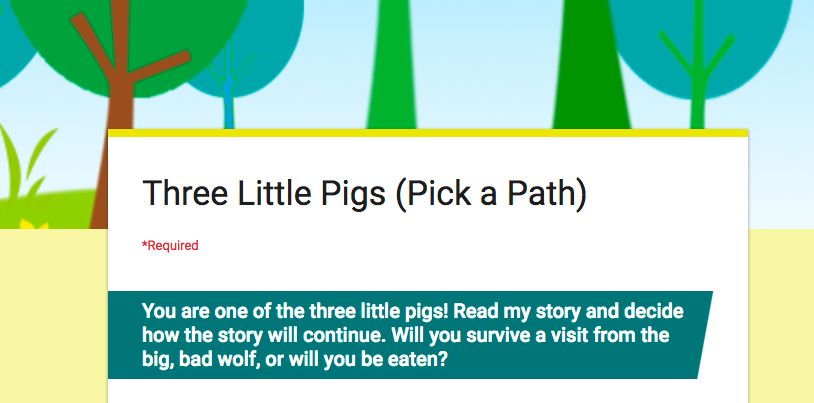
Get your students’ creative juices flowing by helping them design their very own Pick a Path story using Google Forms.
One of my favourite things to read to a class was the Choose Your Own Adventure style of books, commonly known as Pick a Path. These are stories where the readers can choose what happens next and they often have multiple pathways for the plot to develop.
After reading this kind of story with students, the obvious next step is to help them write and create their own. This is becoming more and more achievable for even the very youngest students with the technology we have in today’s classrooms.
Follow the simple steps below to help your students create their own Pick a Path story using Google Forms.
7 Quick Steps to Create a Pick a Path Story in Google Forms
1. Create your Google Form and add an introduction to the story.
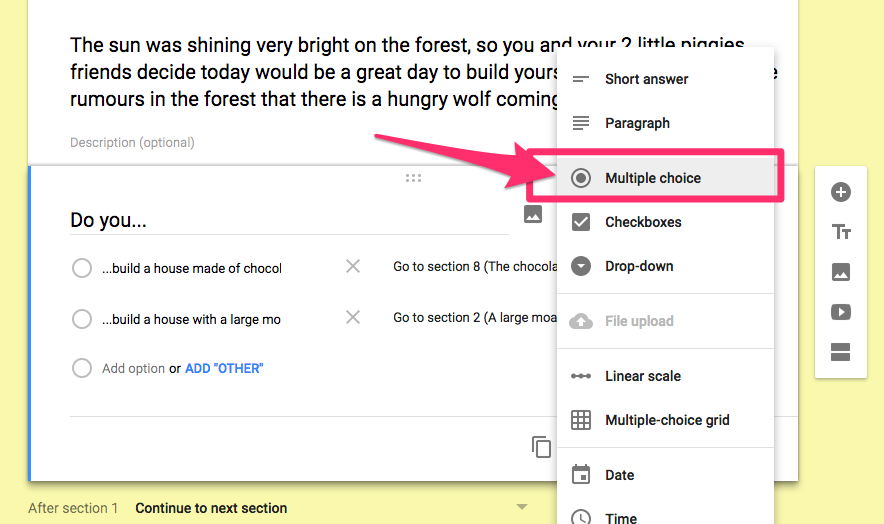
2. Add a multiple-choice question with two different answers for the reader to select from.
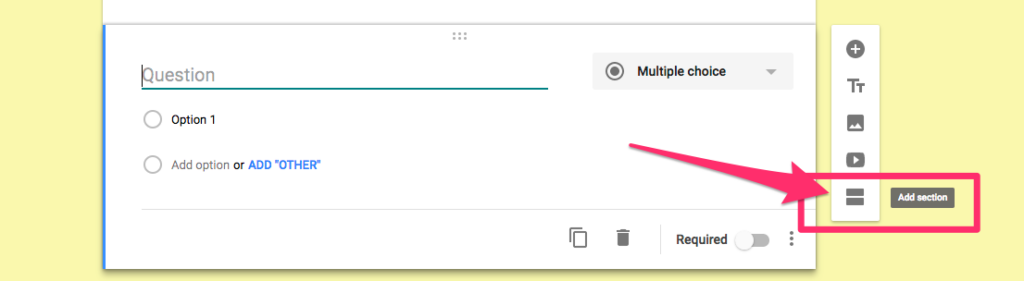
3. Create another section using the ‘Add section’ button on the right. In this section add some text that continues the story for that pathway.
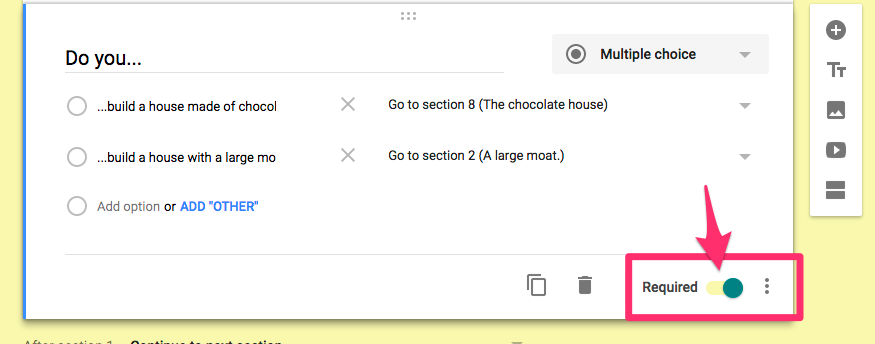
4. Go back to the first question. Slide the ‘required answer’ button to on.
5. Click the 3 dots options button in the bottom right corner of the question. Choose ‘Go to section based on answer.’
6. Click the down arrow next to one of your answers. Select the section that this option will lead the reader to.
7. Continue this for the remaining answers, adding new sections and more questions as your answers and pathways grow.
7 Steps Explained
1 Create a new Google Form and give it a title. Begin your form with some text that explains what this book is about and what the reader will do to follow their own choices. Now add some text that begins your story.
2 Next you should add a question using the ‘plus’ button to the right. When you have added some text with a question for the reader, choose the ‘multi-choice’ option for your answers and write two options for the reader to select from.
Your next step is to add a new section using the ‘Add section’ button to the right of the Forms interface. This is where your reader will go to when they select your first answer. Give the section a name that you will recognise in your story. For example, if this is where the reader goes when a character chooses to ‘go to the barn,’ you could title this section ‘The Barn.’
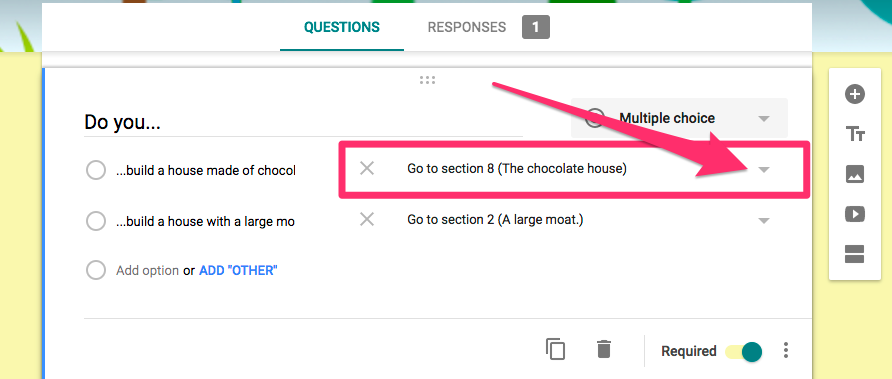
Now you need to go back to the first question and select the ‘required answer’ button in the bottom right and then click the 3 dot options button. Choose ‘Go to section based on answer’ to add this feature to each of your multiple-choice options.
Next you want to tell each answer where to take the reader. Click the down arrow next to each answer and select the section that this answer leads to. By creating other sections below this question you can then direct that question to ‘Go to section based on answer’.
As your story grows you should add questions and sections that lead to other sections and so on. It’s simple once you get started and always a good idea to start small, perhaps with one or two storyline options when students are starting out.
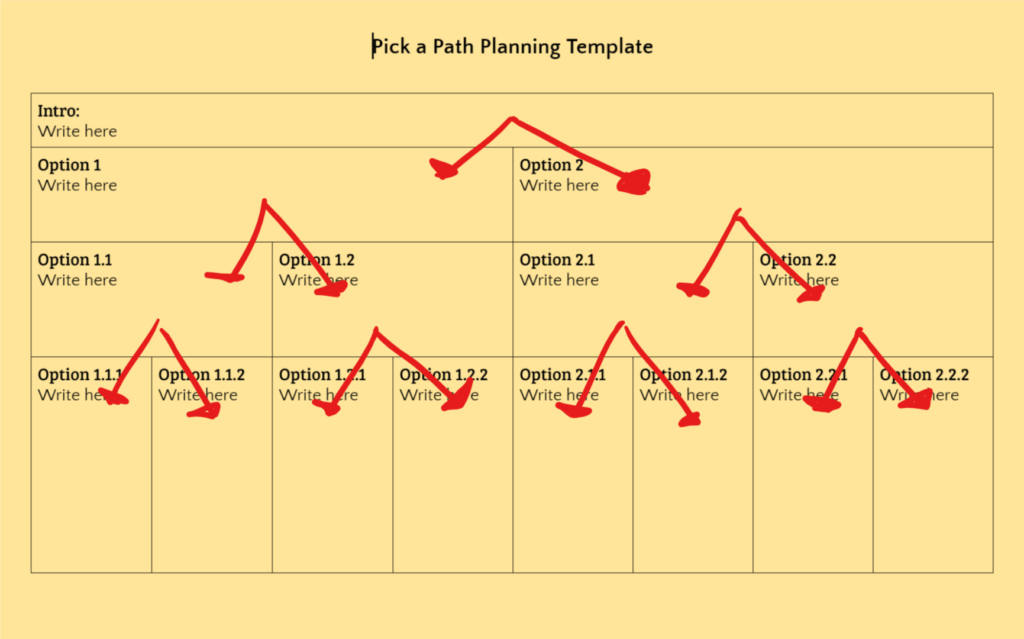
Another good option to help scaffold students with their Pick a Path forms is to give them a template with arrows for each choice. This blank template will give you an idea, and you can see a completed one for the Form I have linked here as an example.
Once you’ve added illustrations and even perhaps some Youtube videos for each section (student created of course!) you can imagine the learning value out of such an engaging project.


