


YouTube has an in-built editing tool which lets you quickly and easily blur faces in your videos. This is really useful if you have a video which includes students or colleagues who have not given permission for their image to be put online. Or for those times when a stranger is behaving oddly in the background of your video! You can choose to automatically blur all faces, or just blur selected faces/sections of the video.
[bctt tweet=”YouTube has an in-built editing tool which lets you quickly and easily blur faces in your videos” username=”samvardanega”]
To blur all faces
1. Upload your video to YouTube.
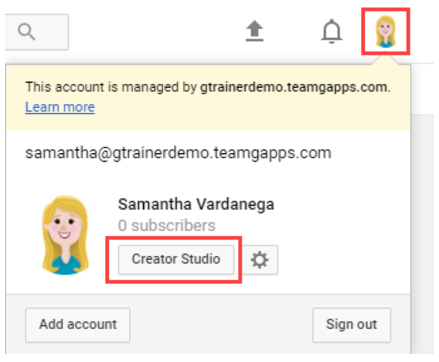
2. Click on your profile picture/icon and then click the Creator Studio button.
3.Choose Video Manager from the menu on the left.
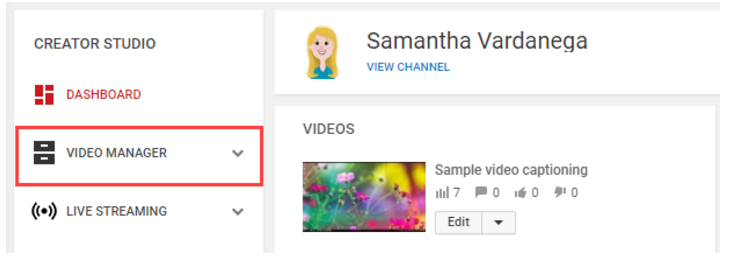
4. Locate the video you want to blur and click the Edit button.
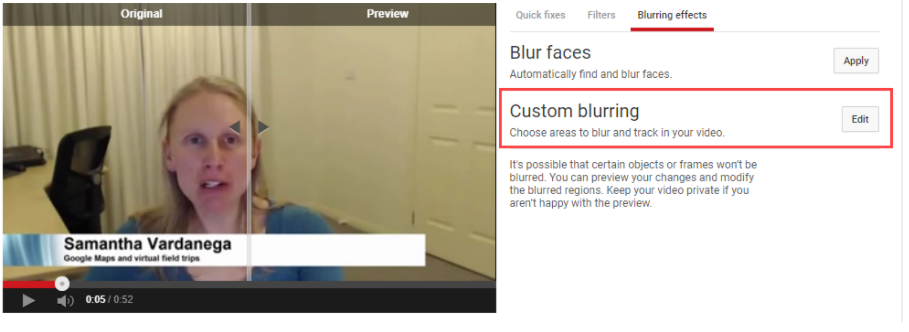
5. Click the Enhancements tab.
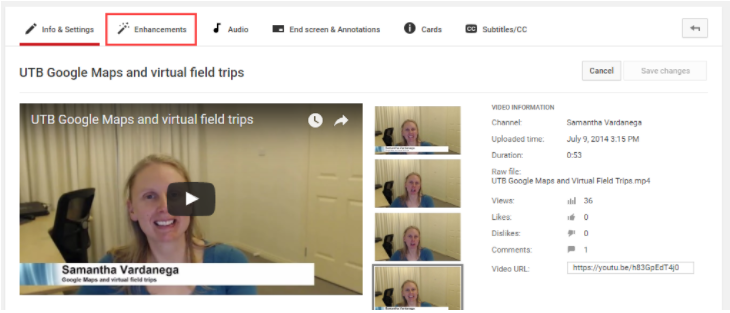
6. Choose Blurring effects.

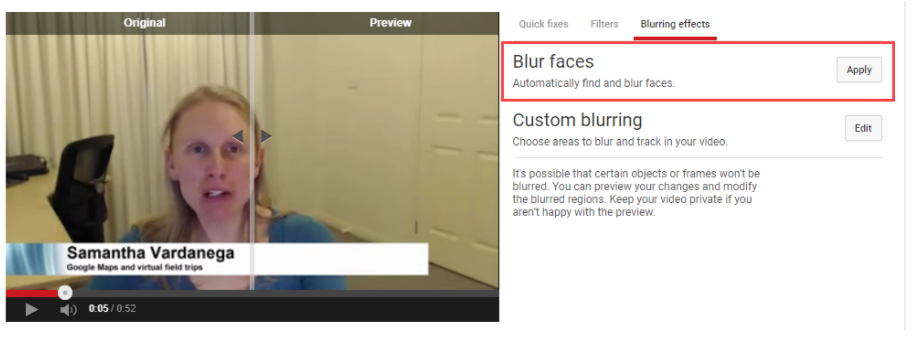
7. You will see the Blur faces option at the top. Click the Apply button and watch as all the faces in the video are blurred.
Tip: Drag the vertical line in the middle of the video screen to the left to see a bigger preview of the blurred image.

8. If you need to remove the blurring, click the Applied button to turn it off.
9. When you’re happy with your blurring, click Save to apply the changes to the existing video. Alternatively, click Save as new video if you would prefer to keep the original version separate.
To blur selected faces/sections
1. Access the Blurring effects enhancements tool by following steps 1-6 in the section above.
2. Locate the Custom blurring option and click the Edit button.
3. Use your mouse to draw over the section or face you want to blur. Click on the box created and drag and drop it into position.
Tip: You can draw multiple shapes to blur multiple faces or sections.
4. Adjust the length of the blur by dragging the ends of the grey bar that appears at the bottom of the custom blurring window. Each blur effect has its own grey bar.
Tip: You can remove a blur by clicking the X at the end of its grey bar.
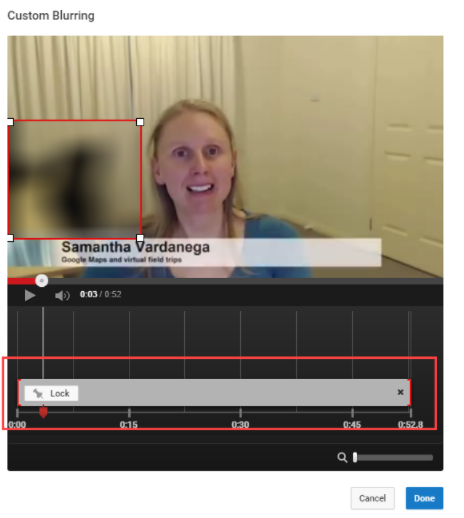
5. Click Done when you are finished.
6. When you’re happy with your blurring, click Save to apply the changes to the existing video. Alternatively, click Save as new video if you would prefer to keep the original version separate.


