


There are many uses for Google Sheets in the classroom. I like to be able to have my own class list where I can keep track of my students. I would use a sheet for attendance, recording homework, anecdotal notes and marks. Many LMS’s can do this, but I like the ability to customise what I see and enter, Google Sheets allow me to do this easily. Often you get class lists from your school database and they may not be in the format that you like. Full student names may be in one column, there may be no email address and you may want to refer to a group of cells for calculations easily. These three tips will help you have a functional sheet to use in your class in next to no time.
[bctt tweet=”These three tips will help you create a functional Google Sheet to use in your classroom.” username=”adifrancis”]
Tip 1 – Defining a Range
The best way to describe this is using a geographical analogy. If you think of a suburb, it is referred to by the name of that specific suburb. For instance Brighton refers to all the streets, buildings and parks in that area. We could always list all the street names and other features in a long list, but this would be problematic to refer to all the time. The same applies to sheets. We may have a number of cells that we want to refer to regularly. We can refer to them by using the cell references -> A1:C10.
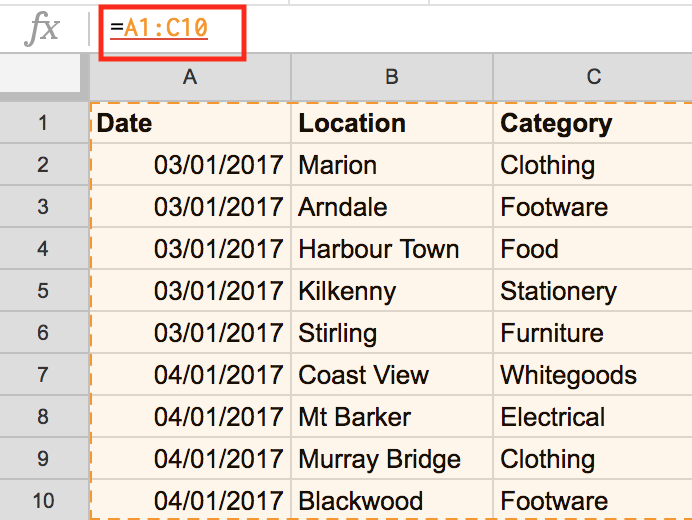
While this works well, you have to keep highlighting the cells or remembering the reference. Like the suburb name, we can name this region so that we can refer to it easier. This is called a named range. To name a range:
1.Highlight the cells
2.Right mouse click to bring up the menu
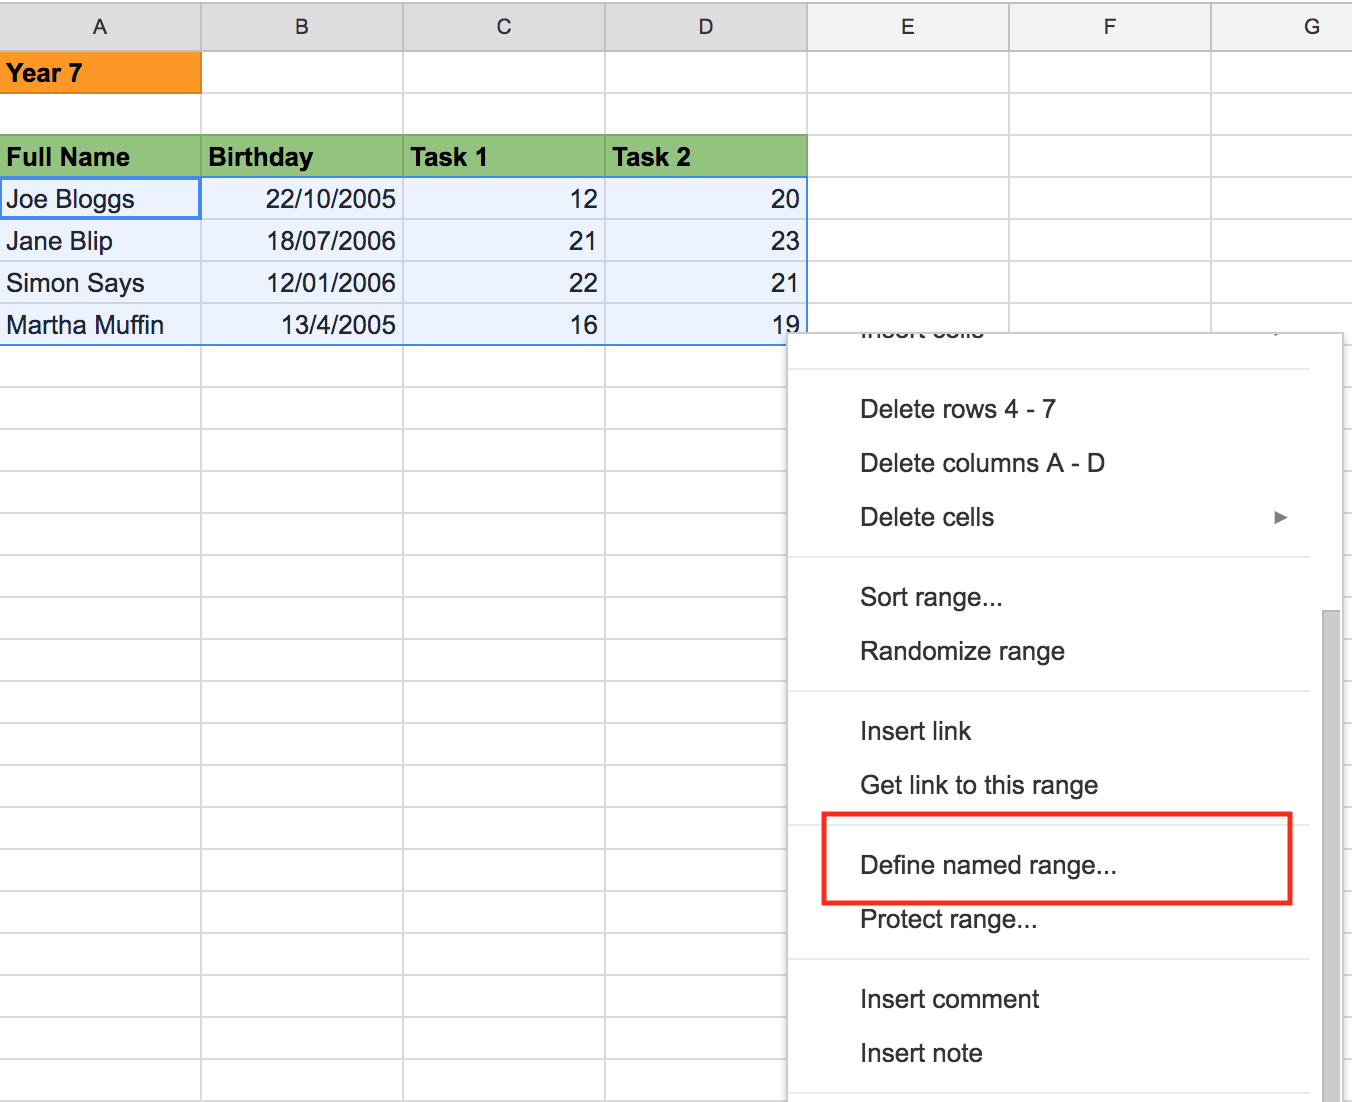
3.A menu will open on the right-hand side of the screen. Here you can name the range. Make it something logical that has some sort of link with the data you have, for instance ‘Year7’’.
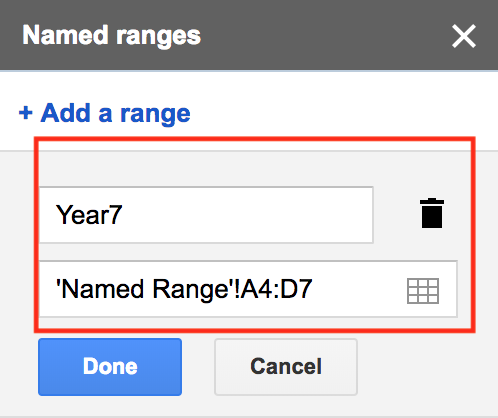
If you need to do calculations or write a formula that involves these cells, then all you do is to refer to the named range. For example =sort(Year7,3,True). This will sort the cells based on column C. To write a formula, you need to type =, then sheets will know that you are writing a formula and not a number or text.
Using named ranges is particularly useful when writing a query.
Tip 2 – Splitting Text
Sometimes you may want to have the first and last names of students in two columns when they are in one column. The split function will do this.
[bctt tweet=”The split function allows you to create separate columns for first and last names.” username=”adifrancis”]
You need to have at least two columns free to do this. If there is a hyphenated name, then you may need three. After you have your empty columns sorted, follow these steps:
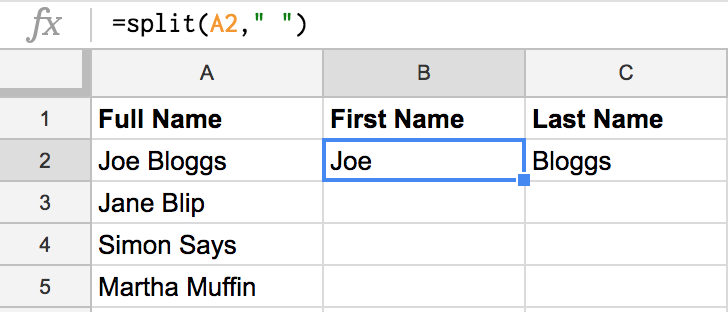
1.Place the cursor in the cell where you want to put the first name. In the case below, this is B2.
2.Now you need to type in the formula to make this happen. The SPLIT function will split your text and look for whatever delimiter there is separating the names. In our example, it is a space, but it could be a comma. The syntax is =split(A2,” “).
3.Copy this formula down into the cells below to split all the names in your list.
Tip 3 – Making email addresses
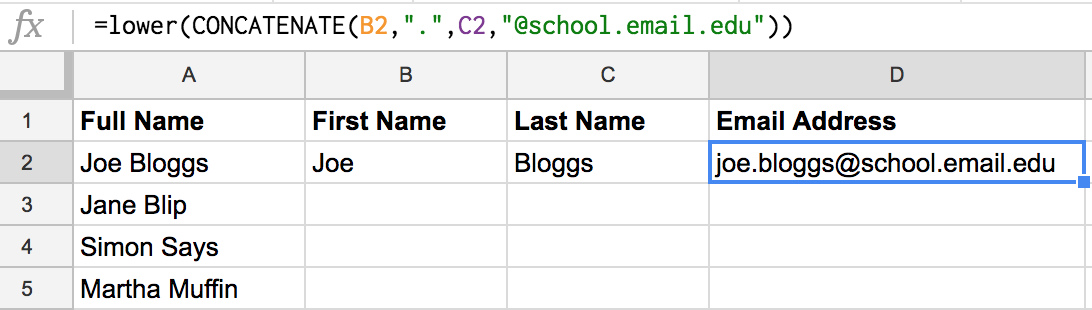
You may have the names of the students, but not their email addresses. The school may use a format similar to firstname.lastname@school.email.edu. To do this we use the concatenate function.
This function will join any string of text together, we just need to tell it to put the email address at the end. You can also use the LOWER function to make it all lower case if needed. The formula for this is shown in the image below.
[bctt tweet=”Want to learn how to convert your class list of names to a class list of email addresses? Then check out this blog post.” username=”adifrancis”]
If you ever do a calculation or task that is repetitive, the chances are that there is a function in Google Sheets that can make your life easier and more efficient. To get a copy of the sheet that has these examples in it, plus a bonus column, click here.
[bctt tweet=”If you ever do a calculation or task that is repetitive, the chances are that there is a function in Google Sheets that can make your life easier and more efficient.” username=”adifrancis”]
If you like saving time, you may also want to check out this blog post for some hints on how to become more efficient in Gmail.


