


Jamboard is now a core G Suite app, yet it’s amazing how many people don’t realise it exists. Designed as a collaborative whiteboard tool, it has a number of really useful applications. If it’s new to you, read on – this blog will give you all the information you need to get started with this great addition to your suite of tools.
In 2016 Google launched the Jamboard as an interactive whiteboard that allowed for collaborative use. The idea was that you could collaborate with other team members across devices that were connected to the board, or even with team members in other places. To be able to access the tools you needed to have an actual physical Jamboard.
More recently however, the software that runs the board has been made available without having to have the actual board itself. It can now be used on mobile devices or on web based devices.
How we can actually access Jamboard?
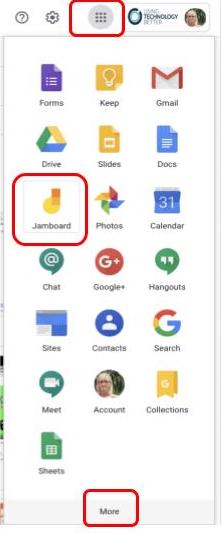
It is one of the core apps within your G Suite Domain. (If you can’t see it, you just need to ask your G Suite admin to turn it on for you). Click on the app launcher in your Drive and you’ll see Jamboard there. You may need to click on ‘More’ to find it. Remember – you can drag and drop these apps around to rearrange them if you want to.
So now that you know where to find it, how do you use Jamboard?
[bctt tweet=”Did you know #Jamboard is a core #GSuite app? Find it in your app launcher #GSuiteEDU #edtech” username=”donnagolightly1″]
Step one: Navigate to your Jams homepage
Once you have launched Jamboard you’ll be taken to your Jamboard homepage where you can see all your existing Jams and create a new one. You see the name of the Jam and when it was created.
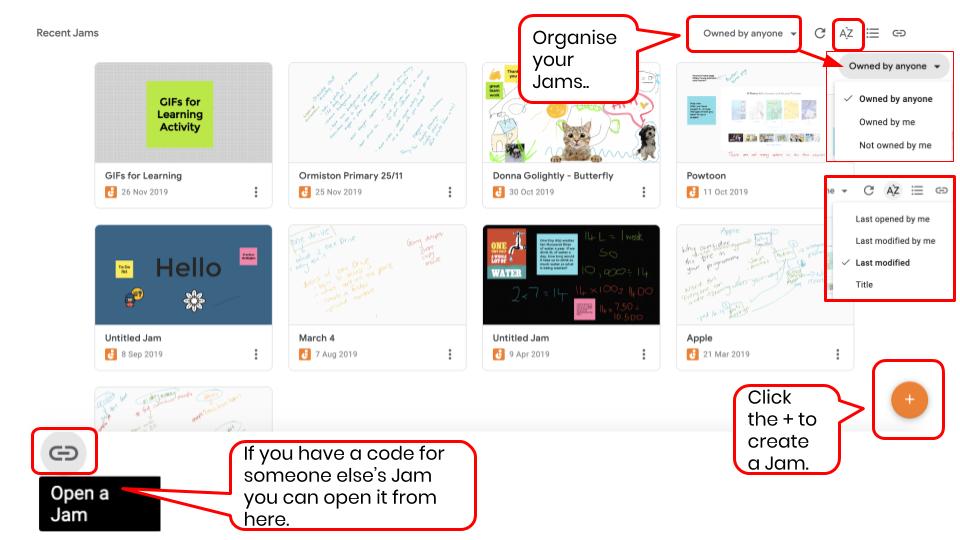
You can decide how you want your Jams to be laid out on your home page:

[bctt tweet=”Did you know you can change the way you view your #Jams in #Jamboard #GSuiteEDU” username=”donnagolightly1″]
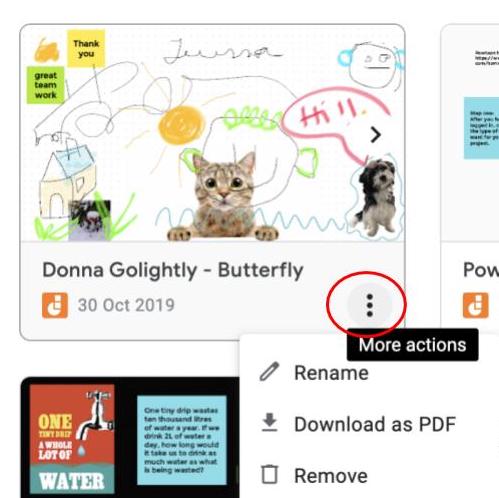
The three dots on the left at the bottom of the Jam allow you to rename it, download it as a PDF or remove it.
Step two: Create a Jam
To create a new Jam on the web simply click on the + in the bottom right corner and name your Jam.
If you are on a mobile device, open the Jamboard app. The + button is in the same place but has four colours and is on a white background. Chromebooks that are able to access Android apps can also use this version.

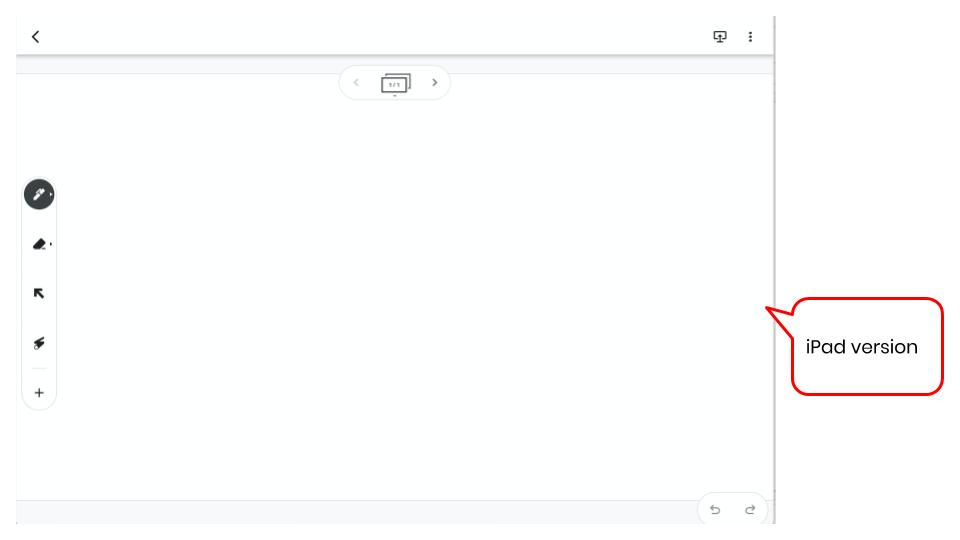
Note that once you create a new Jam, depending on whether you are working on the web version or the app version, they will look slightly different.
You are able to create multiple pages in both versions and add content to both versions. There are however some differences in the tools which we’ll look at in the next step.

Step three: Share your Jam with others so you can collaborate
If you are using the web version click on the blue Share button, just as you would in any other G Suite tool. The sharing permissions work exactly the same. You can read more about link sharing here.
If you are using the app version, click on the 3 dots in the top right hand corner and click on Share.
You can now collaborate on your Jam with other people. Or you can share your Jam for others to view only, depending on your purpose.

[bctt tweet=”Did you know you can #collaborate on a #Jamboard on your laptop or your iPad? #GSuiteEDU!” username=”donnagolightly1″]
Step four: Add content to your Jam
Now that you’ve created your collaborative Jam, what can you actually do with it?
As it’s intended to be a digital, collaborative tool, you can add multiple forms of content to it. And this is where the difference comes in between the web version and the app version.
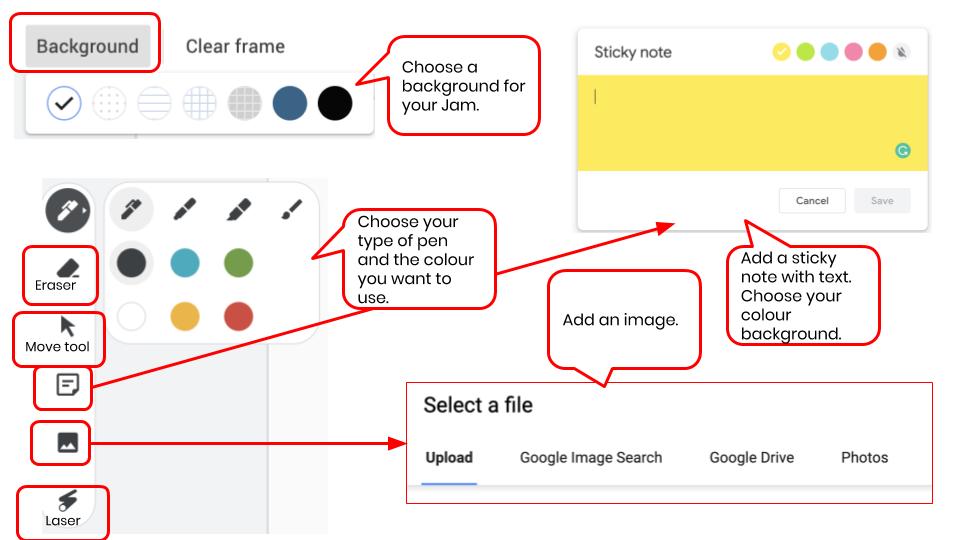
Let’s start with the web version first. You can draw, add text on notes or import images. You can move these around the board as you go. You can also select from a small number of backgrounds.
You can use the laser if you are presenting on a Jamboard or regular digital projector and you want to highlight certain elements on your Jam.
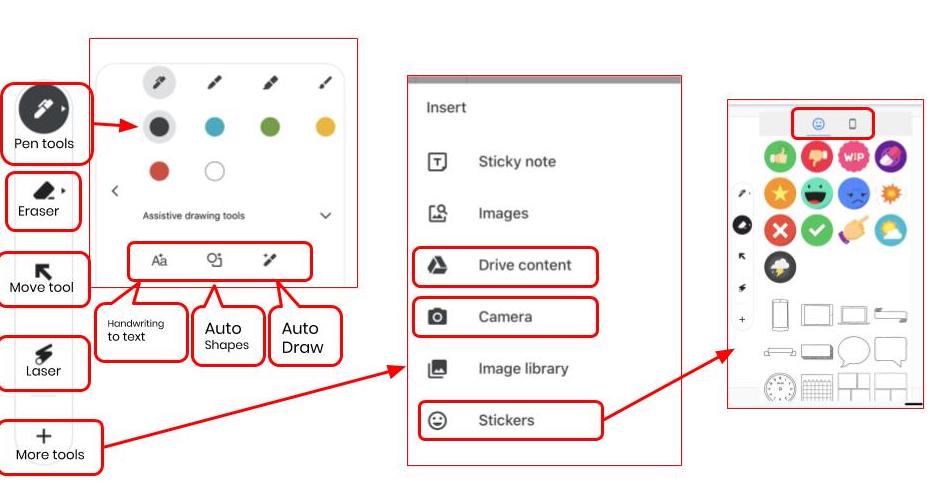
On the iPad or Android app you have almost the same functionality as the web version, with a few extra tools also. The one thing you don’t have on the app are the different background options.
The extra tools that you do have though are the handwriting to text option, auto shape and auto draw tools, the ability to add documents from your Drive, the option to snap a photo using your camera and the stickers.
[bctt tweet=”There are SO many ways to add content to a #Jam using #Google #Jamboard #GSuiteEDU” username=”donnagolightly1″]
Step five: Add more frames to your Jam
One of the awesome things I really like about Jamboard is the ability to have more than one frame. Adding on to your Jam is quick and simple – and works the same way in both versions. You just click the arrow to the right of the frame bar:
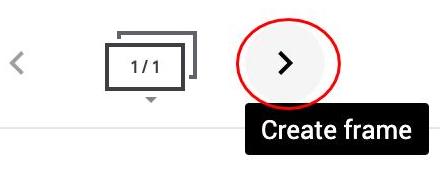
As soon as you create a new frame you’ll notice the numbers change – so it’s really easy to know exactly which frame you are on and how many you have altogether.
These pages, or frames, are able to be moved around also. If you click on the arrow beneath the frame counter you can see them all at once.
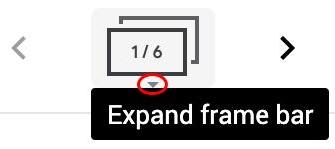
From here you can reposition frames by dragging and dropping them into a new position.
The frame outlined is the frame you are currently on, so you can quickly skip between frames by simply clicking on the one you want to jump to.
Clicking on the 3 dots in the top right corner of the frame lets you duplicate it or delete it.

There are simply unlimited uses for this awesome collaborative tool. It could be used for brainstorming sessions, planning sessions, drag and drop activities, or collating ideas around a central theme and showing change over time.
If it’s new to you – give it a go. You might just be surprised by what it allows you to do!
If you want to learn more tips on using G Suite tools, why not try one of our online courses?


