


In a recent post I explained how labels work in Gmail and how they can be a very powerful and useful tool for keeping your inbox organised. In this post I’m going to dig deeper and share five advanced tips for working with labels.
1. Hide labels you don’t use regularly
The longer you use Gmail, the more labels you’ll probably end up with. Over time, some of these will become less relevant and less used. For example, they may be for completed projects, old clients or related to an old position you once held in your organisation. A great way to ‘spring clean’ your label list without having to delete labels is to hide them. Hiding labels moves them to the ‘More’ section of the label list. This means that your visible label list becomes shorter, but you can still easily access hidden labels.
Note: You can only hide parent labels, i.e. not sub-labels that have been nested. If you want to hide a sub-label, edit it first to remove the nesting and then hide it.
To hide a label:
1. Hover over the label name until you see the three dots button appear.
2. Click the three dots and then choose the Hide option in the ‘In label list’ section.Tip: If you do not see the Hide option, it is probably because you are trying to hide a sub-label. Refer to the note above about this!
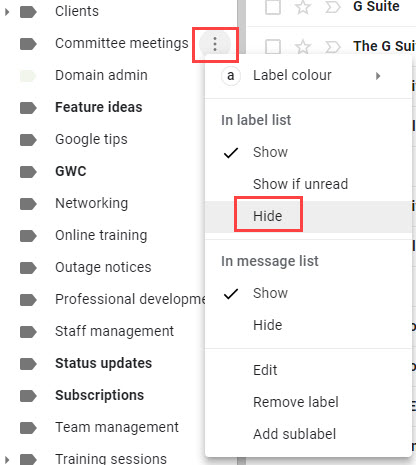
3. Your hidden label will now be located in the ‘More’ section at the bottom of your label list.
[bctt tweet=”Got too many labels in your #Gmail label list? Hiding them is a quick way to do a label spring clean!” username=”samvardanega”]
2. Force key labels to the top of the list by using symbols, numbers or emoji
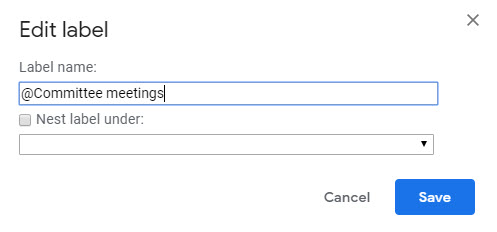
The Gmail label list is always displayed in alphabetical order. This can be a pain if your most-used label is ‘Zoology’! An easy work-around for this is to use a symbol at the start of the label name that you want at the top of your list. For example ‘@Zoology’ or ‘-Zoology’ or ‘#Zoology’. This works because symbols come first alphabetically. You can also use numbers to achieve a similar result (e.g. ‘1 Zoology’), or if you want to give your labels a customised twist, you can also use tools like Emoji Keyboard to add an emoji at the start of the label name.
To edit a label name:
1. Hover over the label name until you see the three dots button appear.2. Click the three dots and then choose the Edit option.
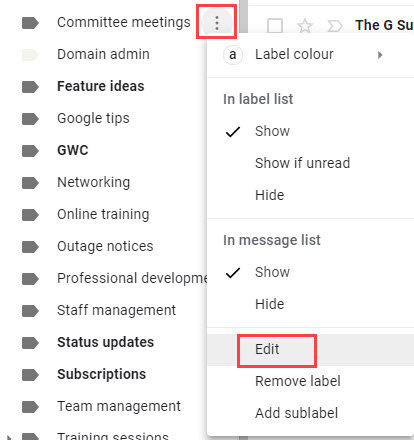
3. Add the symbol and click Save.
[bctt tweet=”Use symbols in the #Gmail label list to move your most frequently used labels to the top!” username=”samvardanega”]
3. Drag and drop labels on to emails
This is always one of the most popular tips I share in my Gmail workshops! It never fails to get ‘ooohhs’ from the audience.
Here’s how to drag and drop a label on to an email without even opening it:
And here’s how to do it when the email is open:
In both cases you’ll notice that the email remains in the inbox. This is because dragging a dropping a label on to an email is like using the ‘Label’ button in the toolbar. If you wanted to get the email out of the inbox, you can drag and drop the email into the label instead.
[bctt tweet=”Here is a very popular advanced tip for working with #Gmail labels” username=”samvardanega”]
4. Apply labels to outgoing emails
If you want to get super organised, you can even apply labels to emails before you send them. This is particularly useful if you use a ‘Waiting for’ or similar label (see tip five below). The recipient of the email will not see the label.
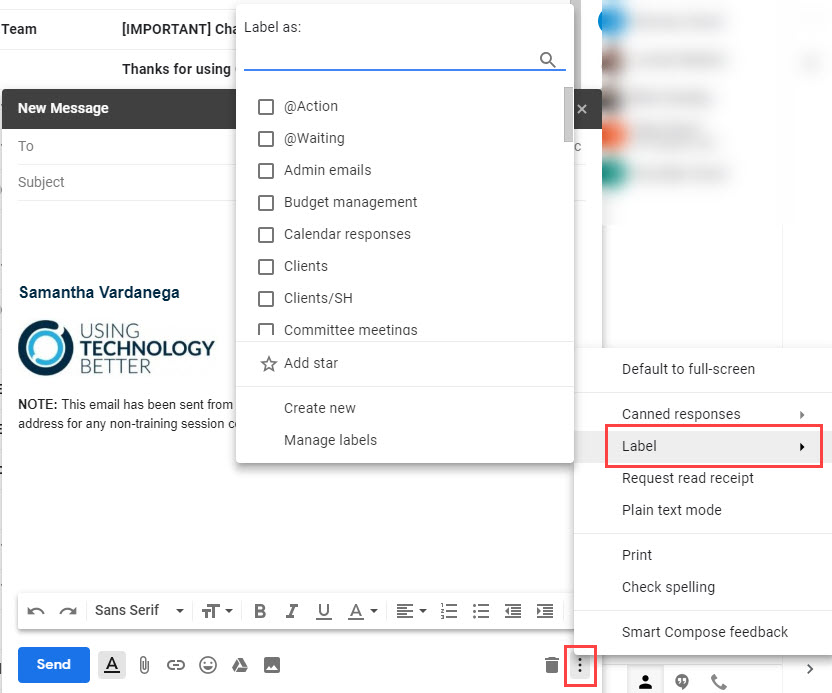
To add a label to an outgoing email:
1. Compose your email.
2. Click the three dots button in the bottom right corner of the email composure window.
3. Click Labels and tick the label(s) you want to apply.
4. Click Apply.
[bctt tweet=”Check out these five advanced tips for working with #Gmail labels!” username=”samvardanega”]
5. Use labels as coloured flags
You may have noticed in tips 3 and 4 that my label list includes labels with names like ‘@Action’ and ‘@Waiting’. These are labels that I use like coloured flags to help track emails that I need to follow up, or that require action or a reply from others. This tip warrants its own article, so head on over to my post on Using labels as coloured flags in Gmail to learn how to set it up!
Are you feeling overwhelmed by emails and want to learn how to better manage your Gmail Inbox? Check out our Get efficient with Gmail the SMART way online course!


