


I have been speaking with Blake Seufert from Naavi about the development of this add-on for a while now, and am glad it is now available to schools.
If you are using Google Classroom, you will enjoy this ad-on. Blake has written the following how-to post, if you have any questions let Blake or the UTB team know.
Naavi Classroom Sync is here! A simple add-on for Google Sheets that can setup your classes in Google Classroom with one easy process. Whether you’re a teacher or school administrator, Naavi Classroom Sync can save you some serious time.
Let’s take a look at how it works:
Create a new Google Sheet and click the Add-ons menu > Get add-ons. Search for Naavi Classroom Sync and click the +Free button to install.
Once installed, it’s time to setup each class in our spreadsheet. Use the image below as a guide. In this example we’ve used a simple example of a teacher with 3 classes and a few students in each class.
Tip: To save even more time, you could copy and paste a list of students from your timetable or student management suite into the Google Sheet.
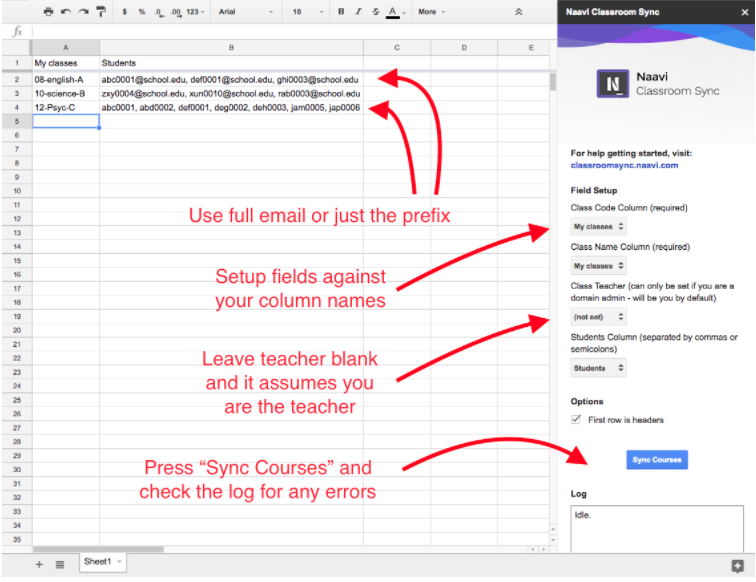
Note: If you’re the school domain administrator you can take your timetable export (import a CSV or Excel file into Google Sheets) and map the columns to pre-setup all student and staff classes in Google Classroom.
[bctt tweet=”Naavi Classroom Sync let’s you create Google Classroom Classes from a class list in Google Sheets!” username=”@blakeSeufert”]
Once you’ve entered all your data, simply press the Sync Courses button!
Check the log to make sure the sync completes without error. If successful, it should look like this:
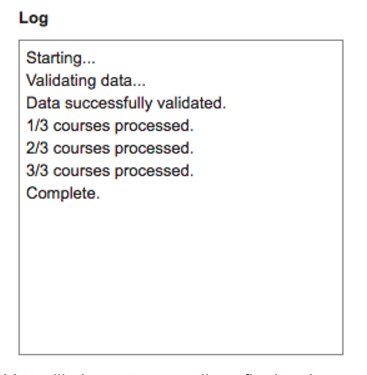
You will also get an email confirming the sync has completed successfully or any errors that it encountered.
Now let’s take a look in Google Classroom and see what has been setup:
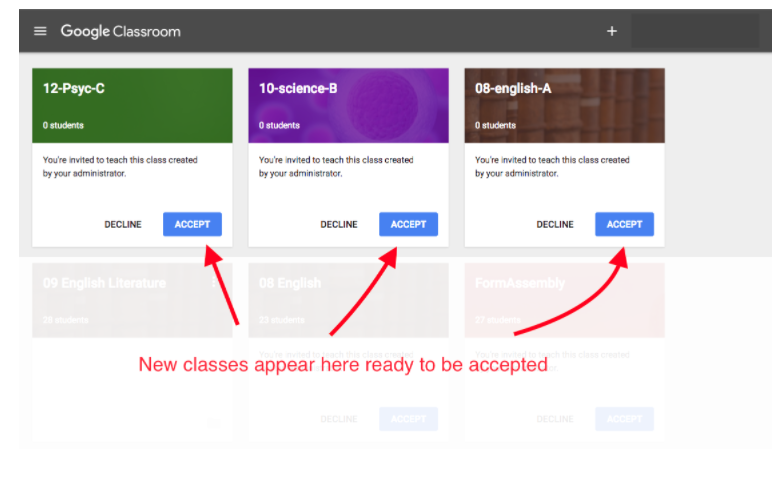
As you can see, the classes have been created and are ready for you to accept!
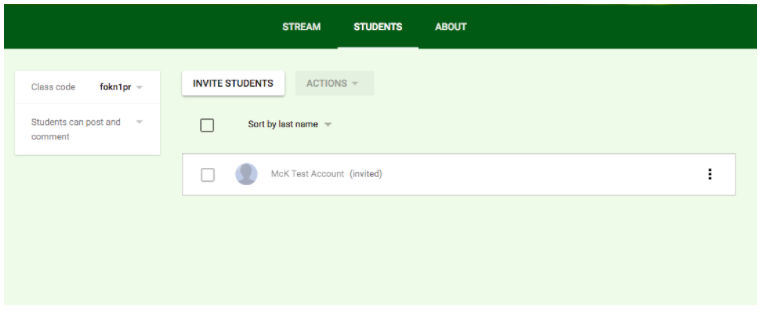
Note: You may notice the student count is at 0 as students are only ‘invited’ at this stage. Once they accept the invitation you will see the student count rise. Students will appear in the ‘Students’ section of the Classroom with ‘(invited)’ next to their name until they join. If you set up classes from a domain admin account, students will be forced to the class, skipping the invite process.
And that’s it! If you want to know more, check out http://classroomsync.naavi.com for a video walkthrough and template to help you get started!


