


Google Slides has a fantastic feature which allows you to create your own templates. The best thing about these templates is that they can have a mixture of editable and non-editable sections. This lets you ‘lock’ certain parts so that fiddly little fingers cannot change or move them. This is particularly useful for younger students who may still be mastering drag-and-drop and moving content. Templates can also help a teacher scaffold a learning activity so that a student’s effort is place on the learning and not the design features of the slides.
[bctt tweet=”Google Slides templates can have a mixture of editable & non-editable sections.” username=”samvardanega”]
Here’s an example of a ‘Fakebook’ template I made for one the Catholic schools we work with in New South Wales.
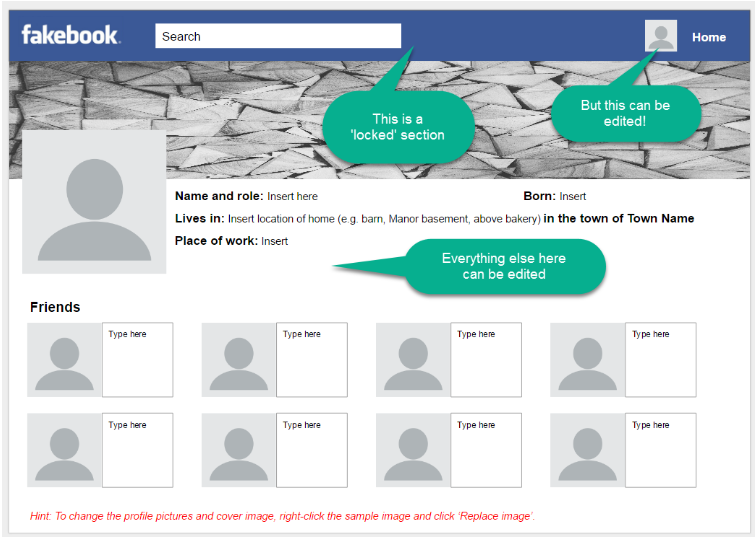
As you can see, the top blue bar with the logo, search box and Home link cannot be changed. However, the students can add content and change the images – even the profile icon in the blue bar.
Here’s how to create your own template.
Part 1: Choose a theme, background & slide size
1. Create and name a new Google Slide and choose an appropriate theme. If you want a blank canvas, just stick with the ‘Simple Light’ theme.
2. If desired, use the Background button to set a background image or colour. Again, just leave this white if you want a blank canvas.
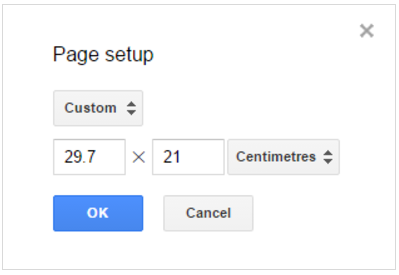
3. Decide if you want to change the size of your slides. If you do, select the File menu > Page setup and select Custom from the list. Enter the dimensions you want.
Tip: An A4 page is 21 x 29.7cm or 8.27 × 11.69 inches.
Part 2: Create the ‘locked’ sections
To make your ‘locked’ sections, you need to edit the Master Slide. To do so:
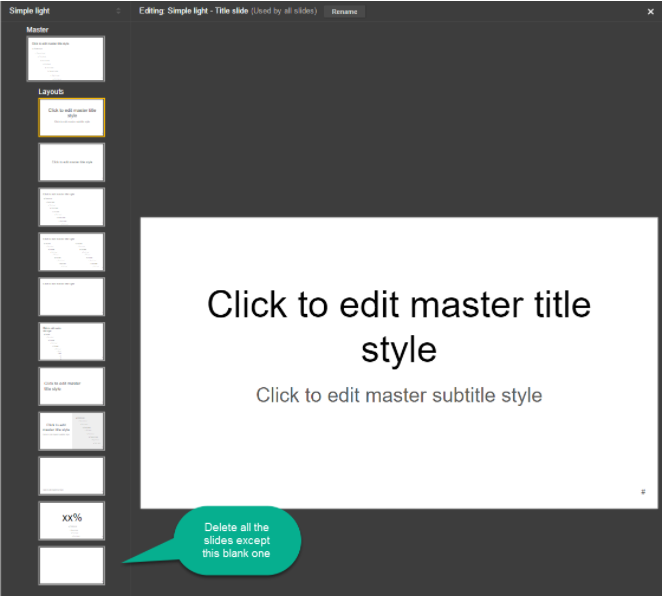
1. Right-click the slide in your presentation, select Apply layout and change the layout to ‘Blank’ (there should just be one slide in your deck. If there is more than one, delete the others for now).
2. Select the Slide menu > Edit master.
3. This will show all the possible slide layouts. I suggest deleting all of them except the blank layout. This will give you just one possible slide in the template, which will be the one you are designing now.
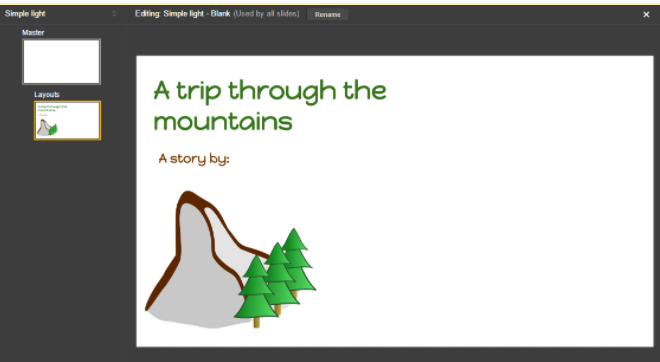
4. Add all the content to the slide that you do not want to be moved or edited. Insert the content just like you would normally on a Google Slide. This could include images, headings (in text boxes), shapes, lines etc. Everything you add to the Master Slide will not be able to be edited by the students.
5. Rename the template to reflect its purpose.

6. Click the X in the top-right corner to exit the Master Slide view.
[bctt tweet=”Use the Master Slide feature in Google Slides to create templates that scaffold your students’ learning.” username=”samvardanega”]
Part 3: Create the editable sections
Now it’s time to add the sections that you want the students to be able to edit. For example, text boxes they can write in, image placeholders and content they can re-arrange on the slide. Insert all of these as you normally would in a Google Slide.
Top tip:
To insert image placeholders:
1. Select the Insert menu > Image > Search and do a search for ‘picture icon’. Scroll down until you find an image that looks similar to this (you can also find it here).

2. Insert the image icon and re-size and position it to suit the template.
3. Add a note instructing your students to right-click the image and select Replace image to insert their own. This will insert their own image in the same position and with the same dimensions as the placeholder.

Part 4: Distribute the template to your students
There are a few different ways you can distribute your new template to your students:
1. Via Google Classroom.
2. Via the Google Docs Template Gallery (upload the template in your school’s gallery)
3. Via a short URL (e.g. goo.gl) or QR code
Tip: Use this Chrome extension to make a link which forces students to make a copy of the original template.
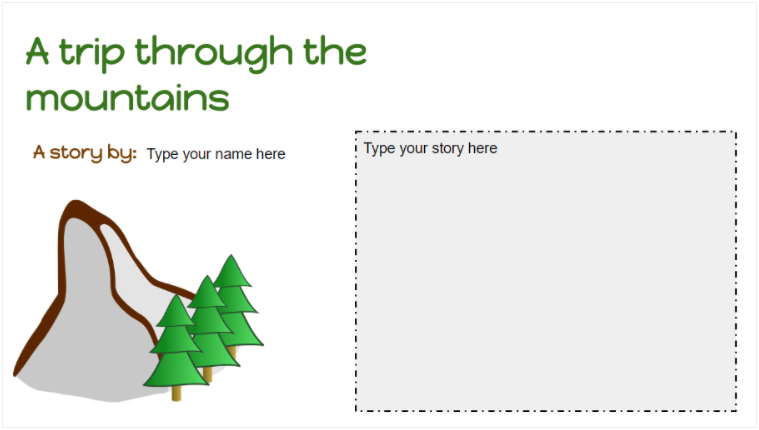
Want to see what the finished product looks like?
Click here to make your own copy of the story template shown in this blog post.


